Movement Type
The default configuration contains several menus to do various SAP transactions such as PO Receipt (101), Receipt without PO (501), and all Oracle Inventory/Manufacturing transactions. However, as per your business requirement, you might need to use some other movement type that is not enabled in OneApp. This guide is an example of creating a new menu for "201: Goods Issue for Cost Center", and you can use the same step to create a new menu for any other business requirements (Steps are the same for Oracle/SAP/any other business system).
You can always use the sedded menus (A_MaterialDocumentHeader for SAP and inventoryTransactions for Oracle) for all transactions. However, it's not advisable as the app won't default any information, and the user will have to enter all the data manually. The best approach is to create a new menu from where users can search a document (PO, WO, Item/Product) and create a corresponding POST transaction.
Follow the below four steps for creating a new menu for a material document (or Inventory/WIP Transaction in Oracle).
Step 1: Decide the source document and configure the search menu.
Ex: Purchase Order for PO Receipt/ Delivery Sales Order for SO Shipment An item for Inventory Receipt Transactions (Misc. Receipt Transactions in Oracle, and 501/561 in SAP) An existing On hand (or Stock in SAP) for Inventory Issue Transactions (Misc. Issue in Oracle 502/562 in SAP). The same is also used for Sub Inventory and Inter/Intra Org Transfers (Oracle ), and Stock transfer in SAP.
Step2: Configure the POST transaction menu
Ex: In Oracle, we search for work orders using dispatchListWorkOrderOperations, but we post all the related transactions to operationTransactions,resourceTransactions,operationStartStops,materialTransactions In SAP, we search purchase order using A_PurchaseOrder, but we POST it to A_MaterialDocumentHeade
(Optional) Step3: Configure any dependent/child entity menu
Ex: In Oracle, if the item is a lot/serial controlled, then we also need to configure the lot/serial paths. In SAP, if a product has a serial profile, then we need to post serial number details to create a material document.
Step4: Assign POST and dependent menu details to search menu
Ex: After completing the first three steps, we need to assign the step 2 and step 3 menu code to step1 menu code
Step 1: Decide the source document and configure the search menu
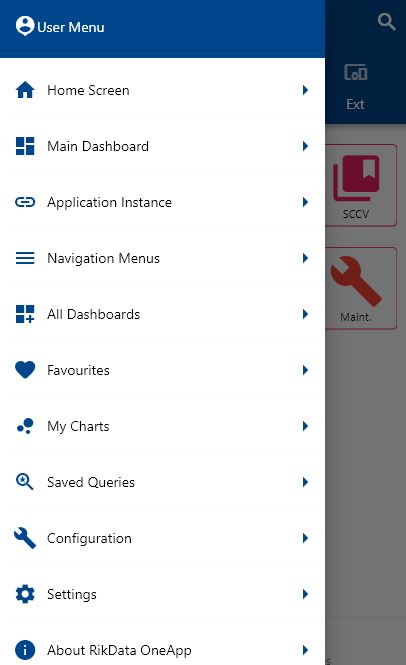
Click on the Menu icon on the configuration page to navigate to the search menu path screen. You can also navigate to the menu paths from the user menu.
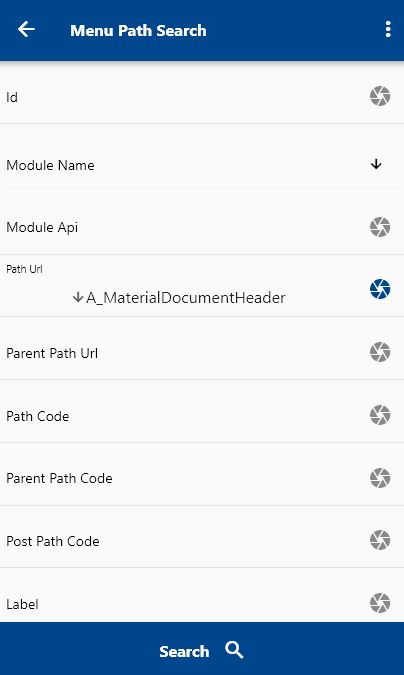
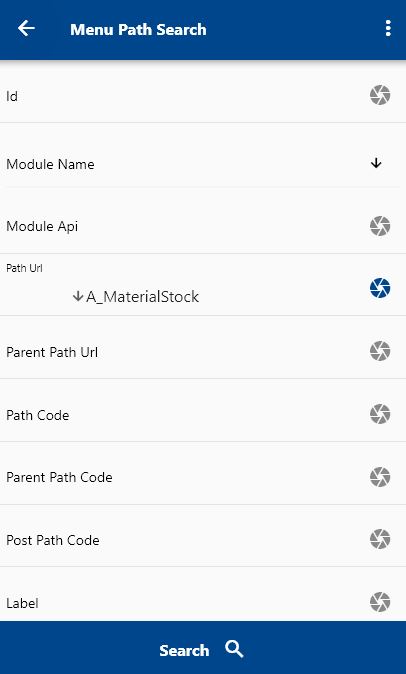
Enter A_MatlStkInAcctMod in the path URL search field and click on the search button.
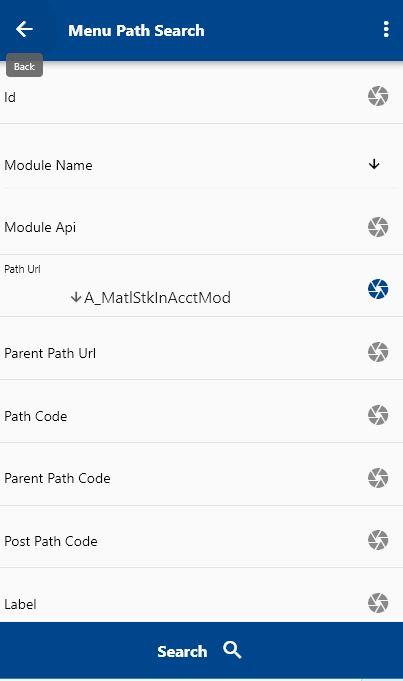
You can select the result format - table or list before clicking on the search button—the value defaults from your settings.
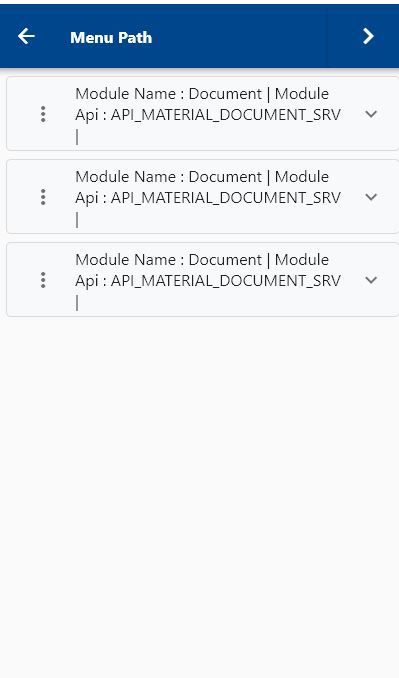
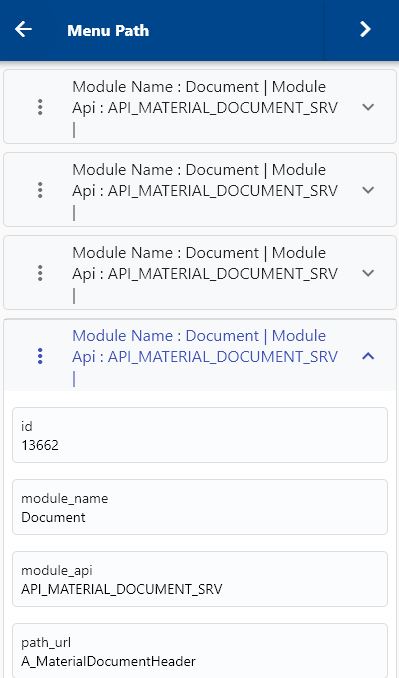
The app will take you to the result screen.
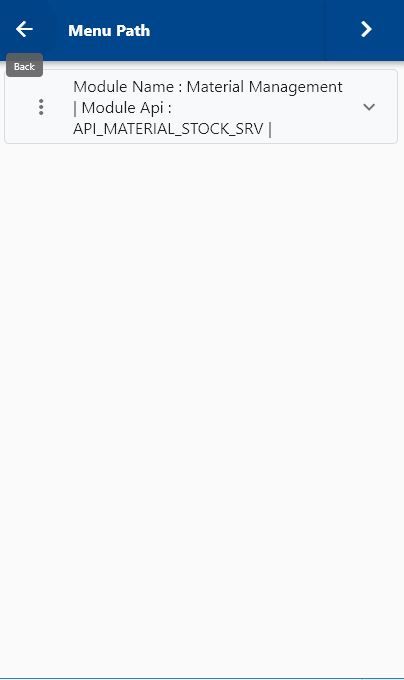
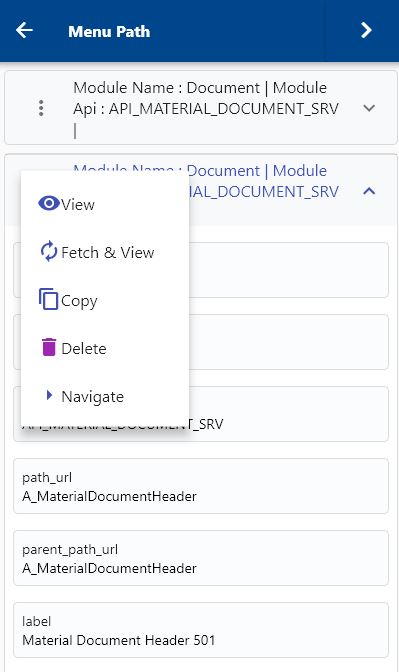
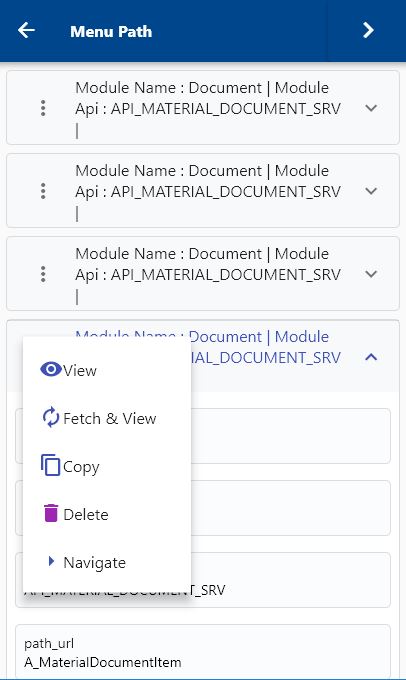
To copy a menu path, click on the copy button on the search result screen.
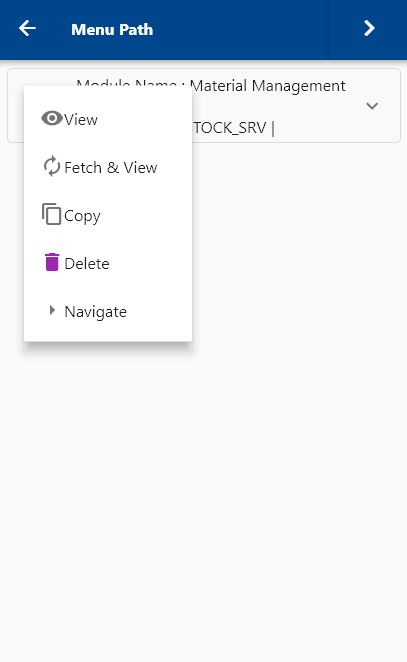
The app will copy all the selected menu path details and will take you to the view/edit form. You can enter/modify any information as per our business needs.
Always enter a unique code for copied paths so that the app can distinguish separate paths
- Edit the label to a more meaningful value as applicable for the transaction
- Scroll down and enter a sequence and navigation group for the new Menu. The module name, navigation group, and sequence controls where the Menu will appear in the dashboard
Save the new Menu
Step2: Configure the POST transaction menu
Click on the Menu icon on the configuration page to navigate to the search menu path screen. You can also navigate to the menu paths from the user menu.
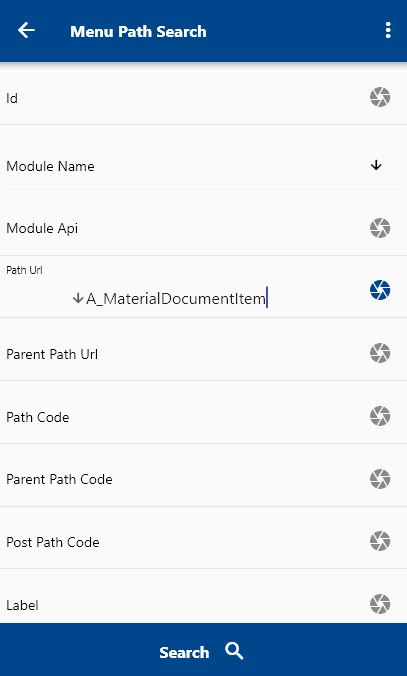
Enter A_MaterialDocumentHeader in the path URL search field and click on the search button.
You can select the result format - table or list before clicking on the search button—the value defaults from your settings.
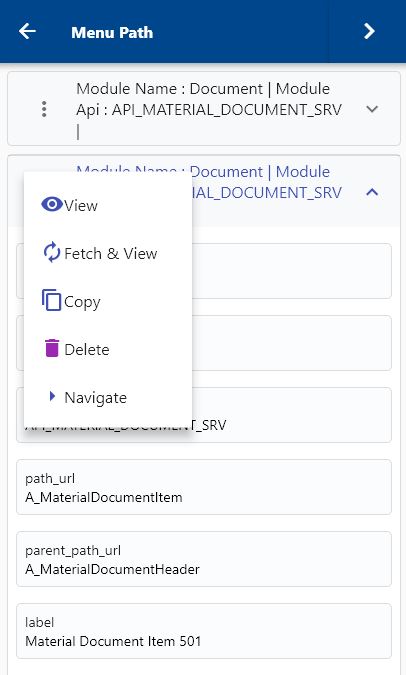
The app will take you to the result screen.
To copy a menu path, click on the copy button on the search result screen.
The app will copy all the selected menu path details and take you to the view/edit form. Enter/modify any information as per your business need
Always enter a unique code for copied paths so that the app can distinguish separate paths

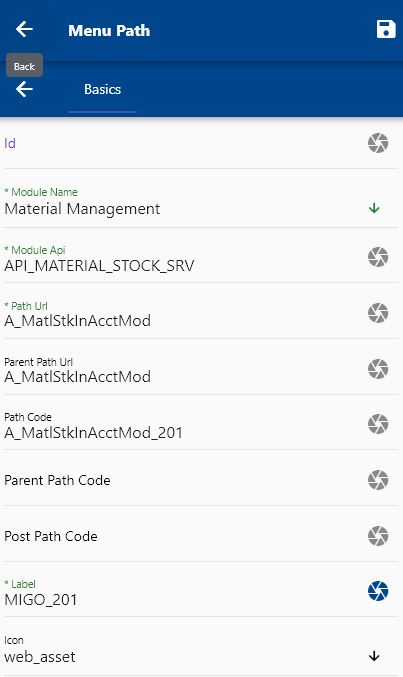
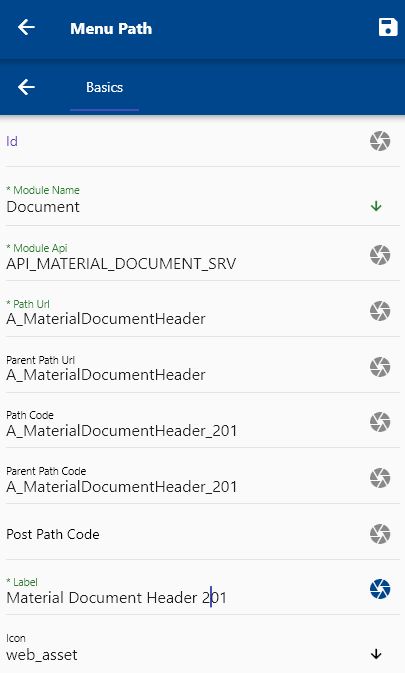
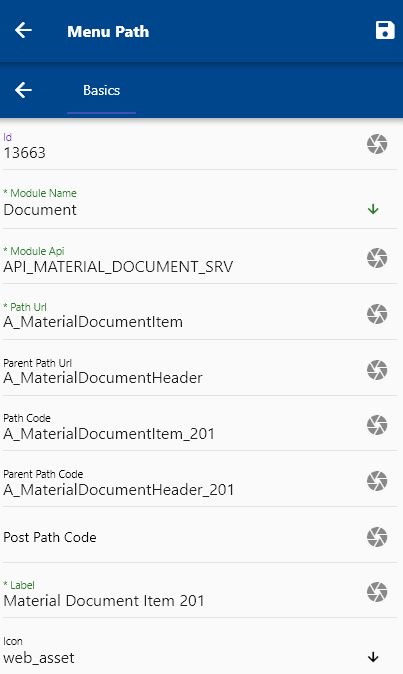
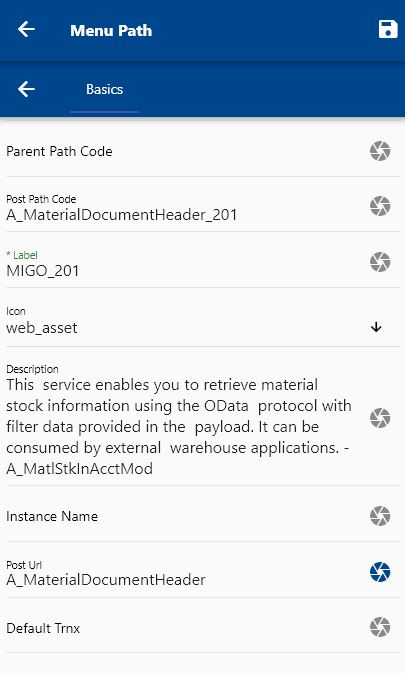
- Enter a path code (ex A_MaterialDocumentHeader_201 - you also need to assign this code to the post path code of step 1)
- Edit the label to a more meaningful value as applicable for the transaction
- Scroll down and enter a sequence and navigation group for the new Menu. The module name, navigation group, and sequence controls where the Menu will appear in the dashboard
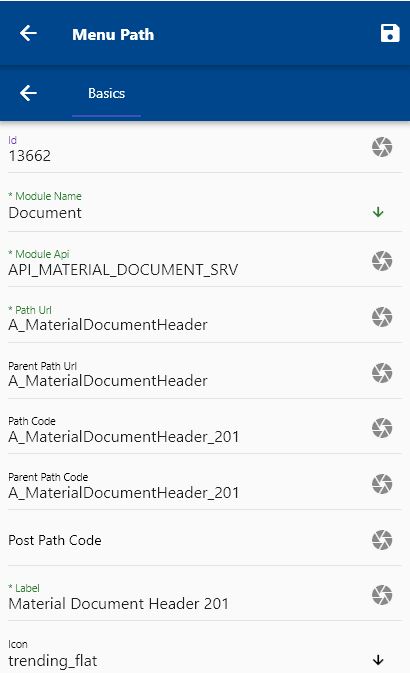
Save the new Menu
Reopen the same path to view and modify the entity details
- Change the value of all the fields as required for the new transaction.
- Enter 03 as the default value for GoodsMovementCode and make it read-only so that users can't use this path to any other transaction
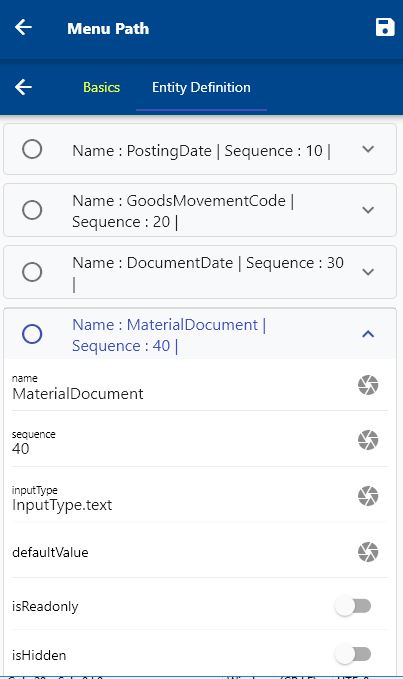
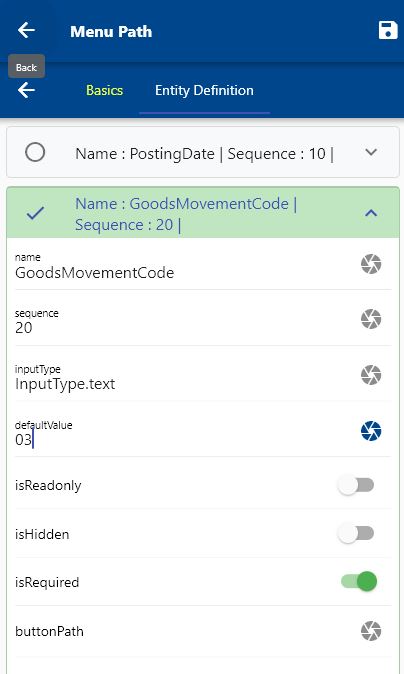
Click on the Save button to confirm the changes.
(Optional) Step3: Configure any dependent/child entity menu
This step is required if the Menu used in step 2 also has dependent paths (Ex: Serial number for items). Click on the Menu icon on the configuration page to navigate to the search menu path screen. You can also navigate to the menu paths from the user menu.
Enter A_MaterialDocumentHeader in the path URL search field and click on the search button.
You can select the result format - table or list before clicking on the search button—the value defaults from your settings.
The app will take you to the result screen.
To copy a menu path, click on the copy button on the search result screen.

The app will copy all the selected menu path details and take you to the view/edit form. Enter/modify any information as per your business need
Always enter a unique code for copied paths so that the app can distinguish separate paths
- Enter a path code (ex _MaterialDocumentItem_201 - you also need to assign this code to the post path code of step 1)
- Enter the parent path and path code from step 2 (A_MaterialDocumentHeader_201)
- Edit the label to a more meaningful value as applicable for the transaction
- Scroll down and enter a sequence and navigation group for the new Menu. The module name, navigation group, and sequence controls where the Menu will appear in the dashboard
Save the new Menu
Reopen the same path to view and modify the entity details
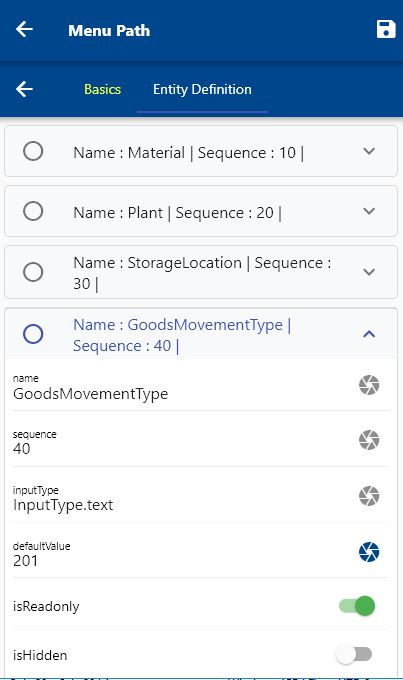
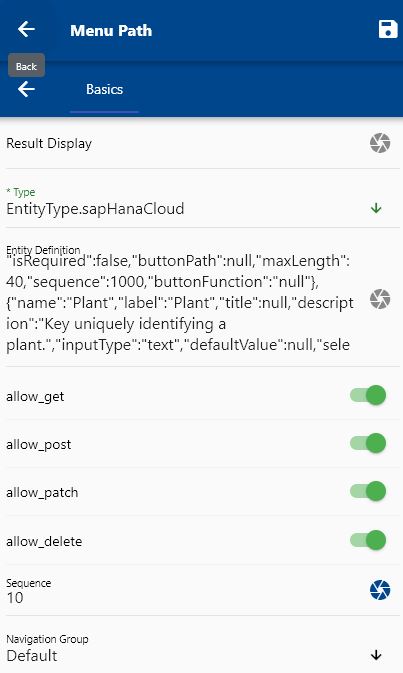
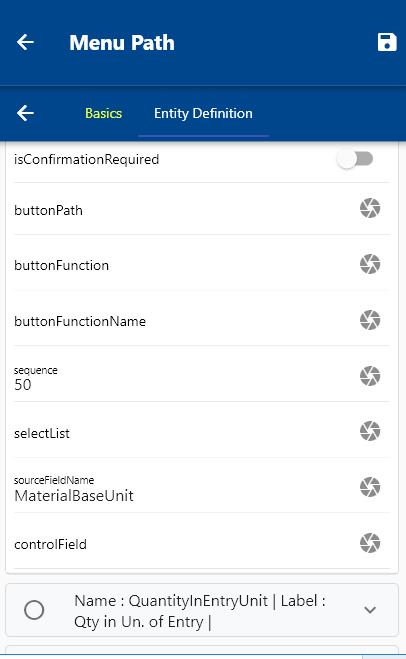
If the field that you want to use has a different name in the source document, then enter the source document name in the entity definition Ex: UOM name in A_MatlStkInAcctMod is different from A_MaterialDocumentItem_201. So, you need to enter the sourceFieldName as "MaterialBaseUnit" for "EntryUnit" field.
- Change the value of all the fields as required for the new transaction.
- Enter 201 as the default value for GoodsMovementType and make it read-only so that users can't use this path to any other transaction
Step4: Assign POST and dependent menu details to search menu
Click on the Menu icon on the configuration page to navigate to the search menu path screen. You can also navigate to the menu paths from the user menu.
Enter A_MatlStkInAcctMod in the path URL search field and click on the search button.
You can select the result format - table or list before clicking on the search button—the value defaults from your settings.
The app will take you to the result screen.
- Add the post path code and post path (A_MaterialDocumentHeader_201 & A_MaterialDocumentHeader)
Save the new Menu
Test the new Menu
Navigate to the dashboard module and group where you have created the new Menu
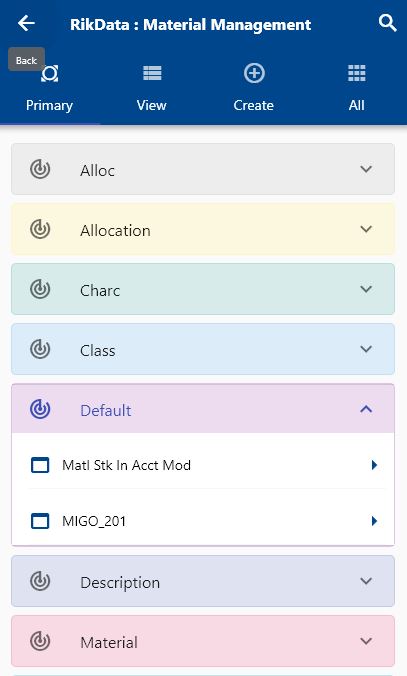
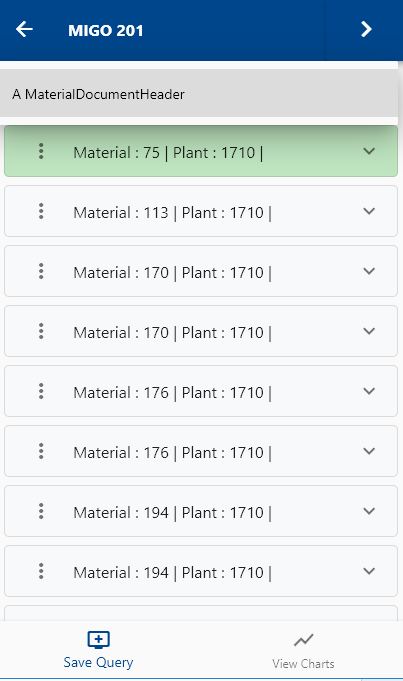
Click on the name of the new Menu. The app will take you to the search screen. Enter the product/plant details or any other criteria in the search form and click on the search button.
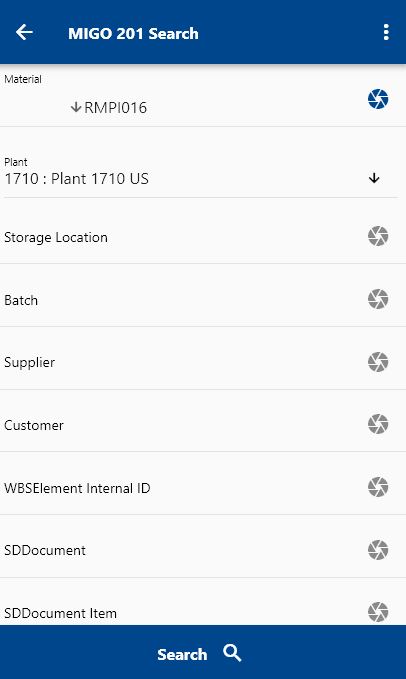
Click on the Menu against an item that you want to transact and click on the select button.
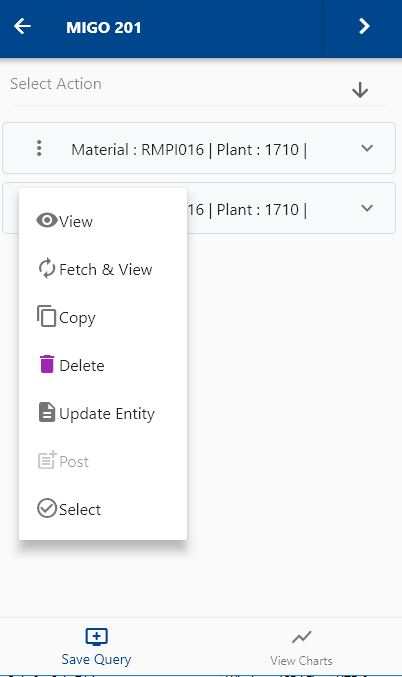
Next, select the transaction type as "Material Document Header."
The app will fetch all the related information required to complete the document creation process. It will take you to a confirmation screen where you need to validate all information and change any detail as needed.
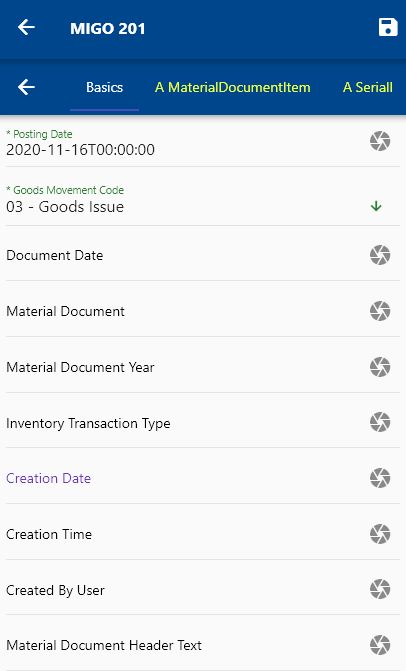
Scroll up and down to view all the fields.
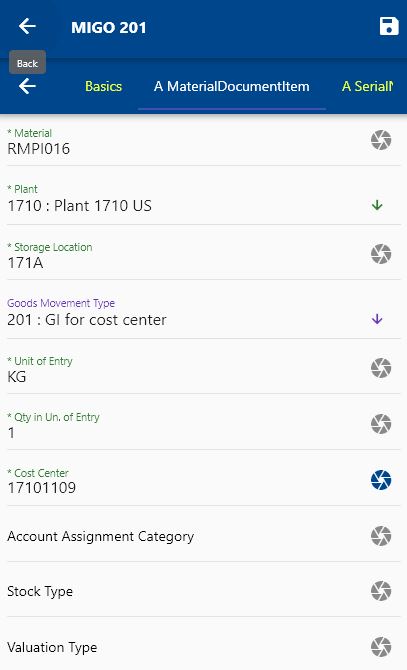
Review/enter/change below fields
- Unit of Entry
- "Quantity in Unit of entry."
- Cost center
Next, click on the Save button.
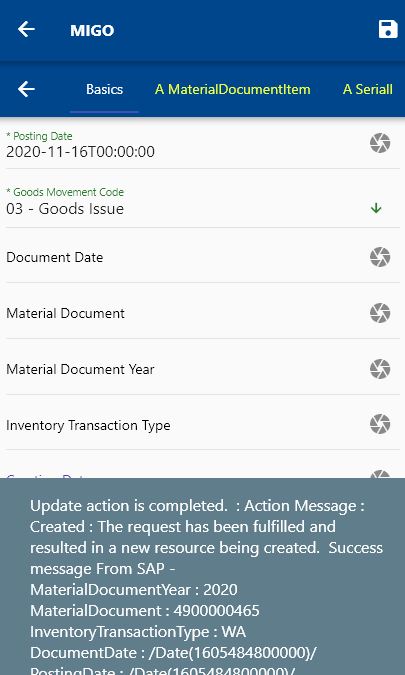
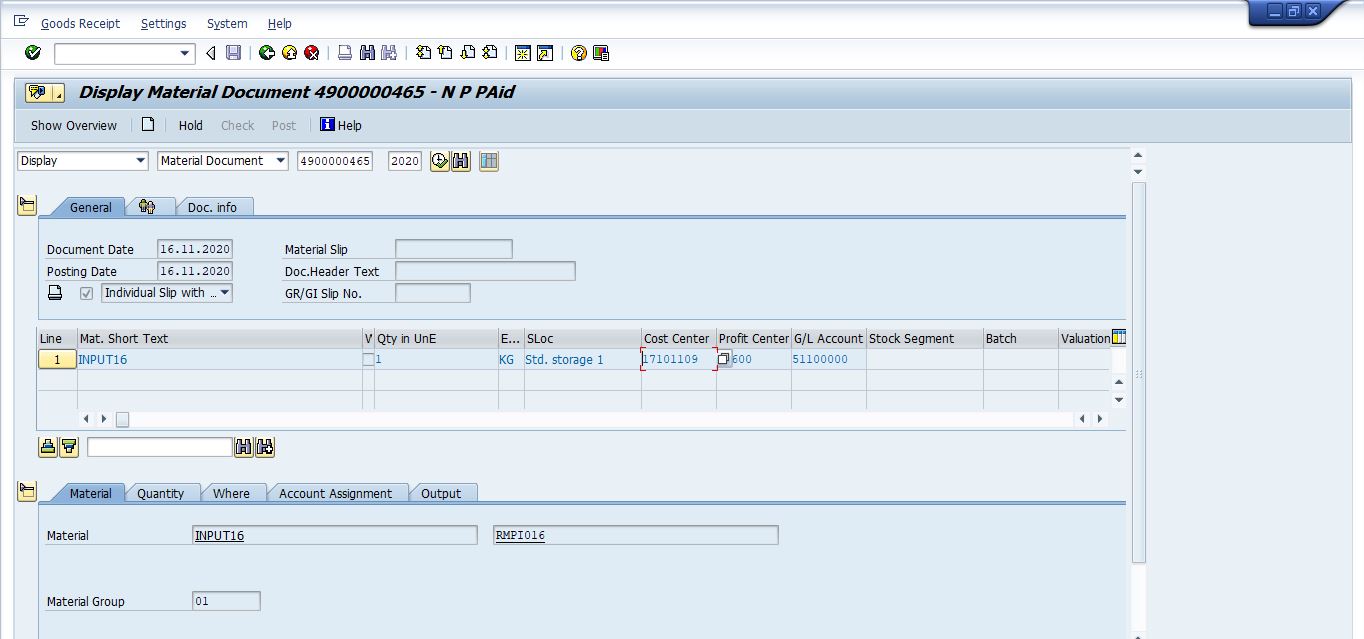
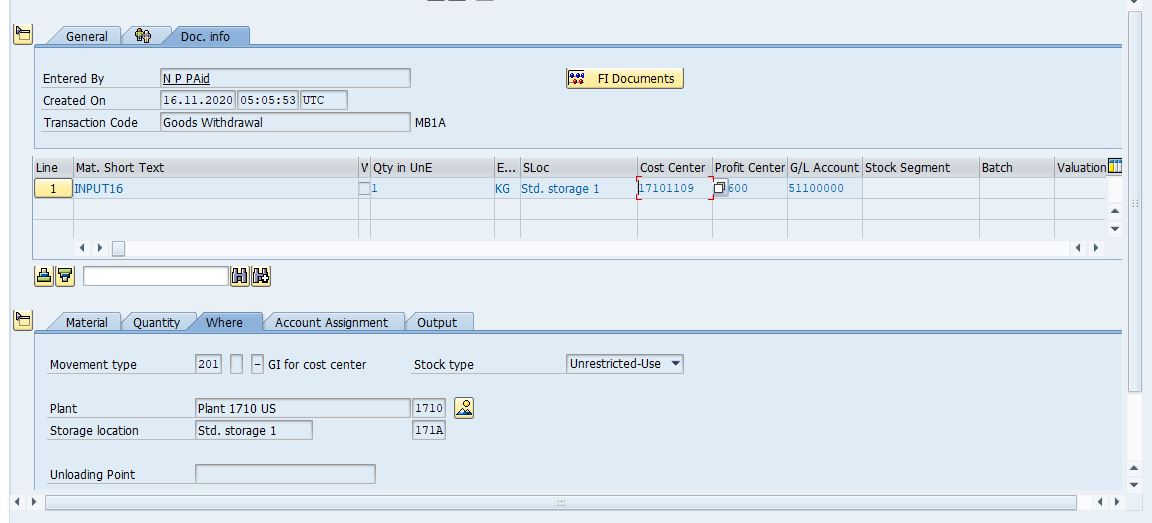
The app will post the document to SAP and will show the returned message (document year, document number, transaction type, date, etc.)
You can review the details on the GUI.
 Issue Log