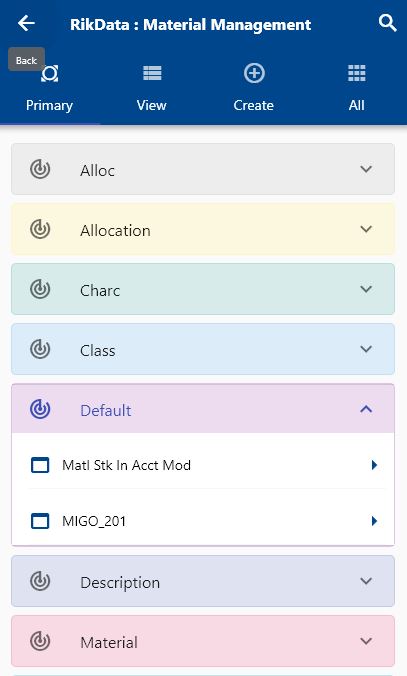
SAP Transactions
This document covers only a few transactions as examples, but you can use the same process to do any other transaction in SAP Hana S/4. Refer to "new movement type/transaction type" guide to create new menus for a specific movement type as per your business requirement
Material Documents
From SAP Docs
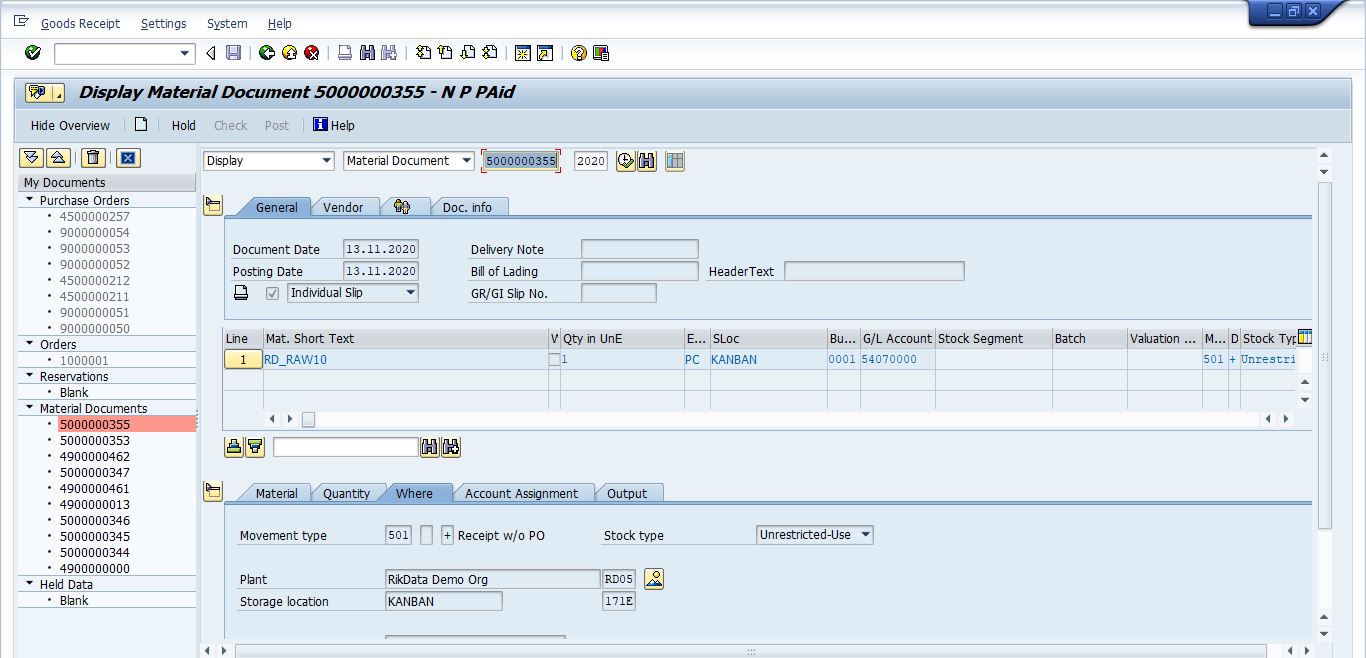
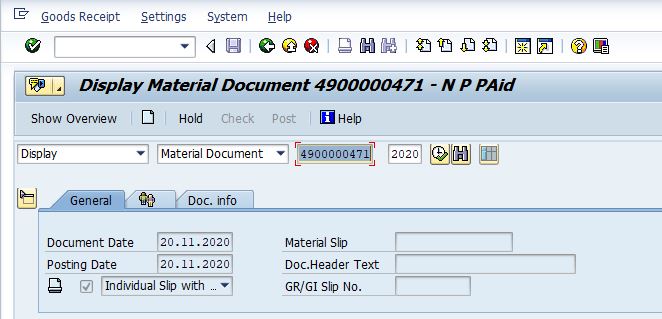
In the Inventory Management system, when a goods movement is posted, a material document is generated that serves as proof of the movement and as a source of information for any applications that follow. A material document consists of a header and at least one item. The header contains general data about the movement (for example, its date). Each item describes one movement.
Once you have posted a goods movement, you can no longer change the document. You can only enter additional information in the document, such as referencing the original document or comment on the event. If you want to reverse the movement or change the quantity of material moved, you must enter a new document.
Source
To create a MIGO transaction, navigate to the MIGO (or any configured version for your organization) form from your dashboard/favorite.
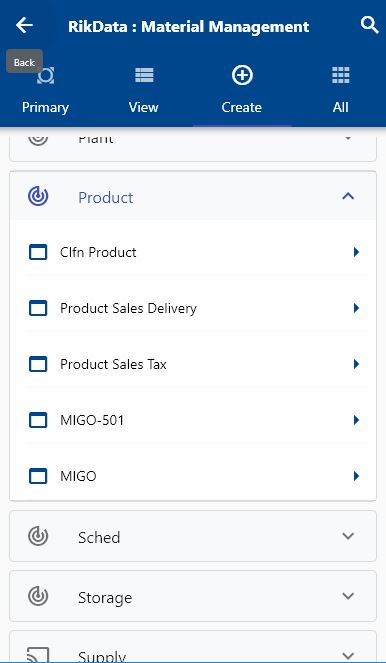
The app comes with several seeded menus for MIGO transactions, and you can copy and modify these paths as per your business requirements. For example, if your organization don't use serial profile for items then you can remove the serial tab from transaction form by removing parent path and parent path code form A_SerialNumberMaterialDocument
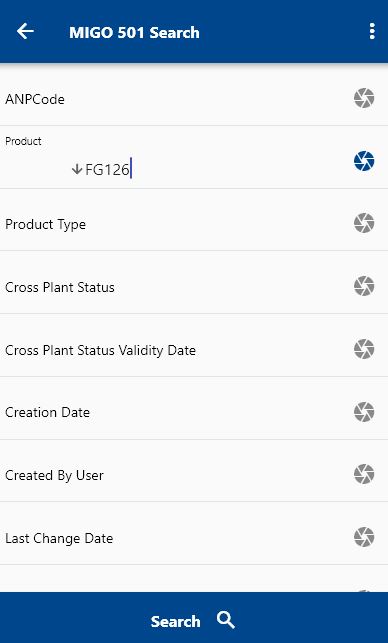
Non Serialized Item
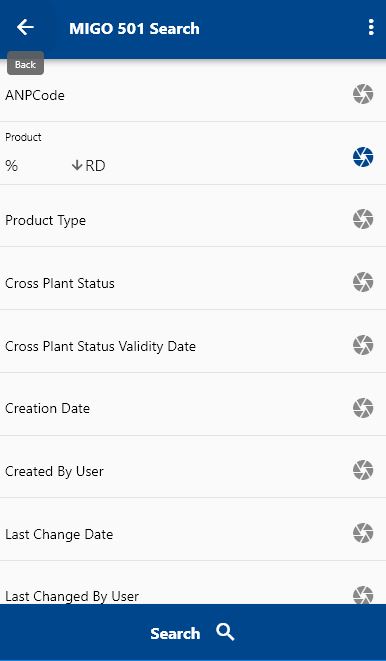
Enter the product/product type details or any other criteria in the search form and click on the search button.
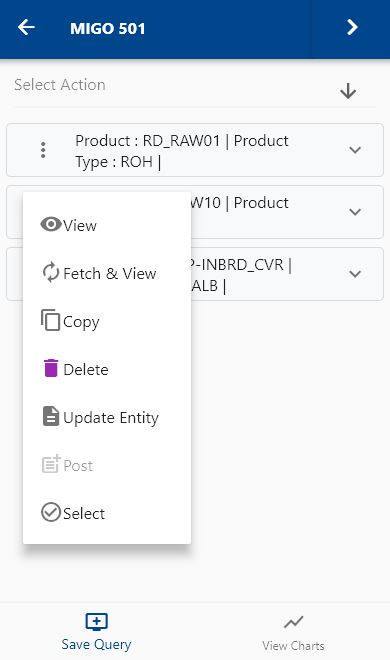
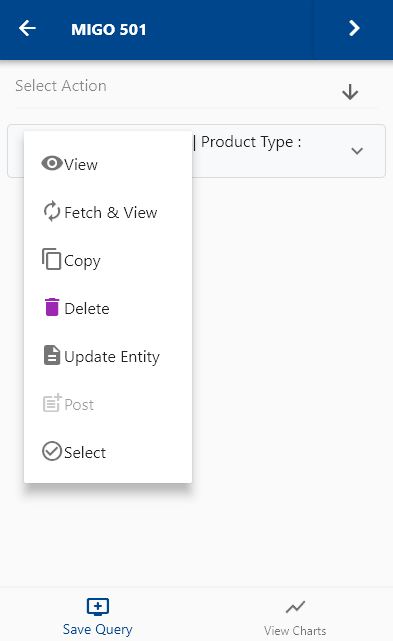
Click on the Menu against an item that you want to transact and click on the select button.

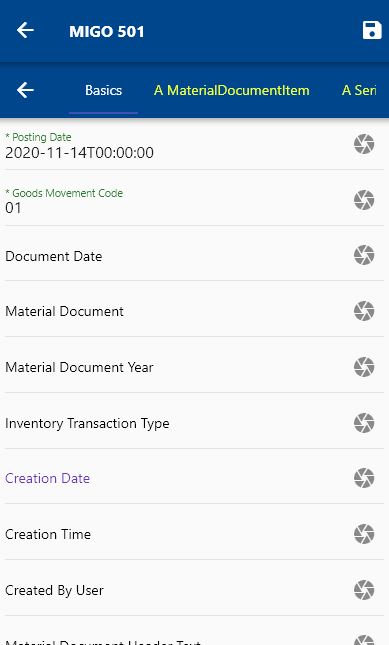
Next, select the transaction type as "MaterialDocumentHeader."
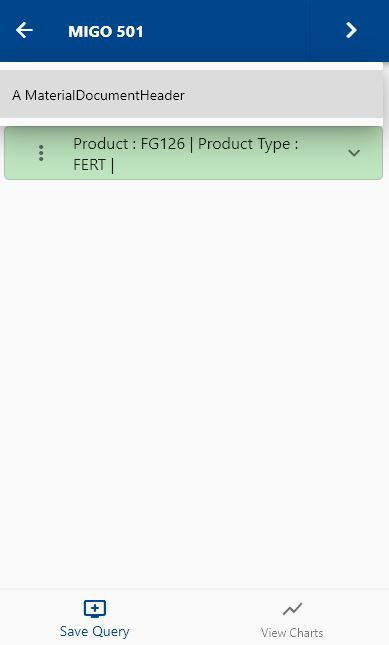
The app will fetch all the related information required to complete the MIGO process. It will take you to a confirmation screen where you need to validate all information and change any detail as required.
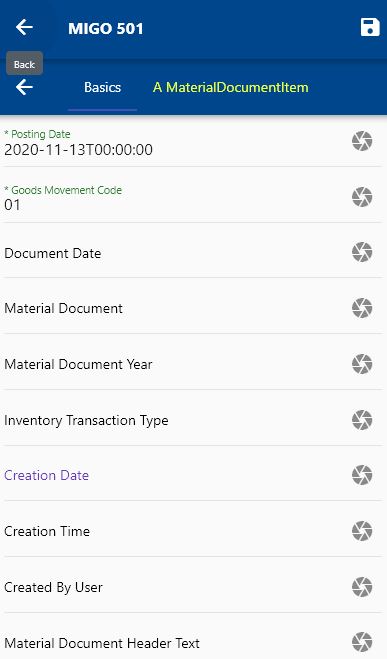

Scroll up and down to view all the fields. You can configure the navigation menu for A_MaterialDocumentHeader, A_MaterialDocumentItem , and A_SerialNumberMaterialDocument to control what fields should be shown to the user and in what sequence. You can also make fields mandatory and read-only, depending on your business requirements.
Enter all the required fields such as Quantity, Storage Location, Plant, and click on the Save button.
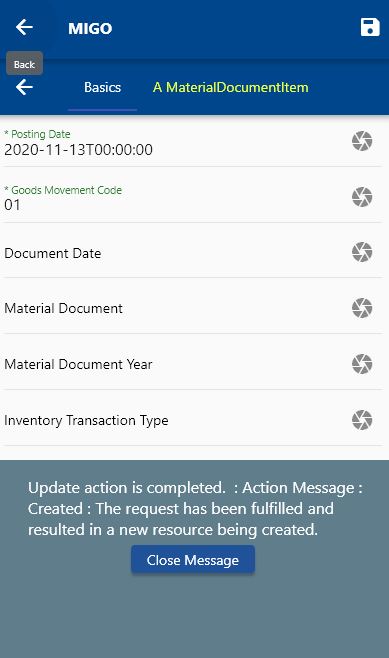
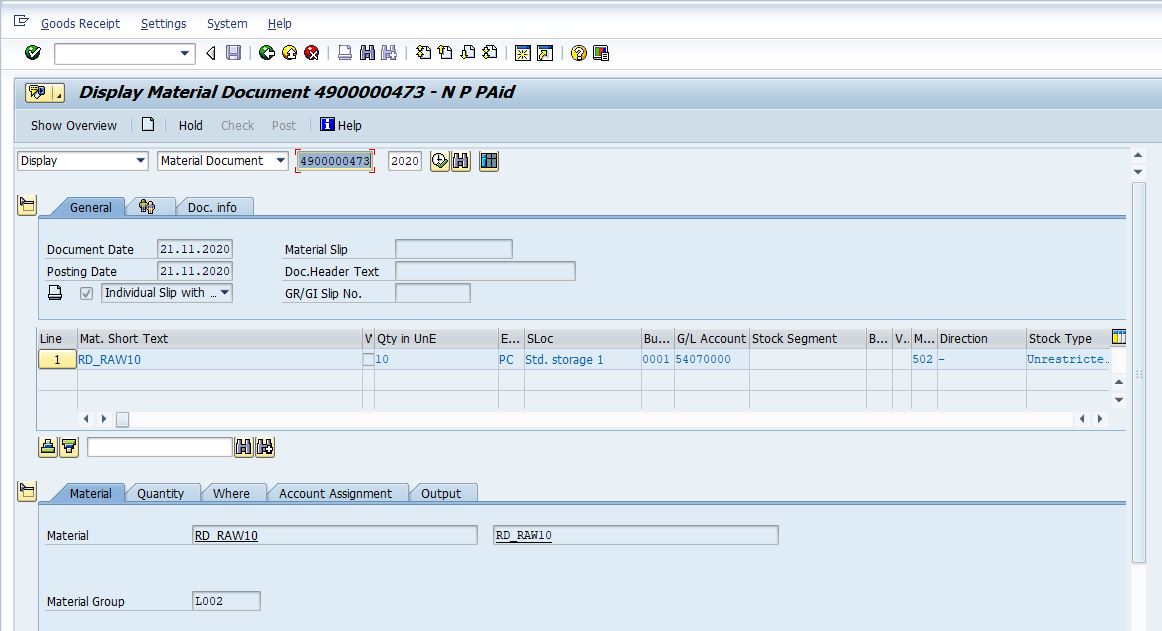
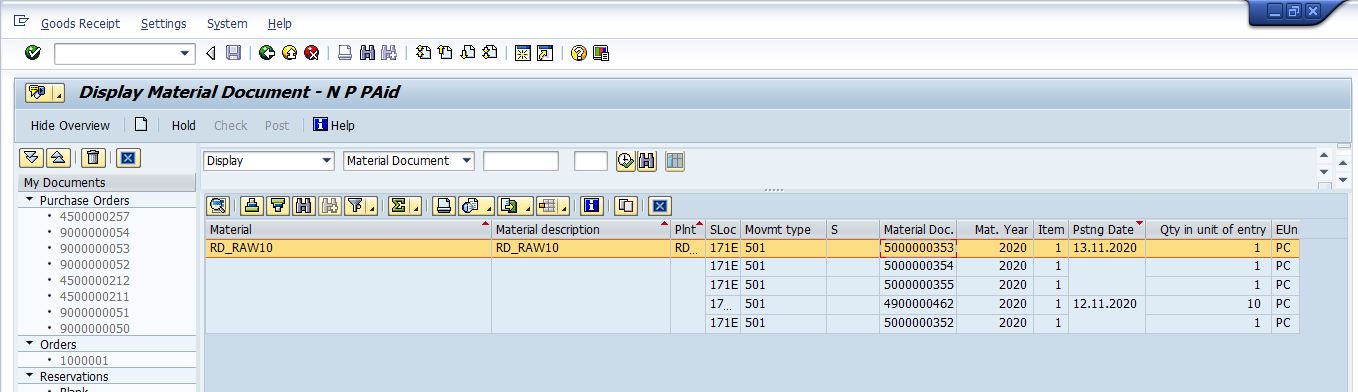
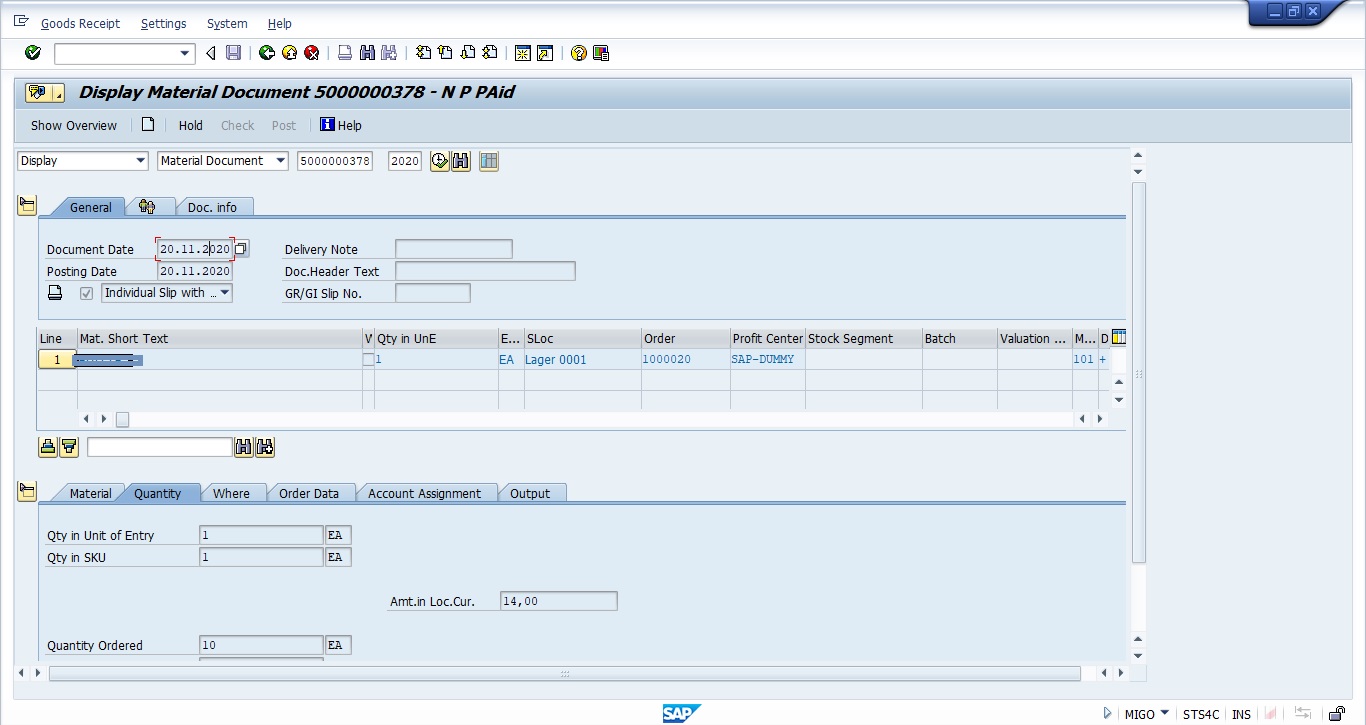
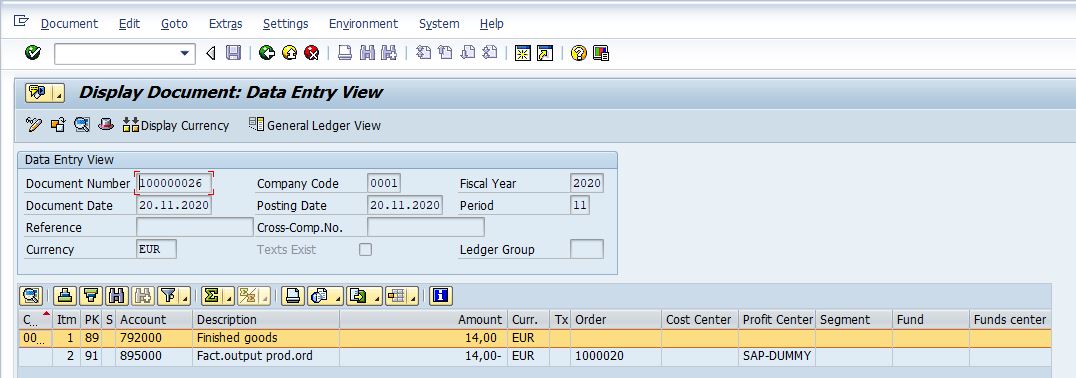
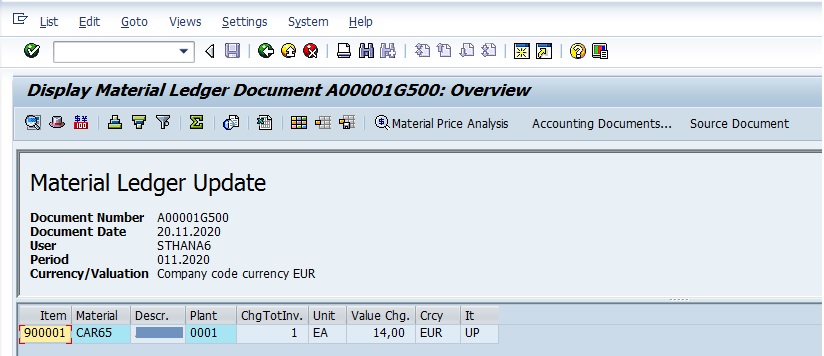
You can review the details in SAP GUI.
Serialized Item
Enter the product/product type details or any other criteria in the search form and click on the search button.
Click on the Menu against an item that you want to transact and click on the select button.
Next, select the transaction type as "MaterialDocumentHeader."
The app will fetch all the related information required to complete the MIGO process. It will take you to a confirmation screen where you need to validate all information and change any detail as needed.
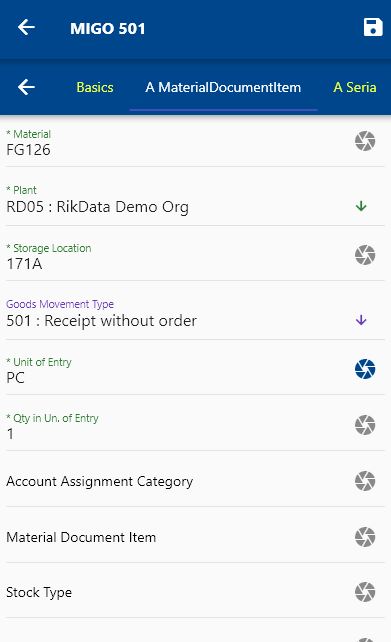
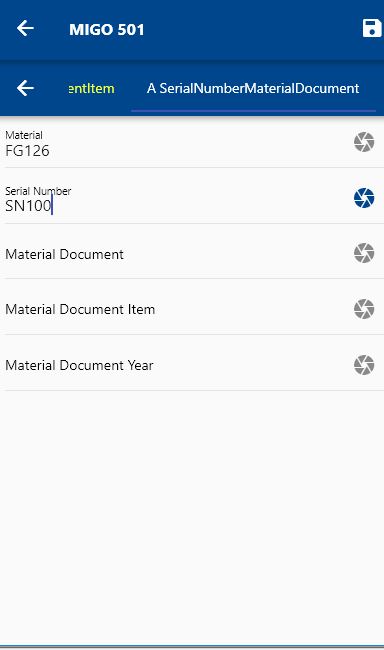
The main difference between this form and the non-serialized form is the serial tab. Scroll to the serial tab and enter serial number information before saving the record.
Receipt for PO (101)
From SAP Docs
With this app, you can post the receipt of goods with reference to the purchase order with which you ordered the goods. If a material is delivered for a purchase order, it is important for all the departments involved that the goods receipt entry in the system references this purchase order. This app supports you, for example, as a warehouse clerk or inventory manager in your daily work.
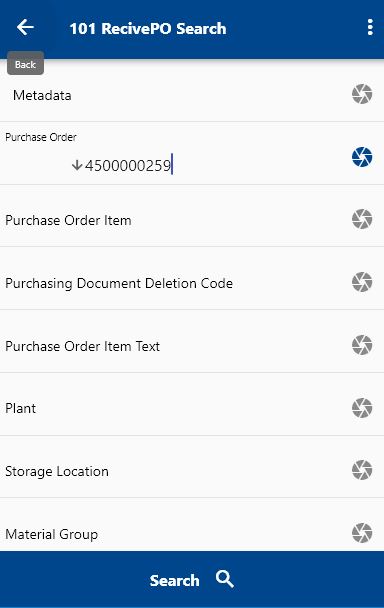
SourceTo receive a purchase order, navigate to the "101 PO Recieve" form from your dashboard/favorite.
The name/label of Menu can be changed as per business preference

Enter the product/purchase order/plant details or any other criteria in the search form and click on the search button.
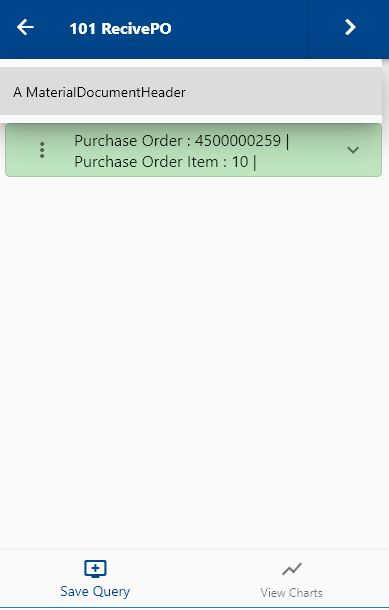
Click on the Menu against an item that you want to transact and click on the select button.
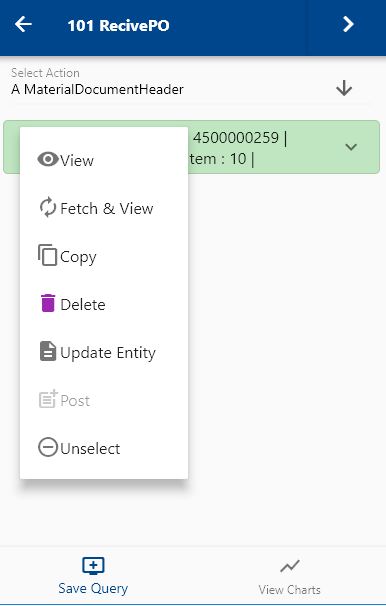
Next, select the transaction type as "Material Document Header."
The app will fetch all the related information required to complete the document creation process. It will take you to a confirmation screen where you need to validate all information and change any detail as needed.
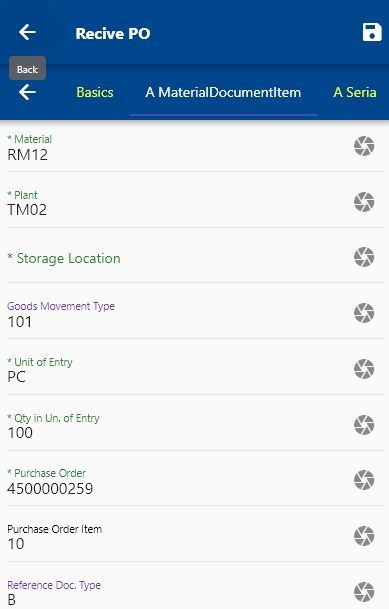
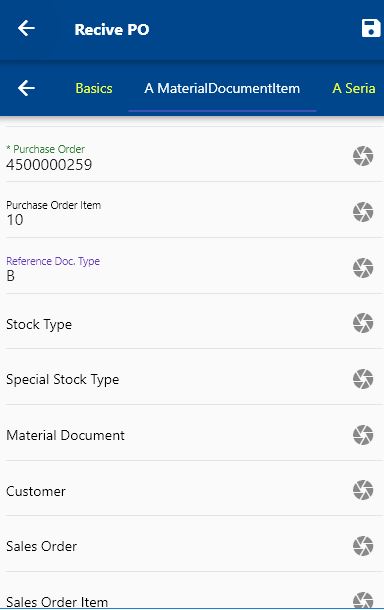
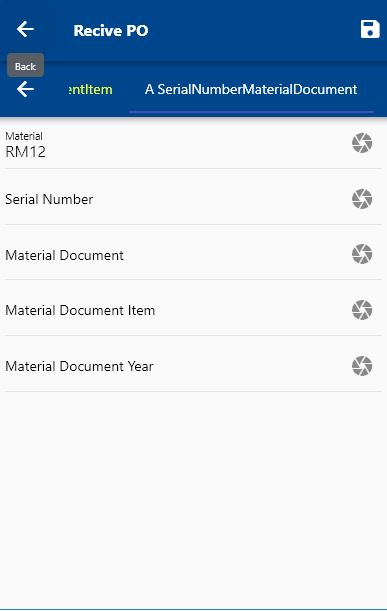
Scroll up and down to view all the fields. You can configure the navigation menu for "101 PO Recieve" to control what fields should be shown to the user and in what sequence. You can also make fields mandatory and read-only, depending on your business requirements.
Review/enter/change below fields
- Storage location (Defaults if entered on PO)
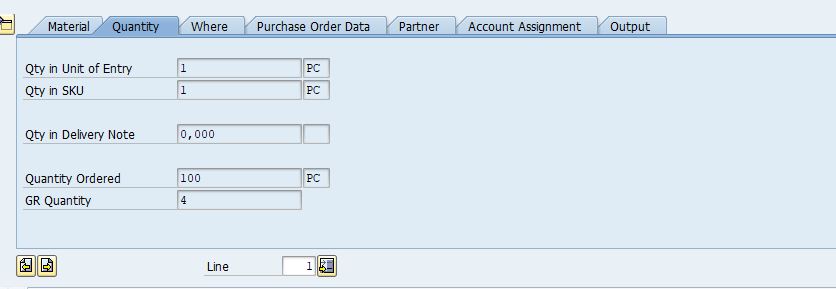
- Quantity (Defaults from PO line)
- Unit of Entry (Defaults from PO line)
Next, click on the Save button.
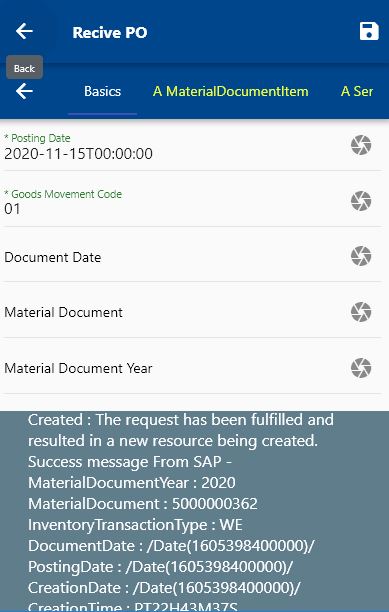
The app will post the document to SAP and will show the returned message (document year, document number, transaction type, date, etc.)
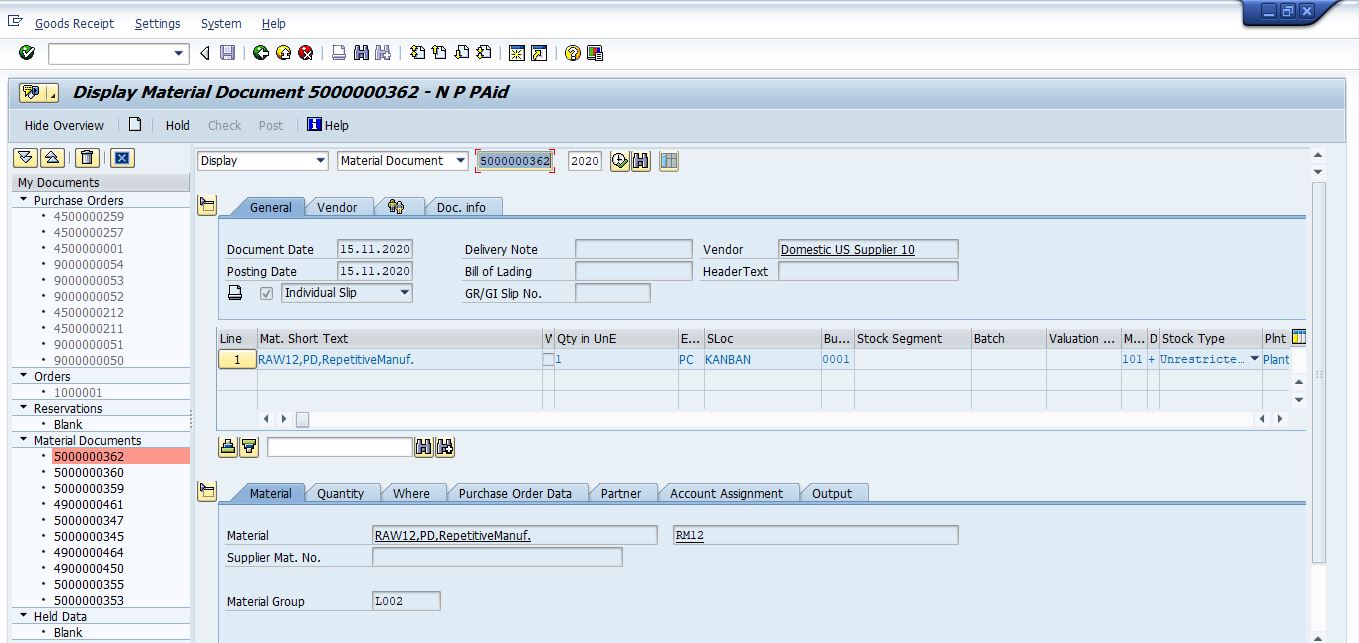
You can review the details on the GUI.
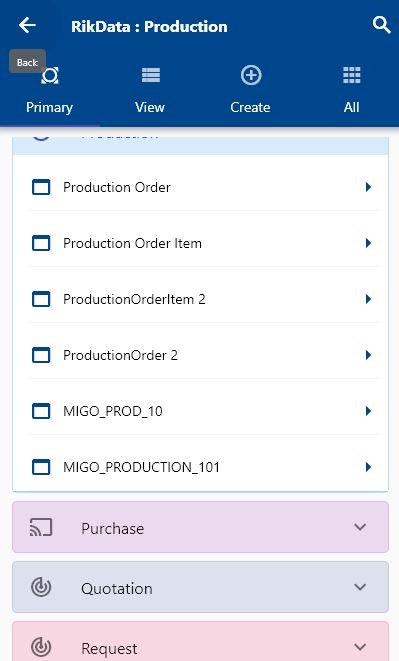
Receipt for Production Order (101)
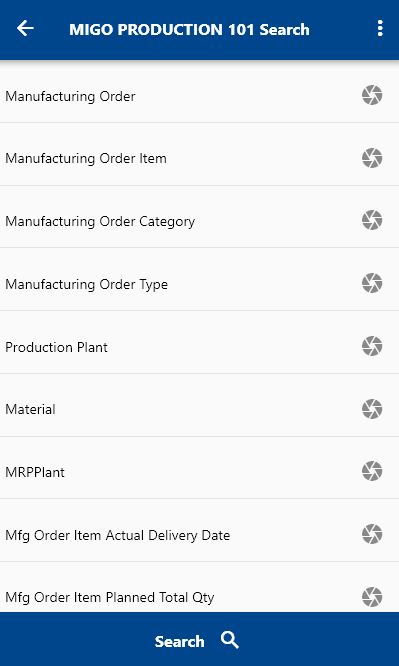
To receive goods against a production order, navigate to the "MIGO Production 101" form from your dashboard/favorite.
The name/label of Menu can be changed as per business preference
Enter the product/production order/plant details or any other criteria in the search form and click on the search button.
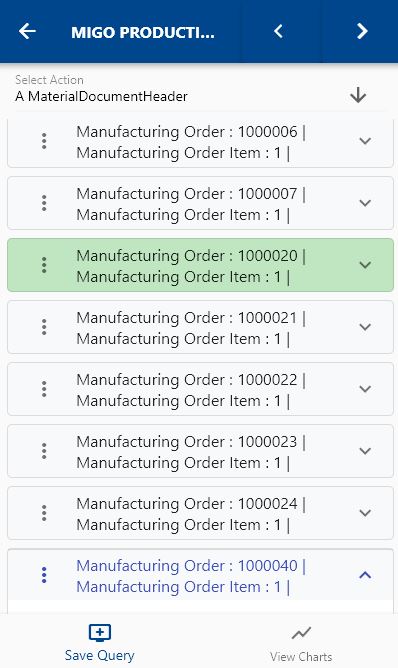
Click on the Menu against an item that you want to transact and click on the select button.
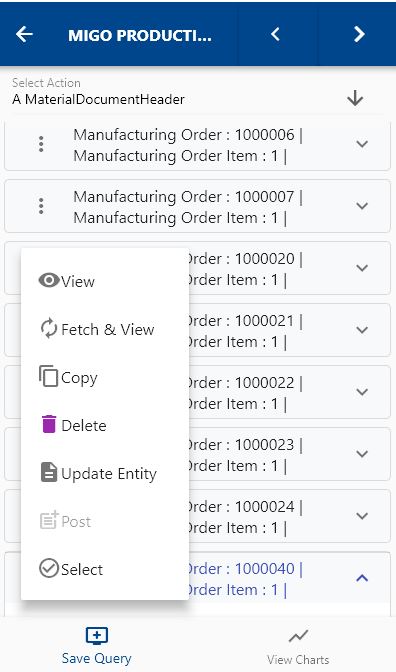
Next, select the transaction type as "Material Document Header."
The app will fetch all the related information required to complete the document creation process. It will take you to a confirmation screen where you need to validate all information and change any detail as needed.
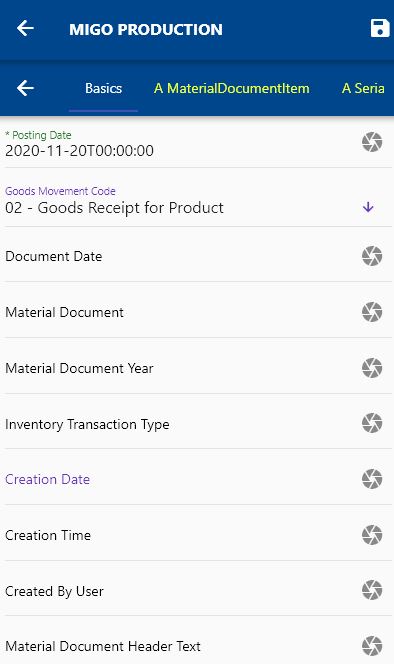
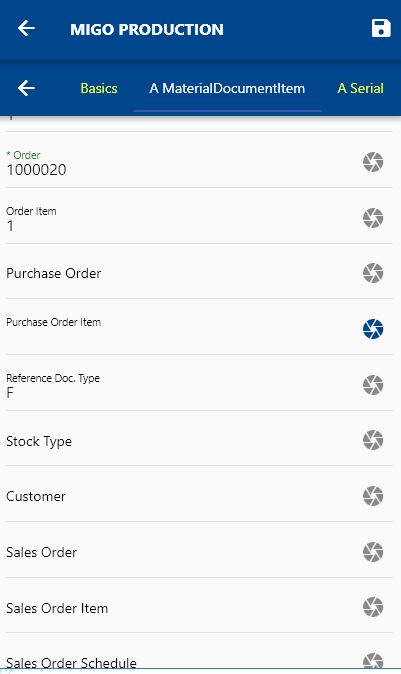
Scroll up and down to view all the fields. You can configure the navigation menu for "MIGO Production 101" to control what fields should be shown to the user and in what sequence. You can also make fields mandatory and read-only, depending on your business requirements.
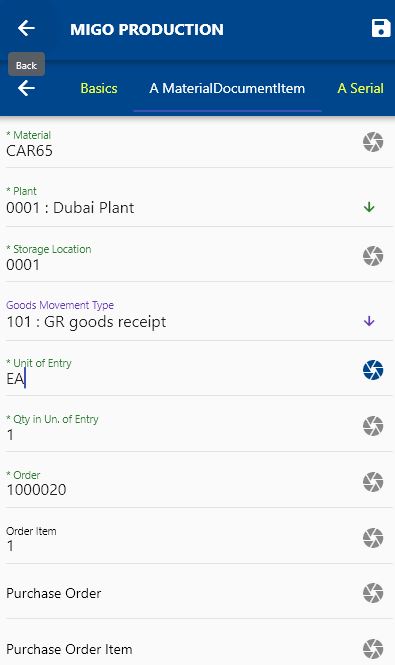
Review/enter/change below fields
- Storage location (Defaults if entered on PO)
- Quantity (Defaults from PO line)
- Unit of Entry (Defaults from PO line)
- Material and Plant will default from the selected production order
Next, click on the Save button.
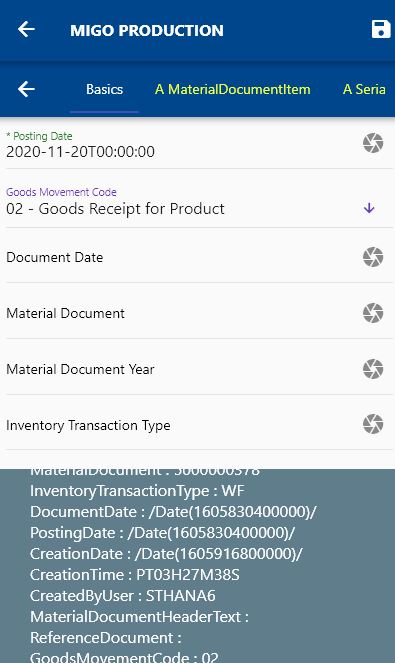
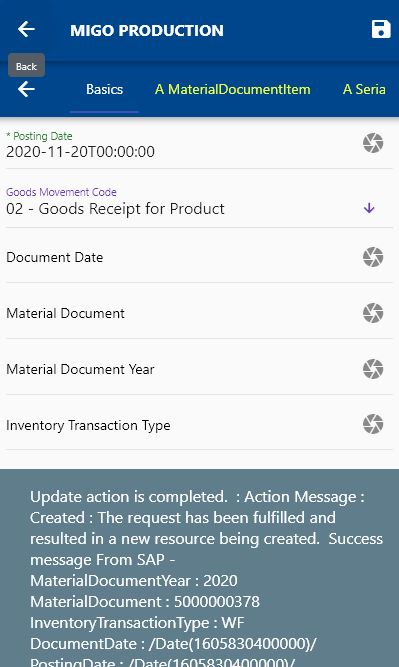
The app will post the document to SAP and will show the returned message (document year, document number, transaction type, date, etc.)
You can review the details on the GUI.
Issue To Production Order (261)
To issue an item/stock against a production order, navigate to the "MIGO 261" search form from your dashboard/favorite.


Enter the product/plant details or any other criteria in the search form and click on the search button.

Click on the Menu against an item that you want to transact and click on the select button. Next, select the transaction type as "Material Document Header."
The app will fetch all the related information required to complete the document creation process. It will take you to a confirmation screen where you need to validate all information and change any detail as needed. Scroll up and down to view all the fields.
Review/enter/change below fields
- Unit of Entry
- "Quantity in Unit of entry."
- Cost center
Next, click on the Save button.
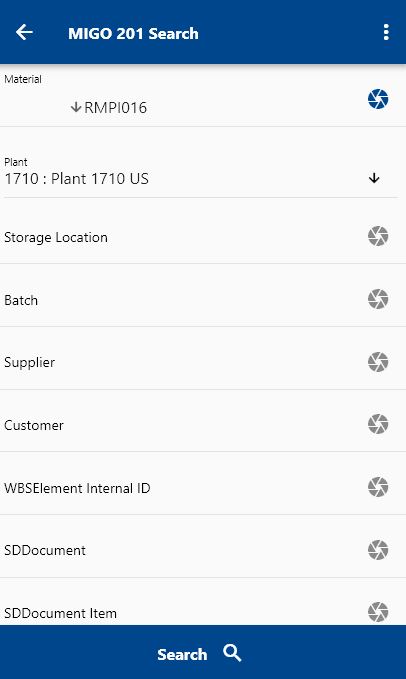
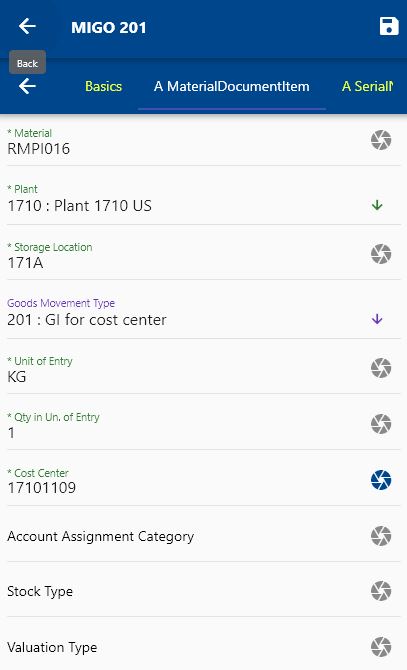
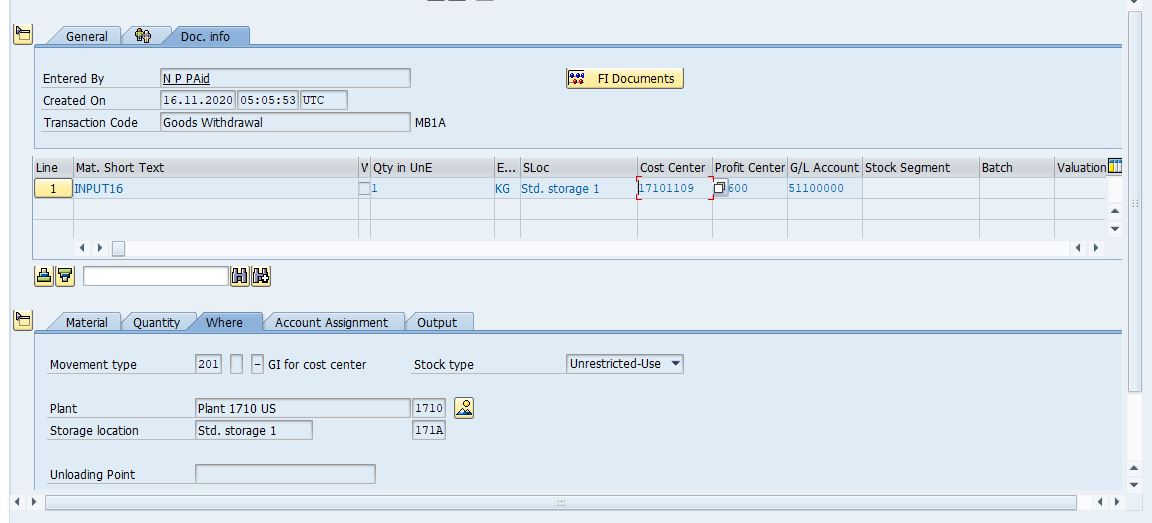
Issue for Cost Center (201)
To issue an item/stock against a cost center, navigate to the "MIGO 201" search form from your dashboard/favorite.
The name/label of Menu can be changed as per business preference
Enter the product/plant details or any other criteria in the search form and click on the search button.
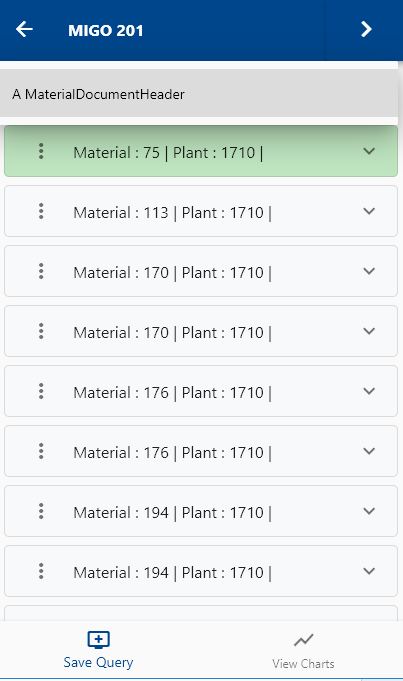
Click on the Menu against an item that you want to transact and click on the select button.
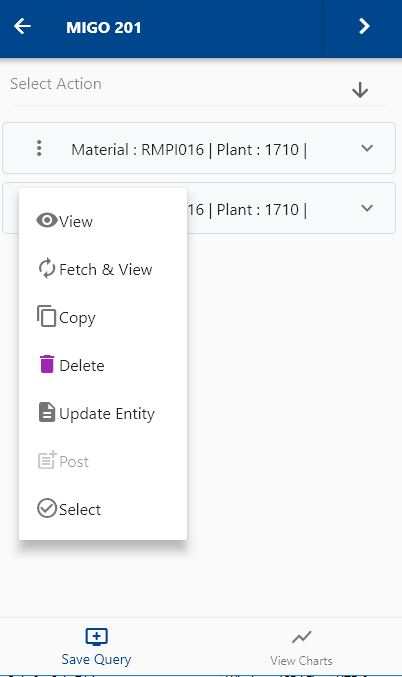
Next, select the transaction type as "Material Document Header."
The app will fetch all the related information required to complete the document creation process. It will take you to a confirmation screen where you need to validate all information and change any detail as needed.
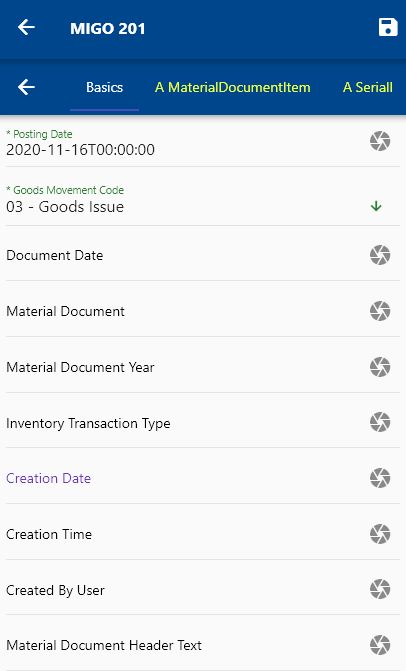
Scroll up and down to view all the fields.
Review/enter/change below fields
- Unit of Entry
- "Quantity in Unit of entry."
- Cost center
Next, click on the Save button.
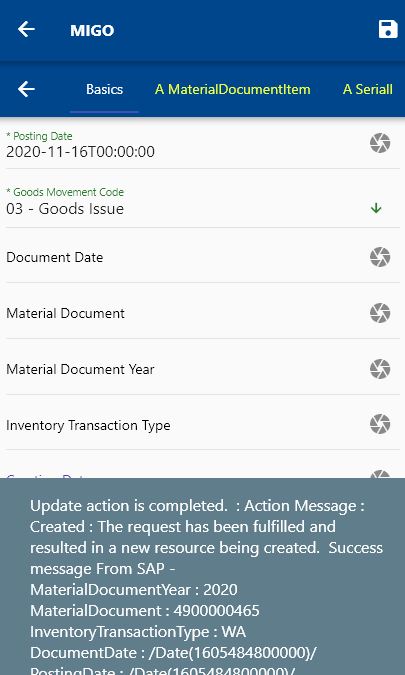
The app will post the document to SAP and will show the returned message (document year, document number, transaction type, date, etc.)
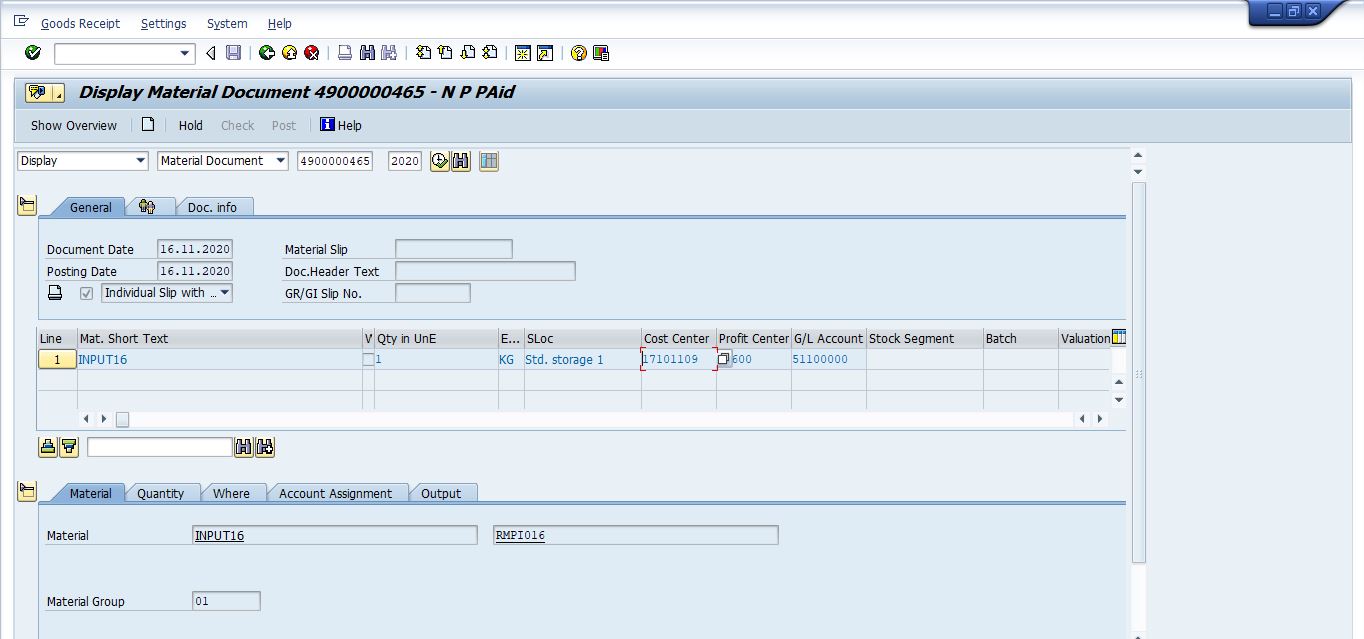
You can review the details on the GUI.
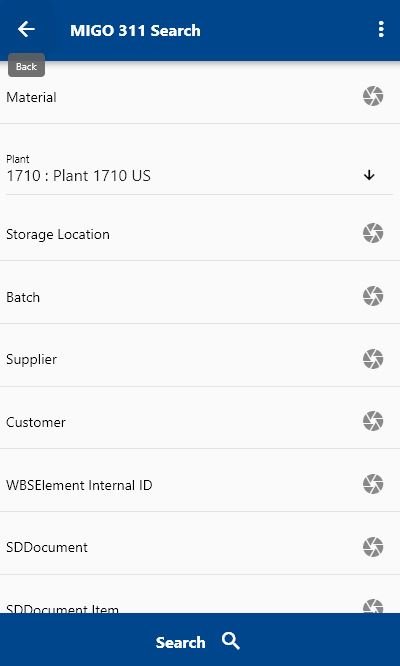
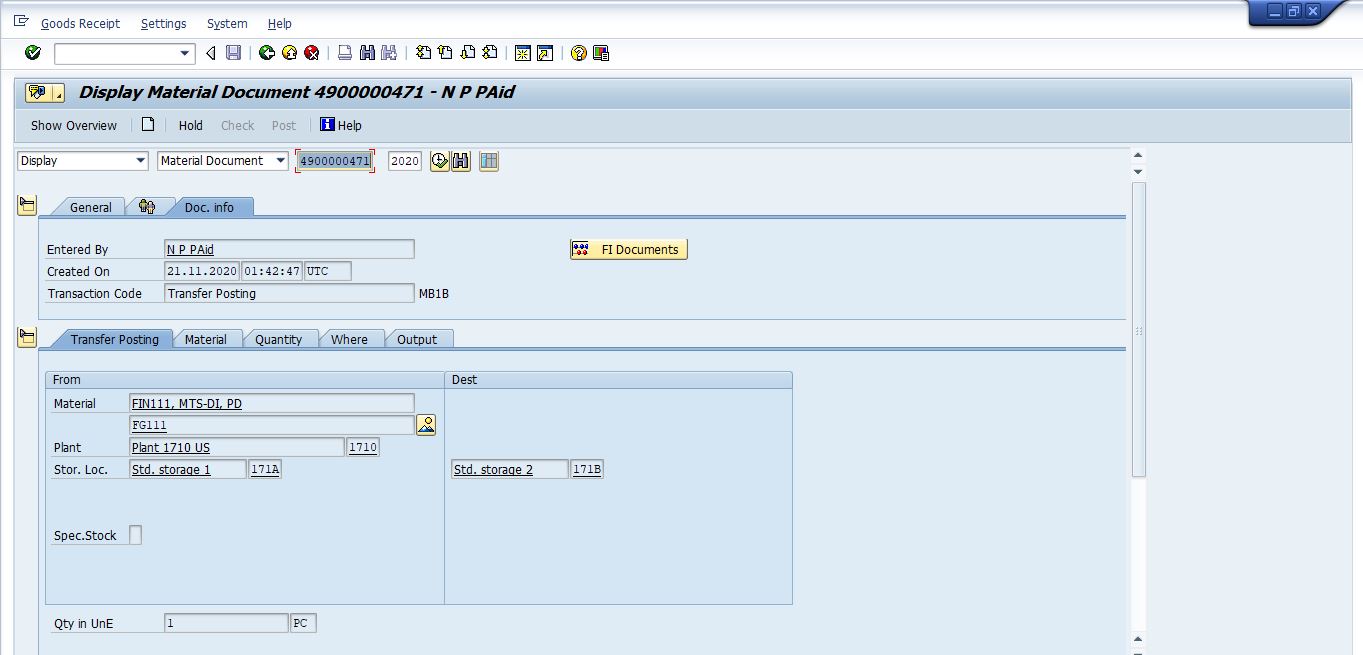
Transfer Posting (311)
To transfer goods between two different storage locations, navigate to the "MIGO 311" search form from your dashboard/favorite.
Enter the product/plant details or any other criteria in the search form and click on the search button.
Click on the Menu against an item that you want to transact and click on the select button.
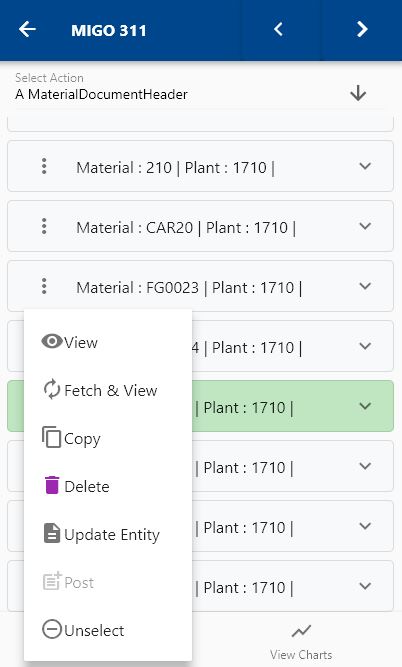
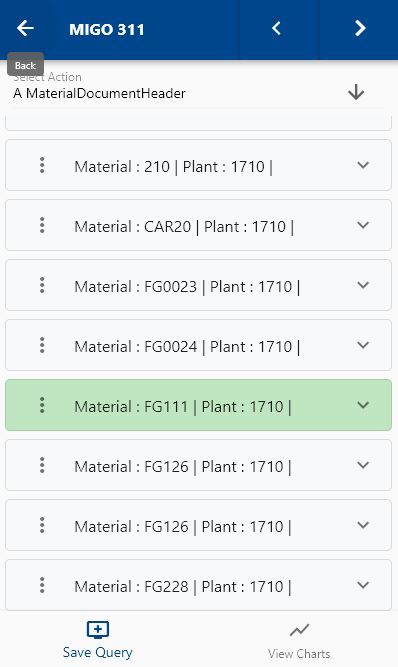
Next, select the transaction type as "Material Document Header."
The app will fetch all the related information required to complete the document creation process. It will take you to a confirmation screen where you need to validate all information and change any detail as required.
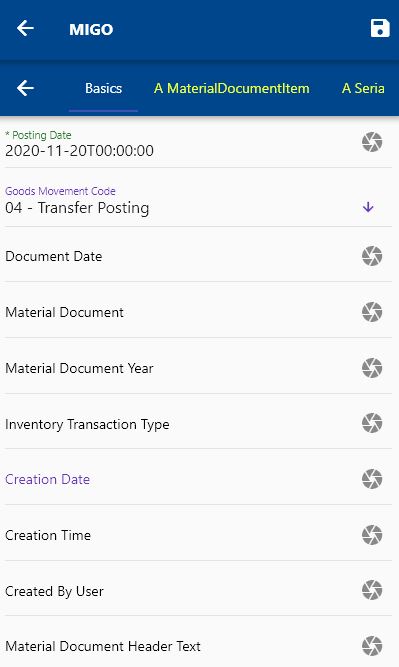
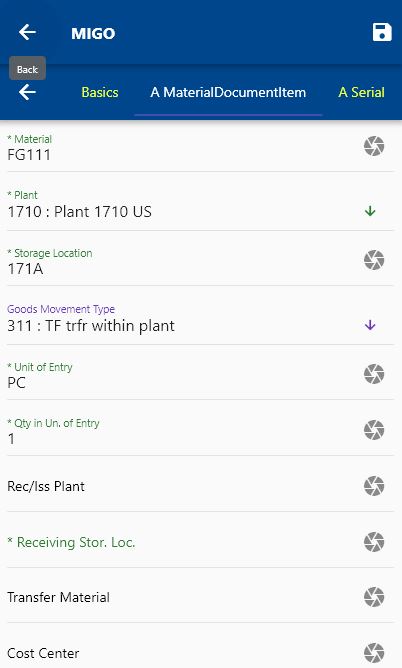
Scroll up and down to view all the fields.
Review/enter/change below fields
- Unit of Entry
- "Quantity in Unit of entry."
- Receiving Plant
- Receiving Storage Location
Next, click on the Save button.
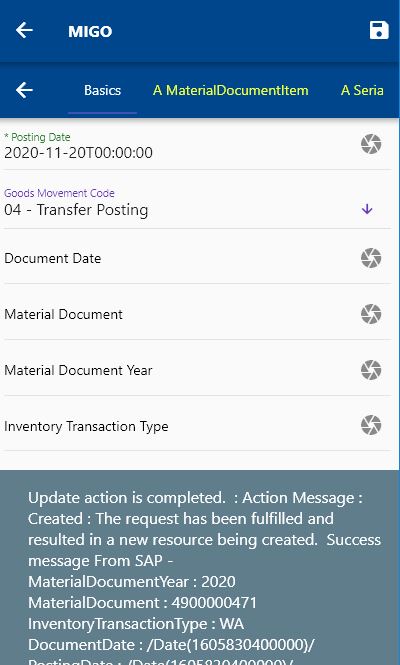
The app will post the document to SAP and will show the returned message (document year, document number, transaction type, date, etc.)
You can review the details on the GUI.
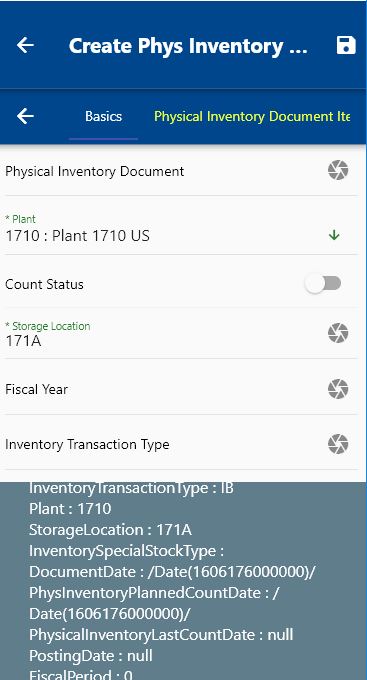
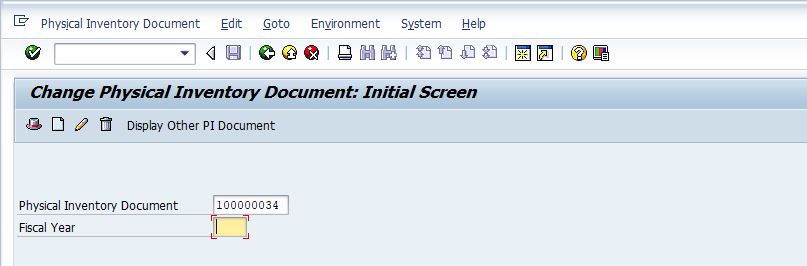
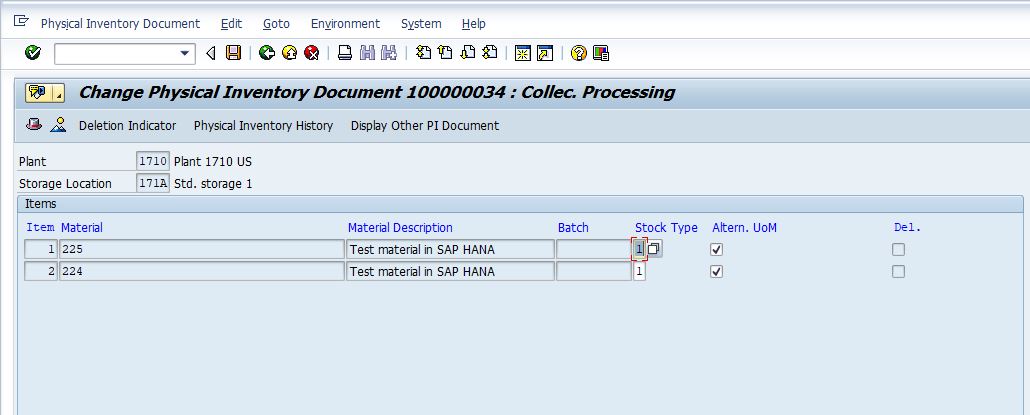
Create/Copy Physical Inventory
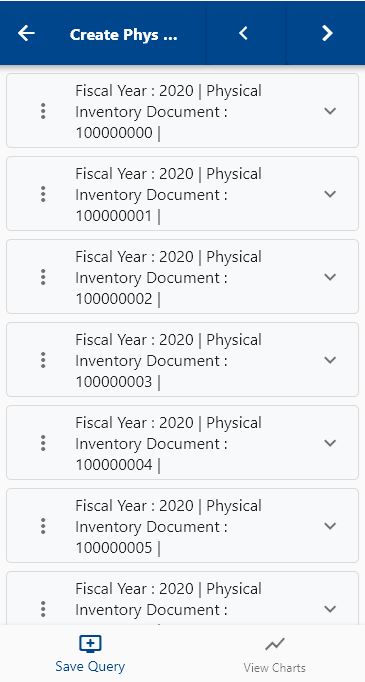
To create a Physical Inventory, navigate to the "Create Physical Inventory Doc" search form from your dashboard/favorite.
Enter an existing document or any other information of an existing PI document in the search form and click on the search button.
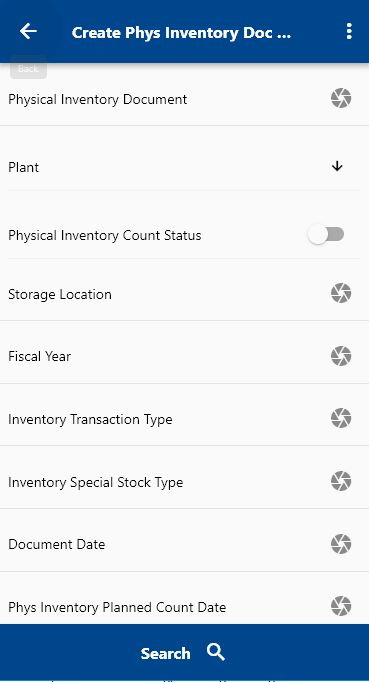
Click on the Menu against an item that you want to copy and click on the copy button.
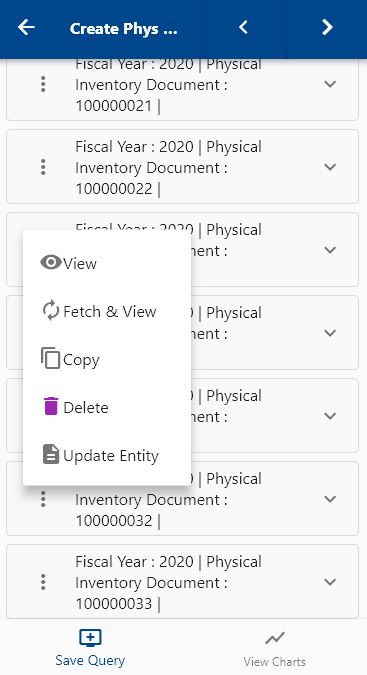
The app will fetch and copy all the document header and item information required to create a new physical document. You can configure which field values should be copied/ignored in the menu path settings. It will take you to a new screen where you need to validate all information and save the new document.
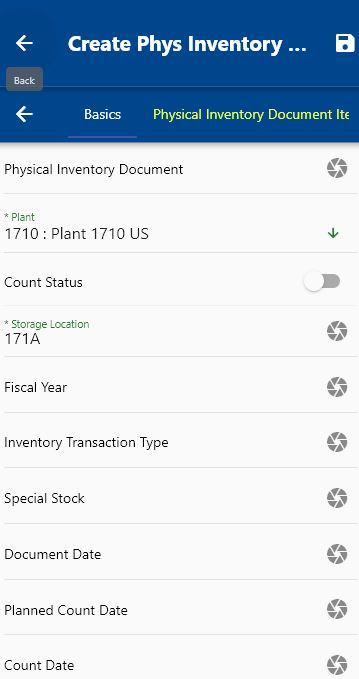
Scroll up and down to view all the fields.

To add a new line, click on the menu on any of the line records and select add new.
Next, click on the Save button to create a new PI document.
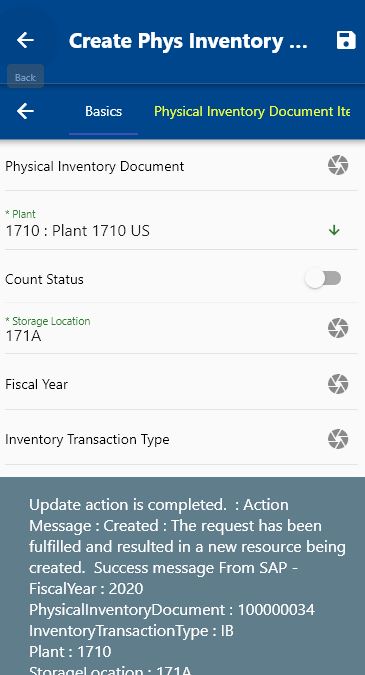
The app will post the document to SAP and will show the returned message (document year, document number, transaction type, date, etc.)
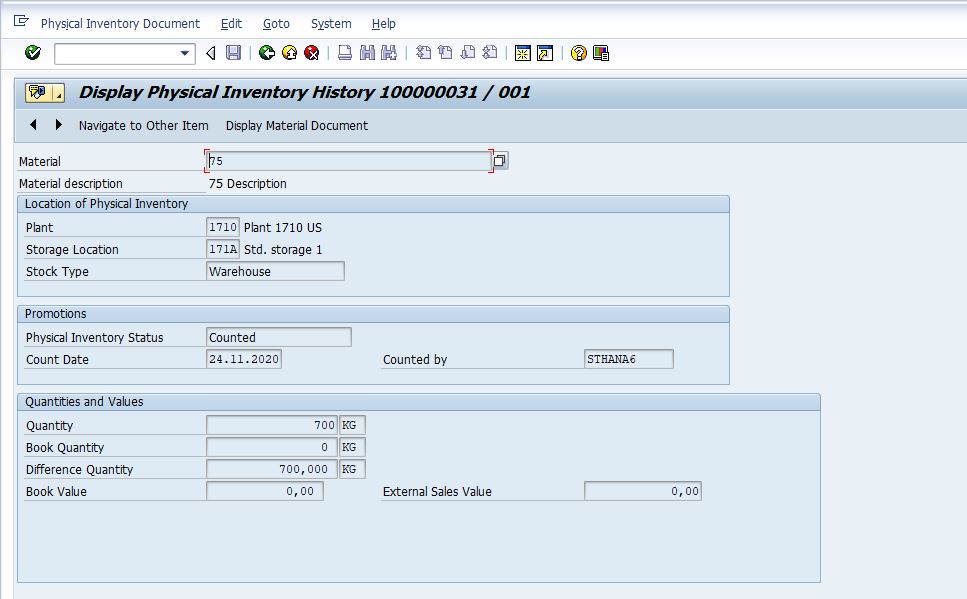
You can review the details on the GUI.
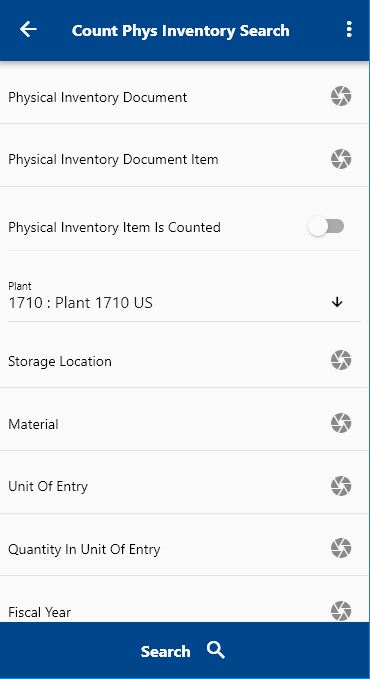
Count Physical Inventory
To count a Physical Inventory, navigate to the "Count Physical Inventory Doc" search form from your dashboard/favorite.
Enter a document number/plant or any other information of an existing PI document in the search form and click on the search button.
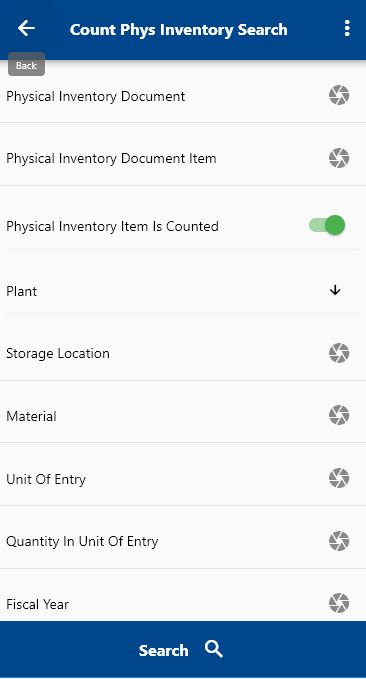
To search only uncounted entries, switch off the "Physical Inventory Item is counted" button (You have to switch on and then off)
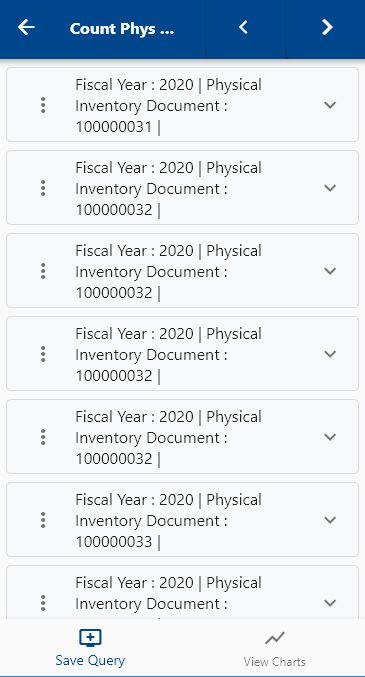
Click on the Menu against an item that you want to count and click on the view button.
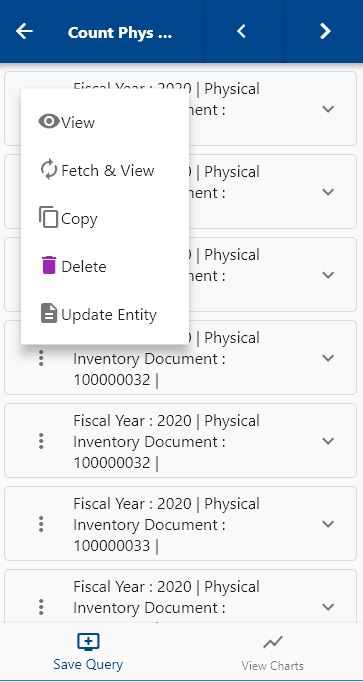
The app will fetch the document header and item information required to confirm a count. You can configure which field values should be copied/ignored/hidden/required in the menu path settings. It will take you to a new screen where you need to validate all information and save the new document.
The basic tab shows the item information. You can scroll to the Physical Inventory Document to view header level information.
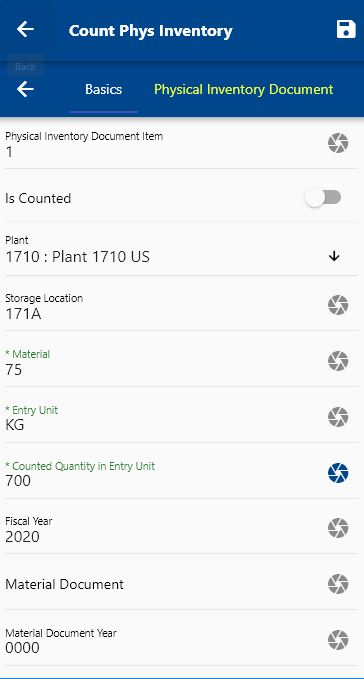
Scroll up and down to view all the fields. Next, click on the Save button to create a count.
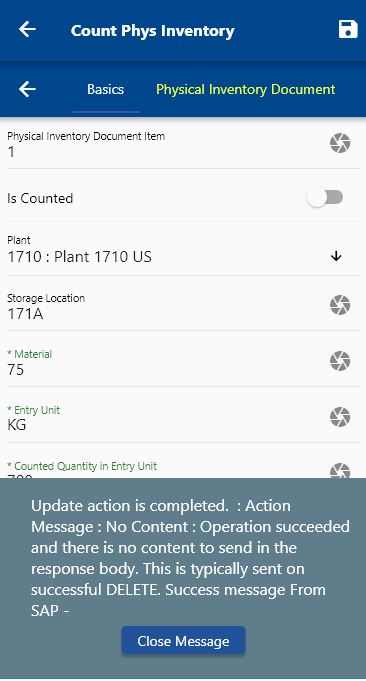
The app will post the document to SAP and will show the returned message.
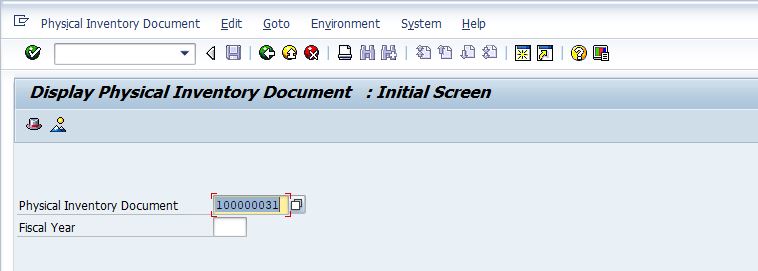
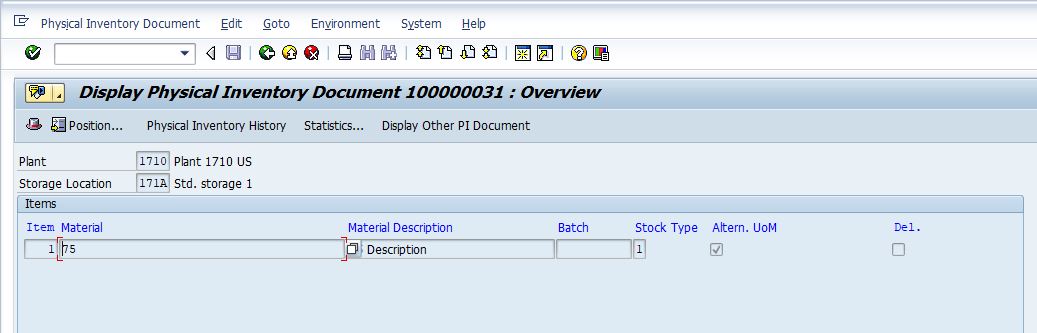
You can review the details on the GUI.
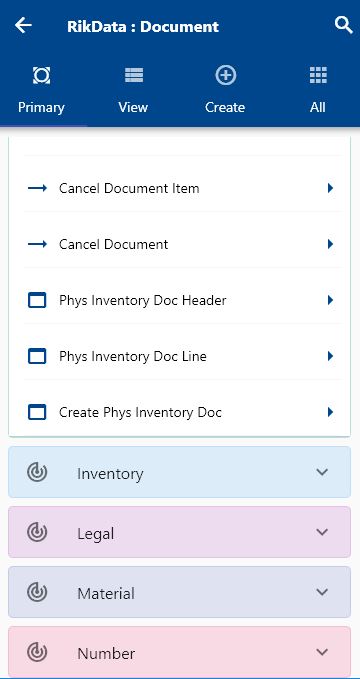
Cancel Document
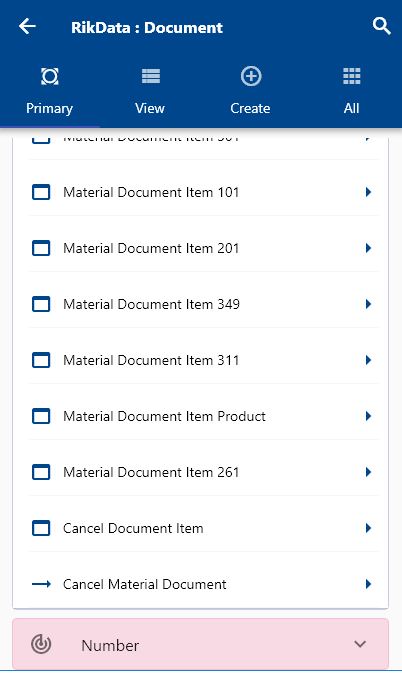
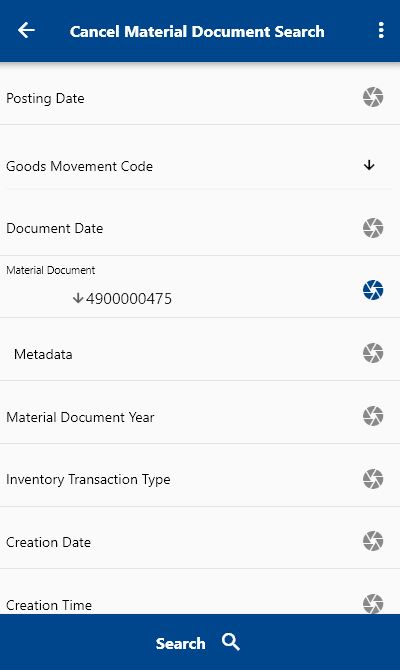
When you cancel a material document at the header level, all material documents are canceled. To cancel a material document at header level, navigate to the "Cancel Material Document" search form from your dashboard/favorite.
Enter the Material Document/Movement Code or any other criteria in the search form and click on the search button.
Click on the Menu against an item that you want to cancel and click on the select button.
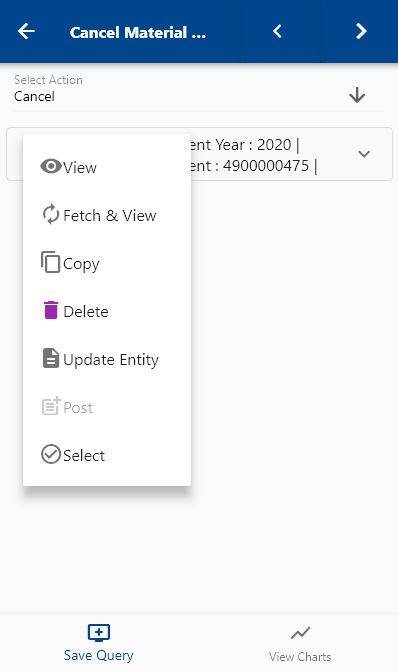
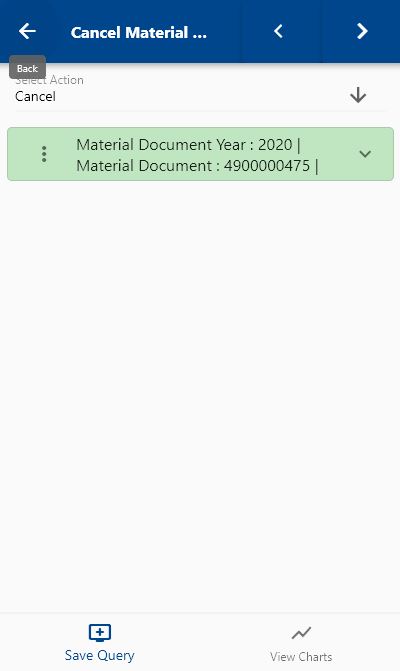
Next, select the transaction type as "Cancel."
The app will fetch all the related information required to cancel the. It will take you to a confirmation screen where you need to validate all information and cancel the document header.
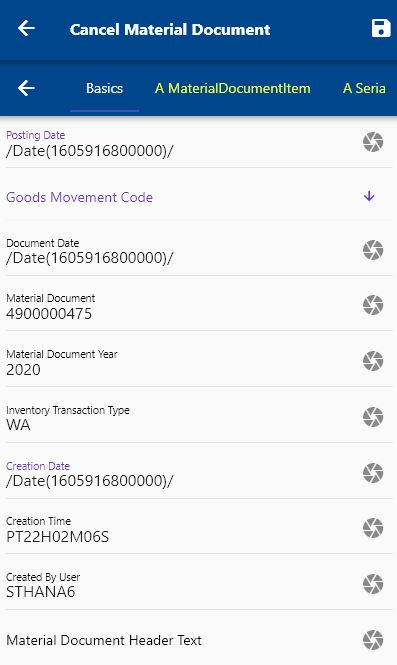
Scroll up and down to view all the fields. Next, click on the Save button to cancel the document.

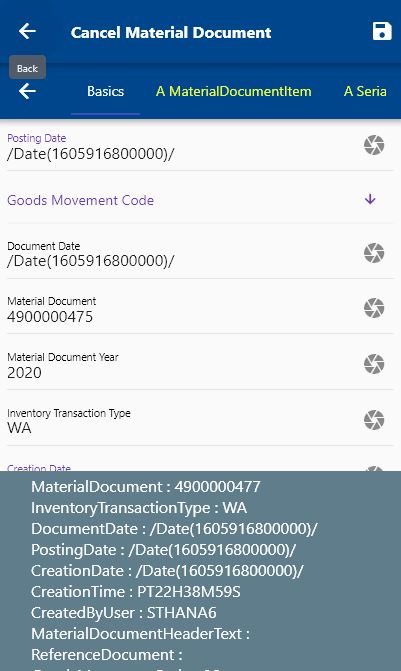
The app will post the document to SAP and will show the returned message (document year, document number, transaction type, date, etc.)
You can review the details on the GUI.
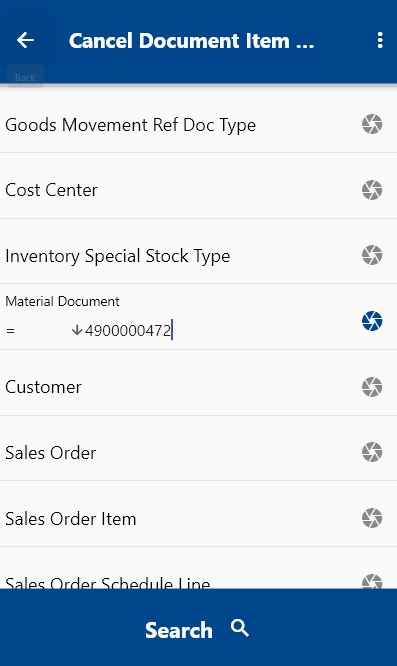
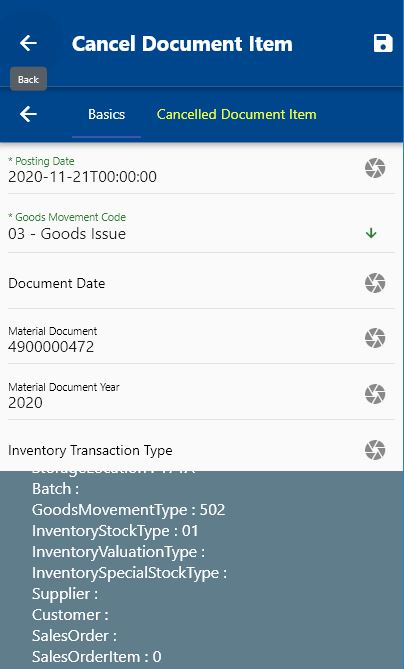
Cancel Document at Item Level
When you cancel material documents at the item level, only the specified items are canceled. To cancel a material document at the item level, navigate to the "Cancel Document Item" search form from your dashboard/favorite.
Enter the Material Document/Movement Code or any other criteria in the search form and click on the search button.
Click on the Menu against an item that you want to cancel and click on the select button.
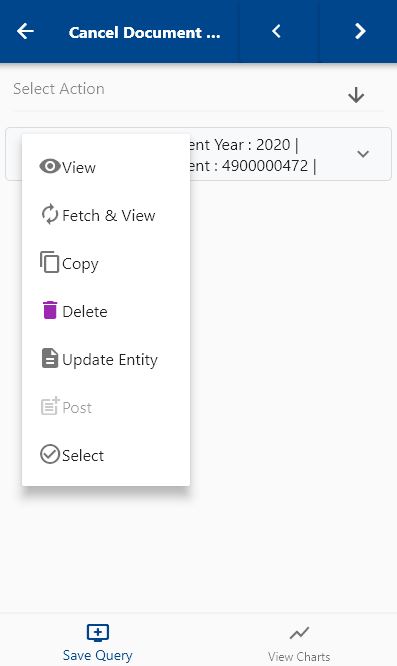
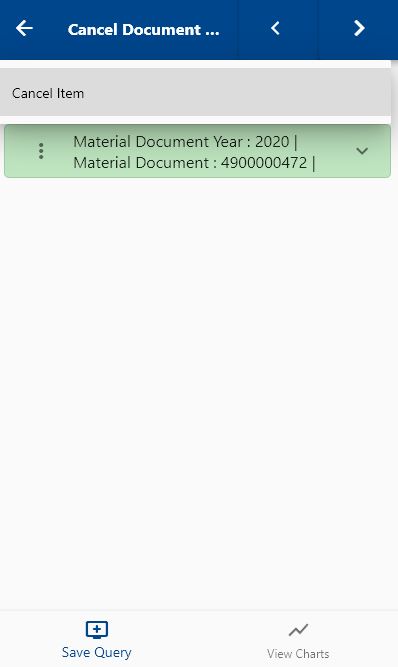
Next, select the transaction type as "Cancel Item."
The app will fetch all the related information required to cancel the document item. It will take you to a confirmation screen where you need to validate all information and cancel the document item.
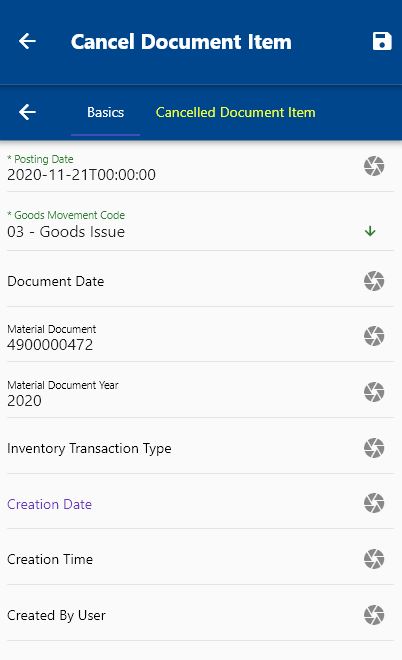
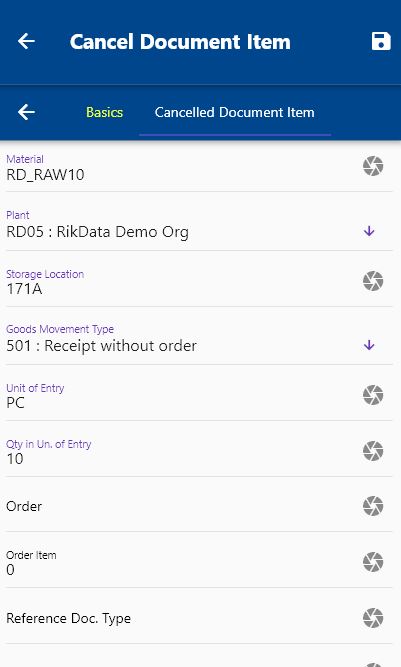
Scroll up and down to view all the fields. Next, click on the Save button to cancel the document.

The app will post the document to SAP and will show the returned message (document year, document number, transaction type, date, etc.)
You can review the details on the GUI.