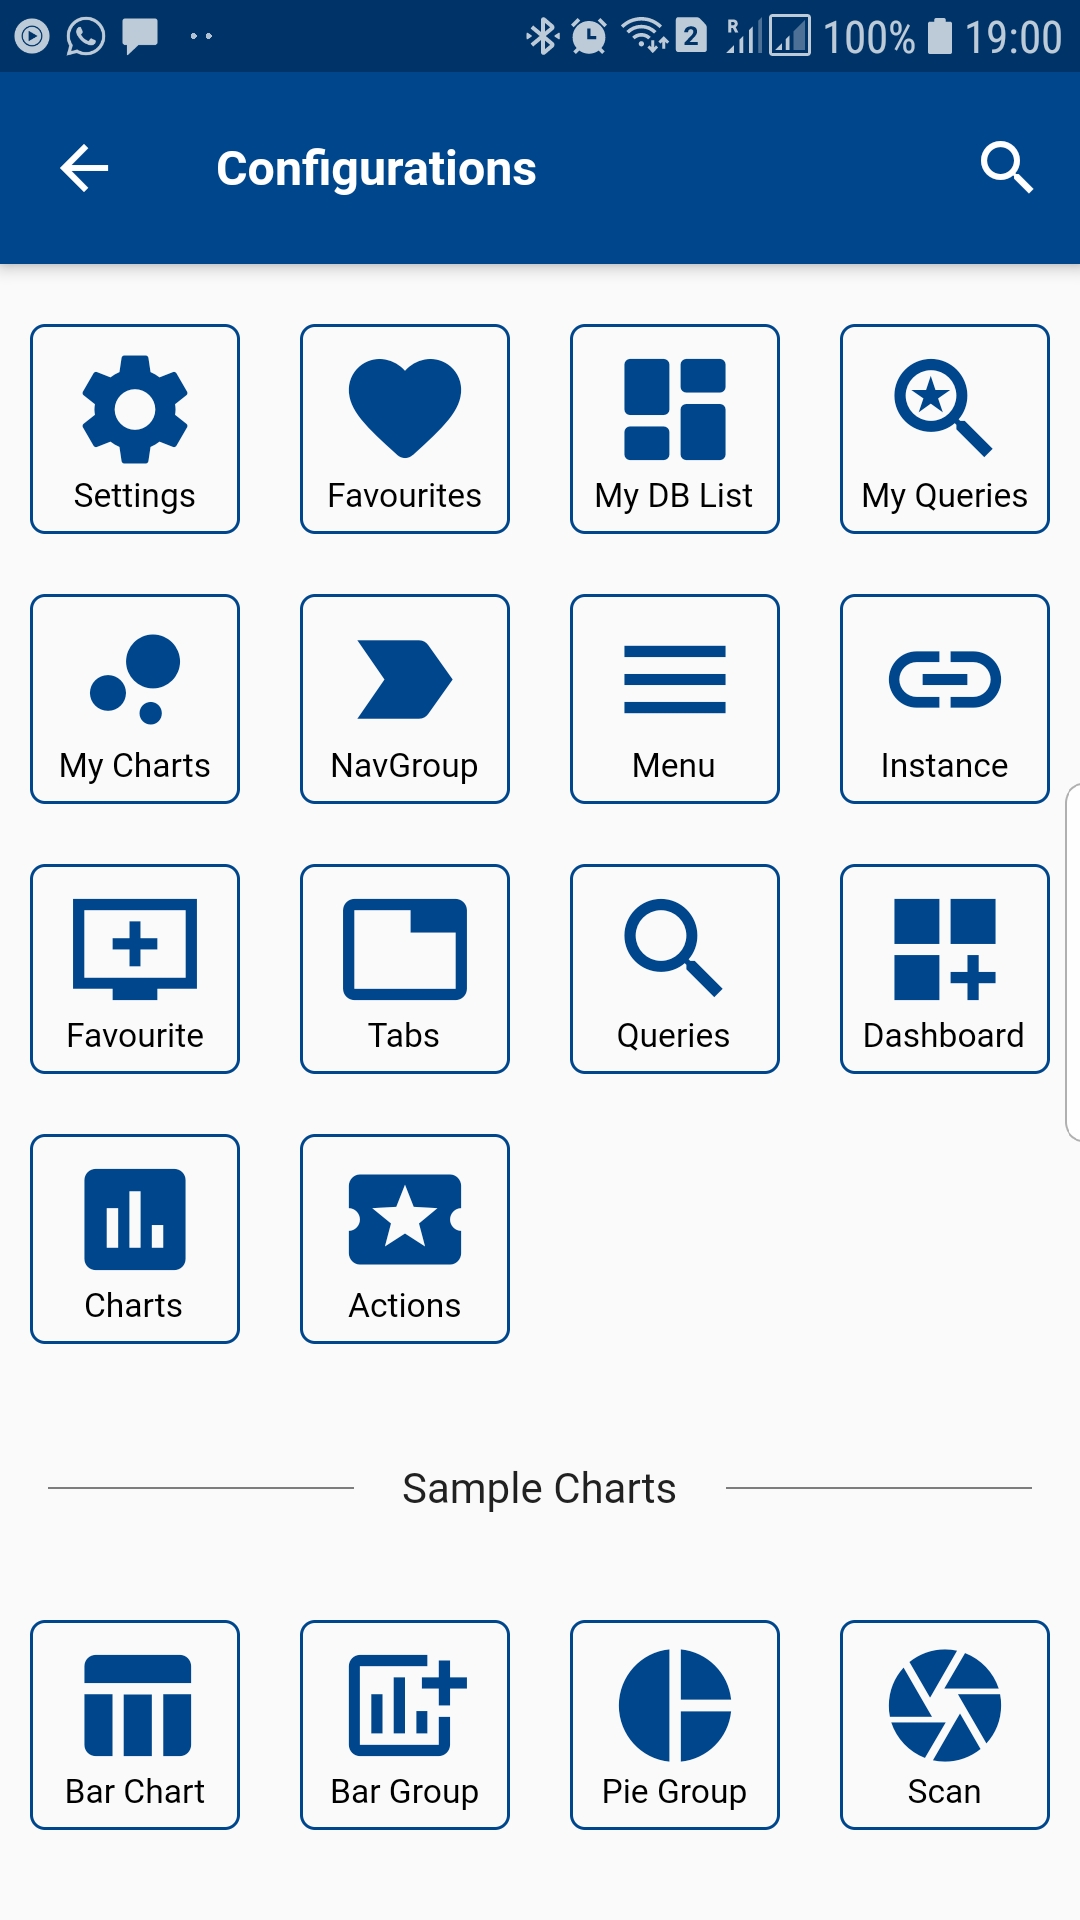
Configuration
OneApp allows you to configure all forms and fields used in documents and transactions. You can define constraints (such as required fields, hidden fields, field data type) in addition to the constraints provided by the ERP service providers. It also allows you to create queries, dashboards, charts, etc., and share it with other business users across your organization.
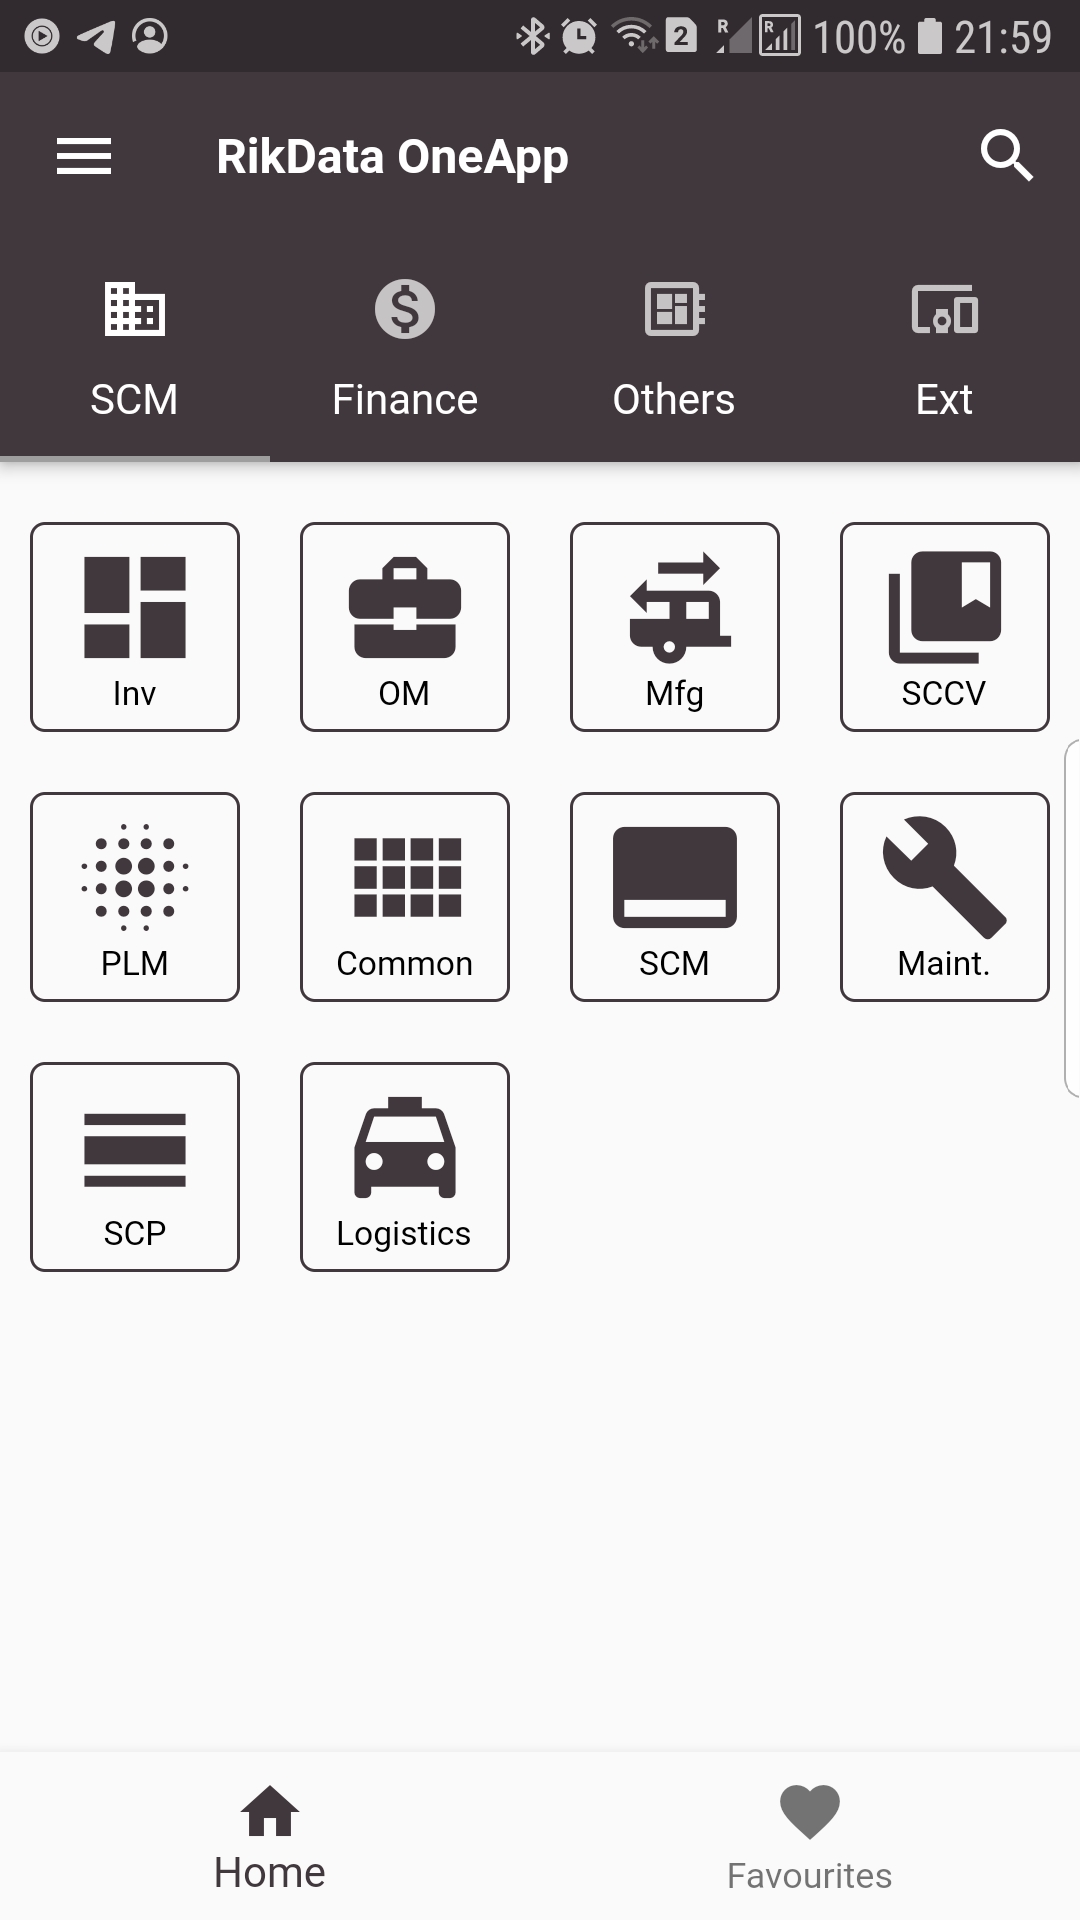
Navigate to the configuration screen from the user menu to access all the available configuration entities.
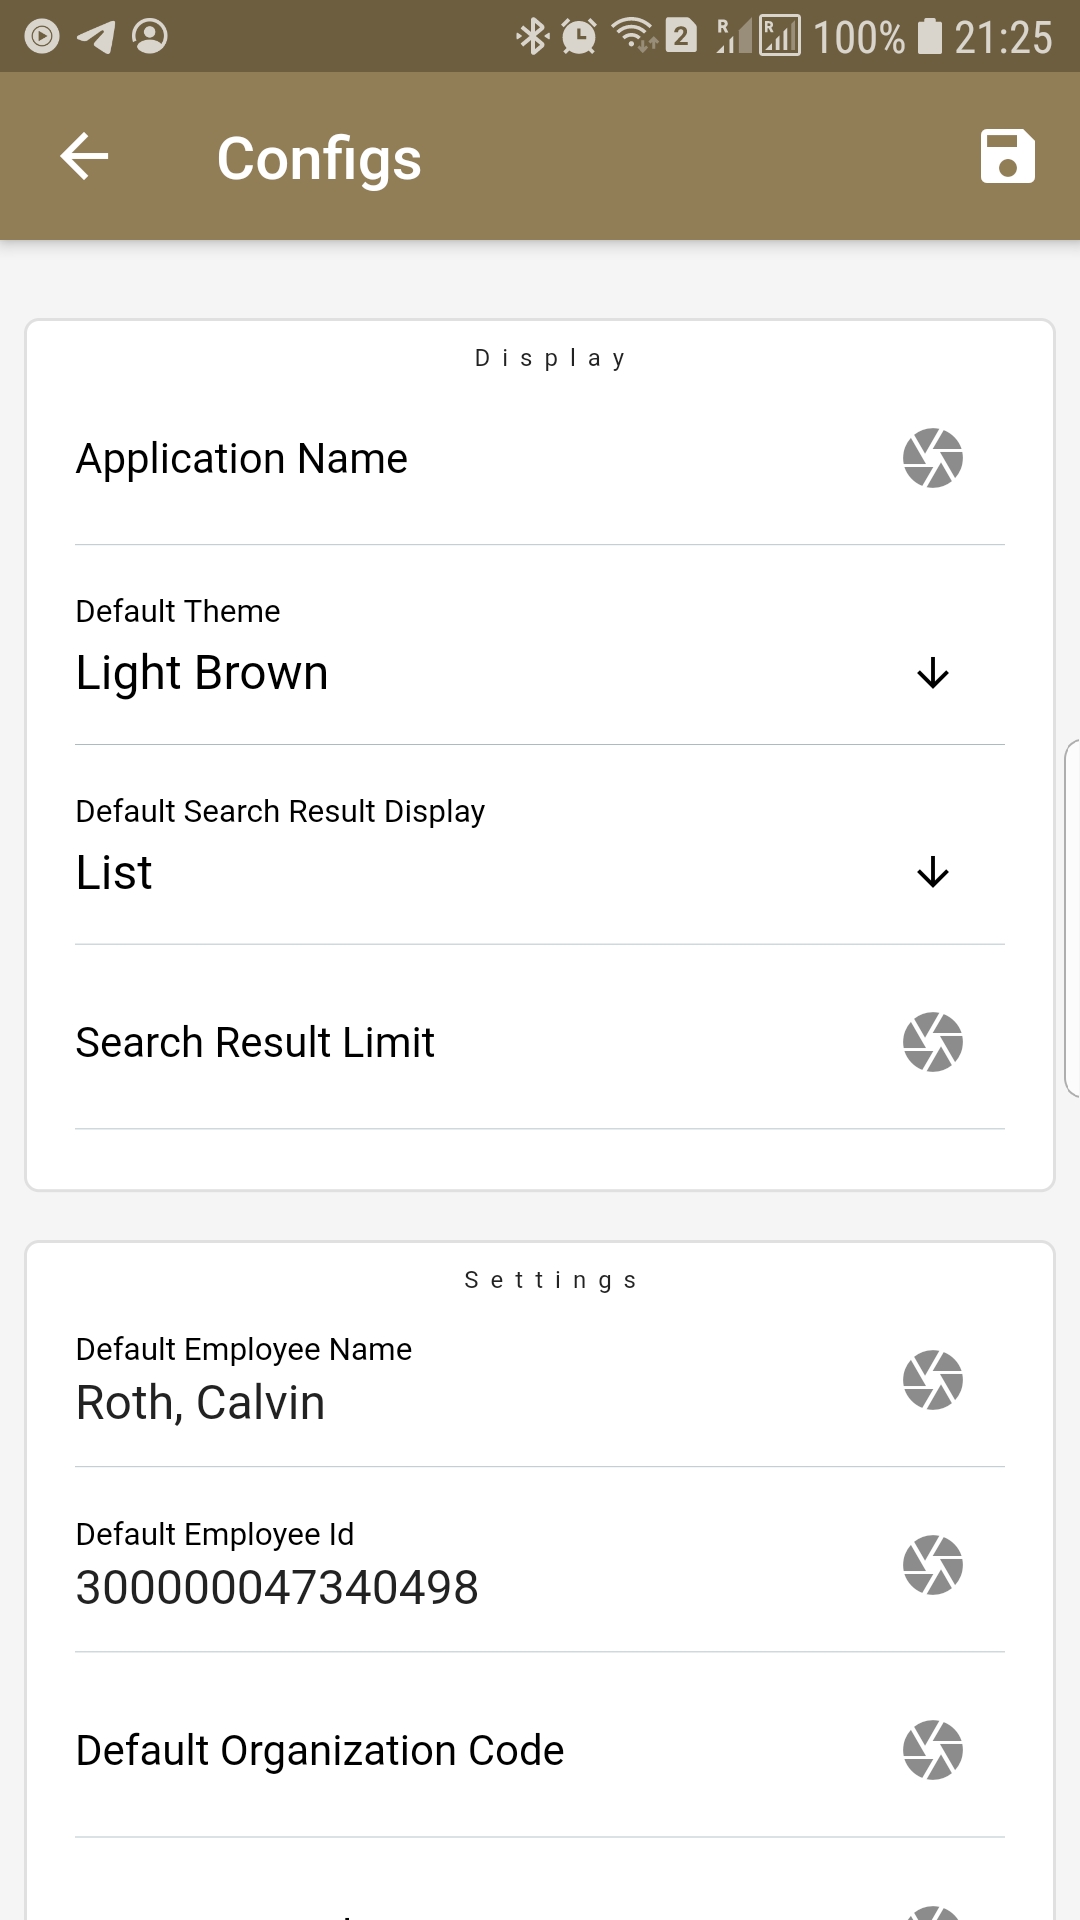
Settings
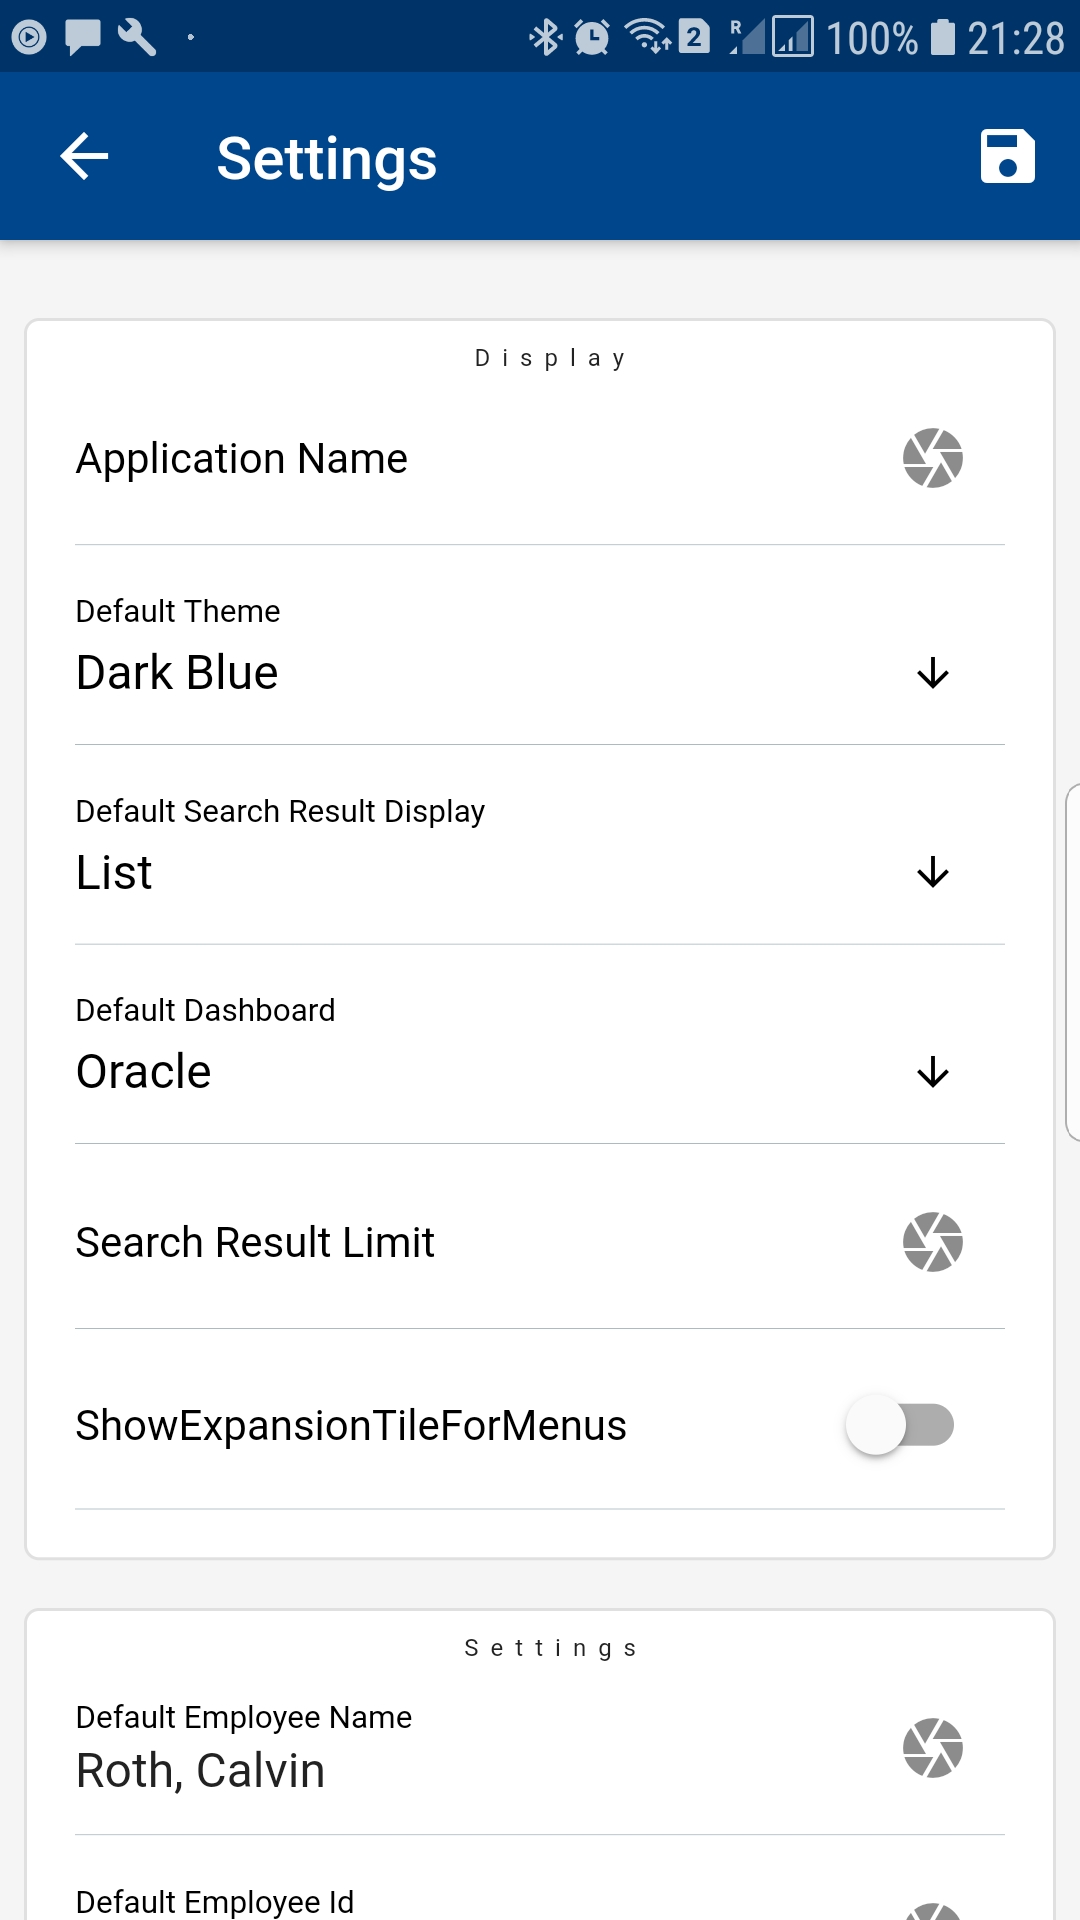
The settings screen allows the user to configure the application for defaulting various information. The settings screen is the only configuration that is not shared with other users, and each user has to do the setup on their own. None of the options in the settings are mandatory. However, entering data in Settings helps in data entry in various forms as the app defaults the value from settings.
Default Theme
The default theme controls the application background and text colors. It also controls other color combinations such as progress bar, circular progress indicator, icon colors, etc. The application comes with several color themes; choose the theme that best suits your test. You need to close and re-open the application for the theme to take effect.
Default Search Result Display
You can view search results in tabular and list format. For transactions, you have to query data in list format. The default search result display controls how the app will show the search result if you don't select anything before search. If you change the display type before the search, then the application will cache the current session's value and show all the other results in the same format. If you need to view it differently, then change it before doing the next search.
Default Dashboard
The application comes with two seeded and two configured dashboards. You can create any number of dashboards. However, select one of the seeded dashboards as your default dashboard.
Search Result Limit
The search result limit controls how many rows will be fetched and shown on a single screen. You can enter a search number value before each search, but if you use a default value, then the system will use that value for all inquiries.
ShowExpansionTilesForMenus
If you want to view the navigation menus grouped, then enable the "ShowExpansionTilesForMenus" checkbox else; The app will show all the menus in a single list. For groups to work, you need to define groups and add them to the navigation path. The app comes with several groups, and you can use them or modify them.
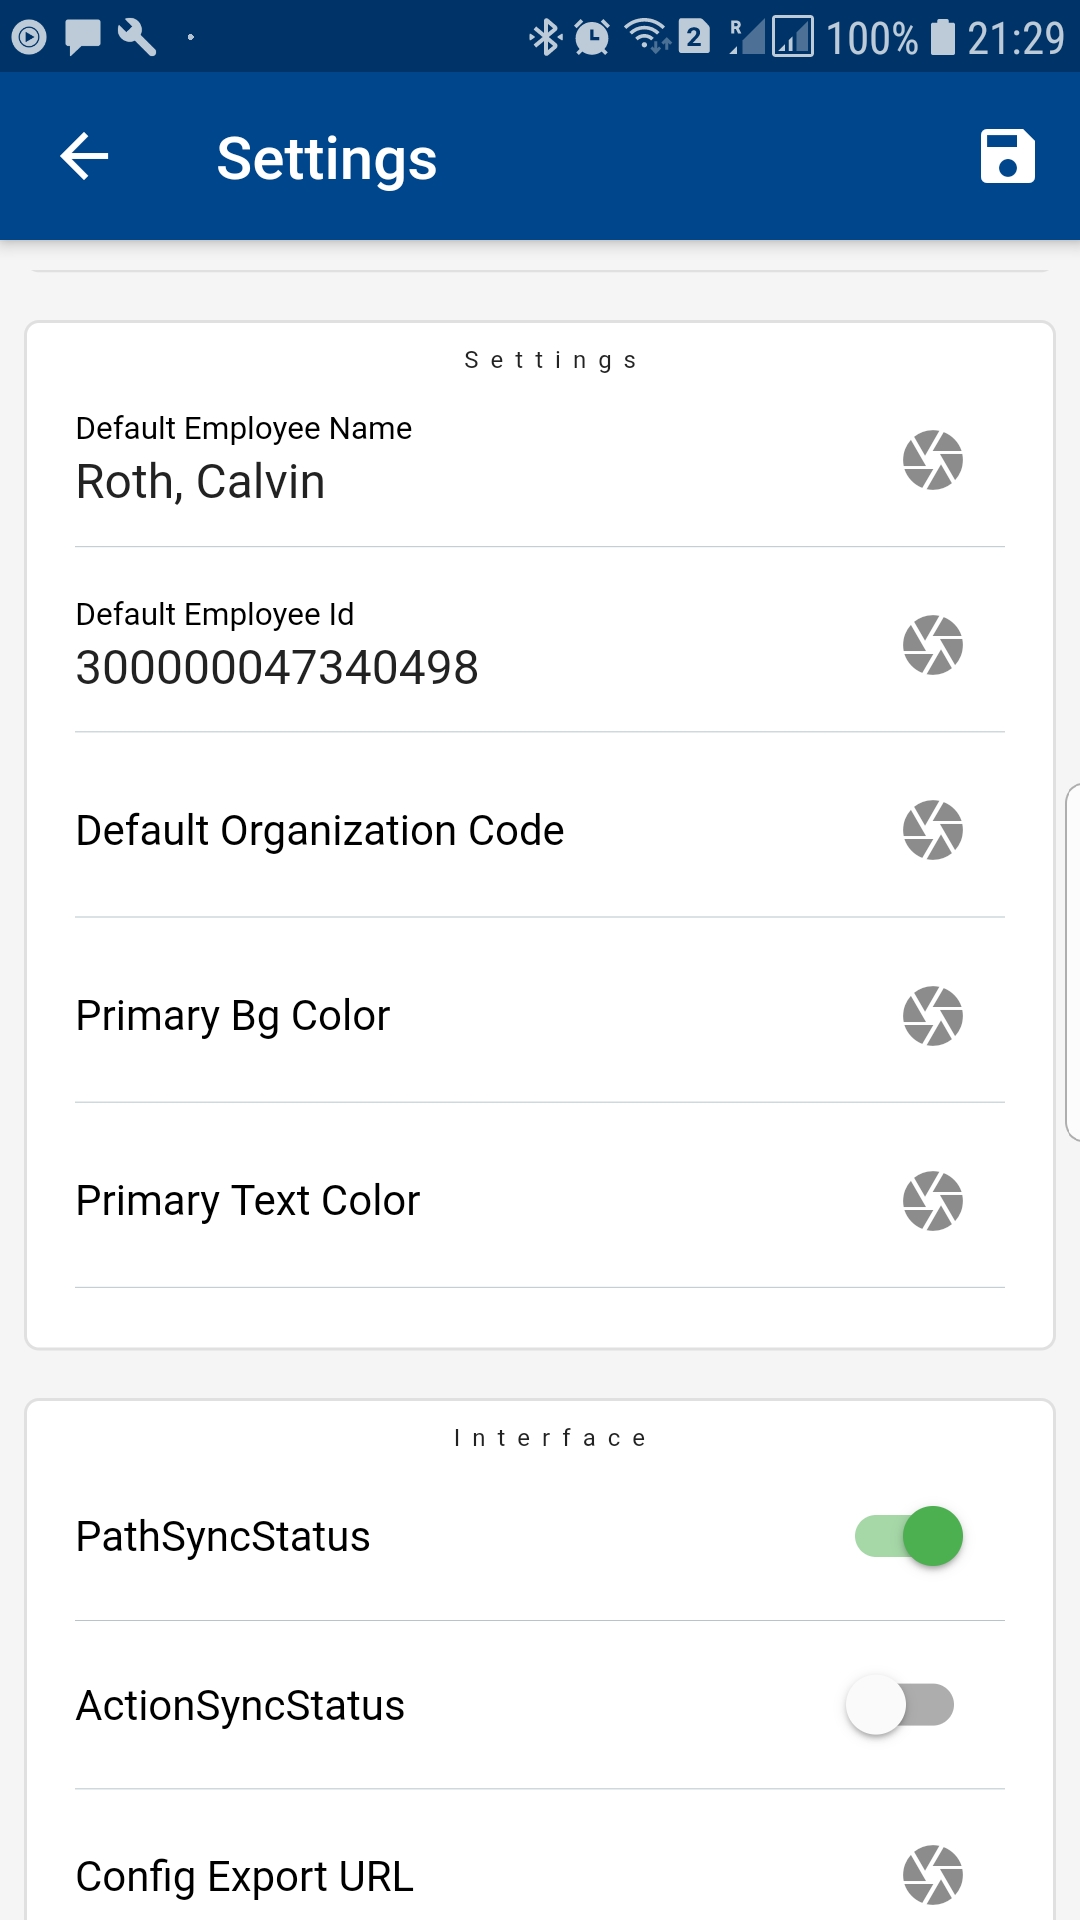
Default Employee Name
Default Employee Id
While doing certain transactions in Oracle (ex Cycle Count Entry, Receipt, etc.), we have to enter an employee name/id. The employee name/id can be different from the user doing the transaction. Enter the employee name/id that you want the app to default while doing such a transaction. You can override the value before completing such transactions.
Default Organization Code
If you have access to multiple organization codes, then enter the organization code that you want the system to default while doing transactions.
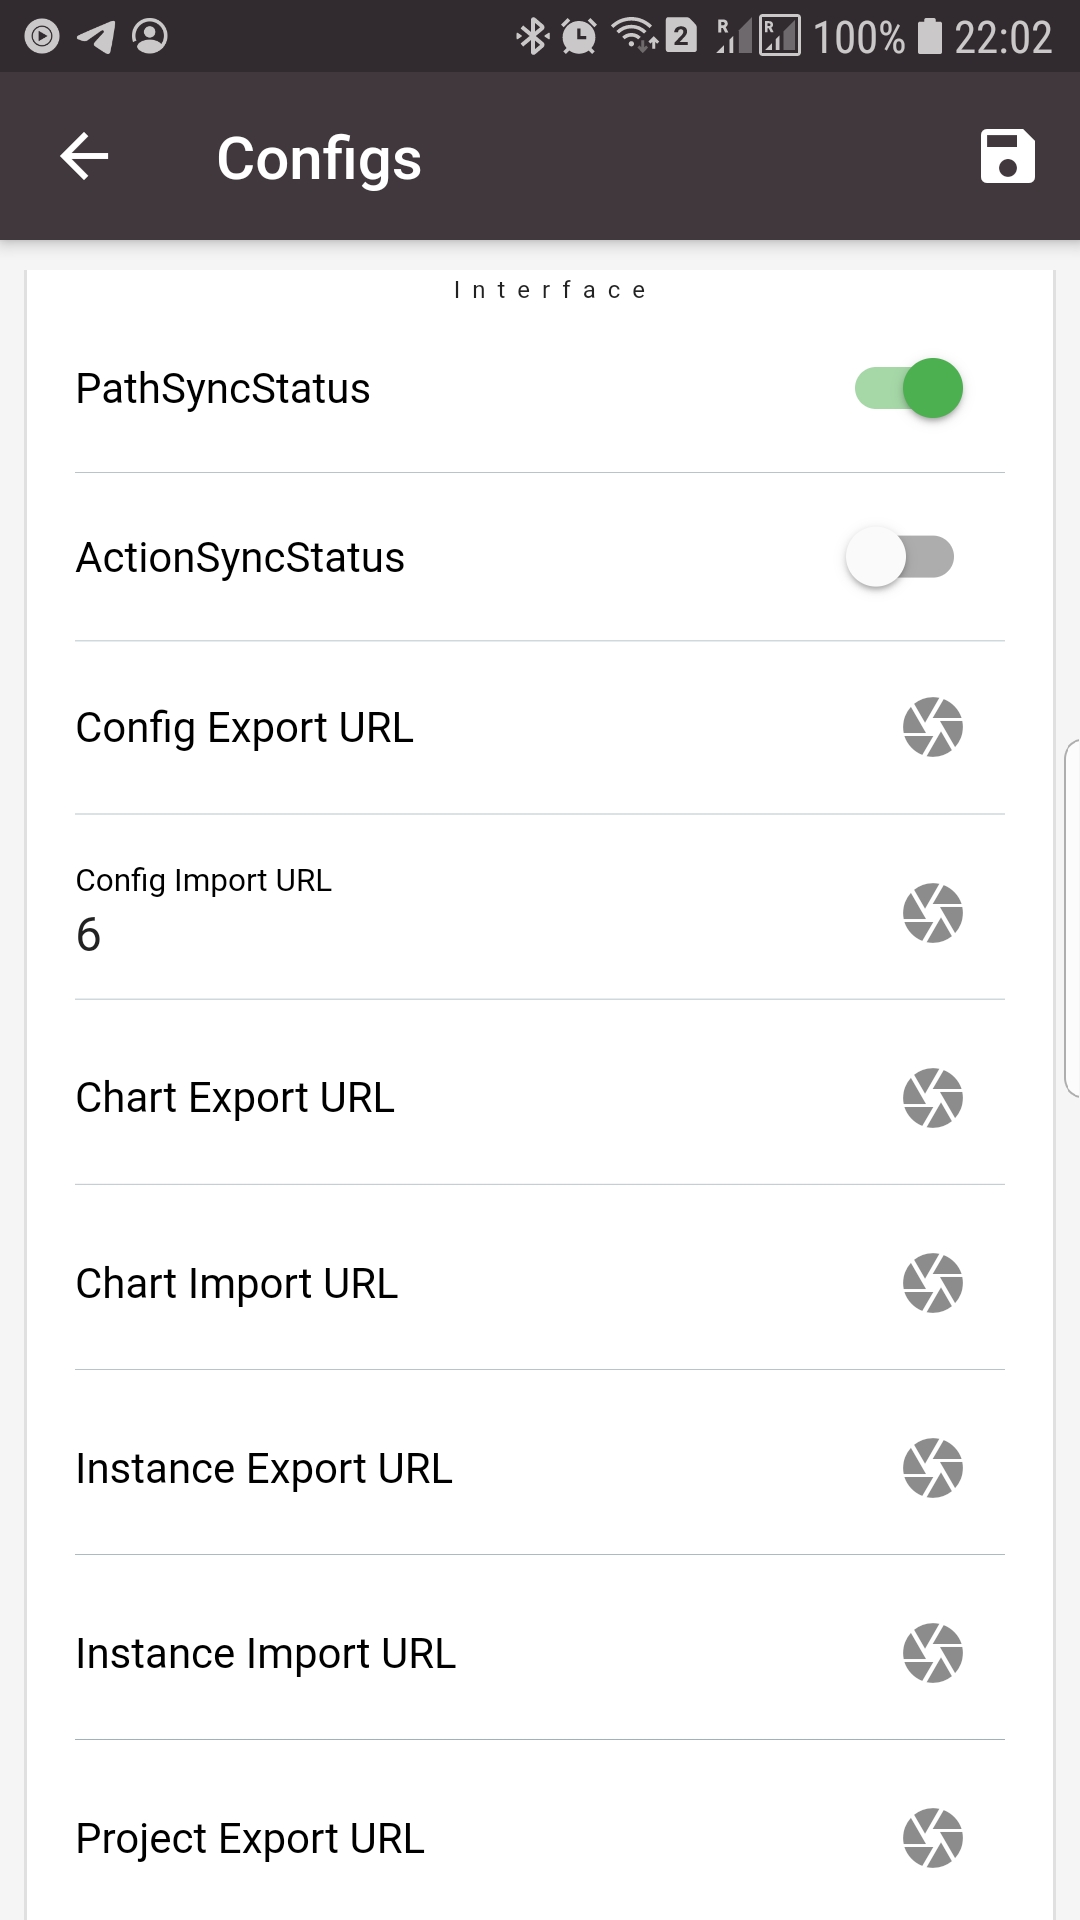
Path Sync Status
The check box tracks and shows if navigation menus have been created and defined for an application. Don't change the value if you have not been instructed to do the same by your admin.
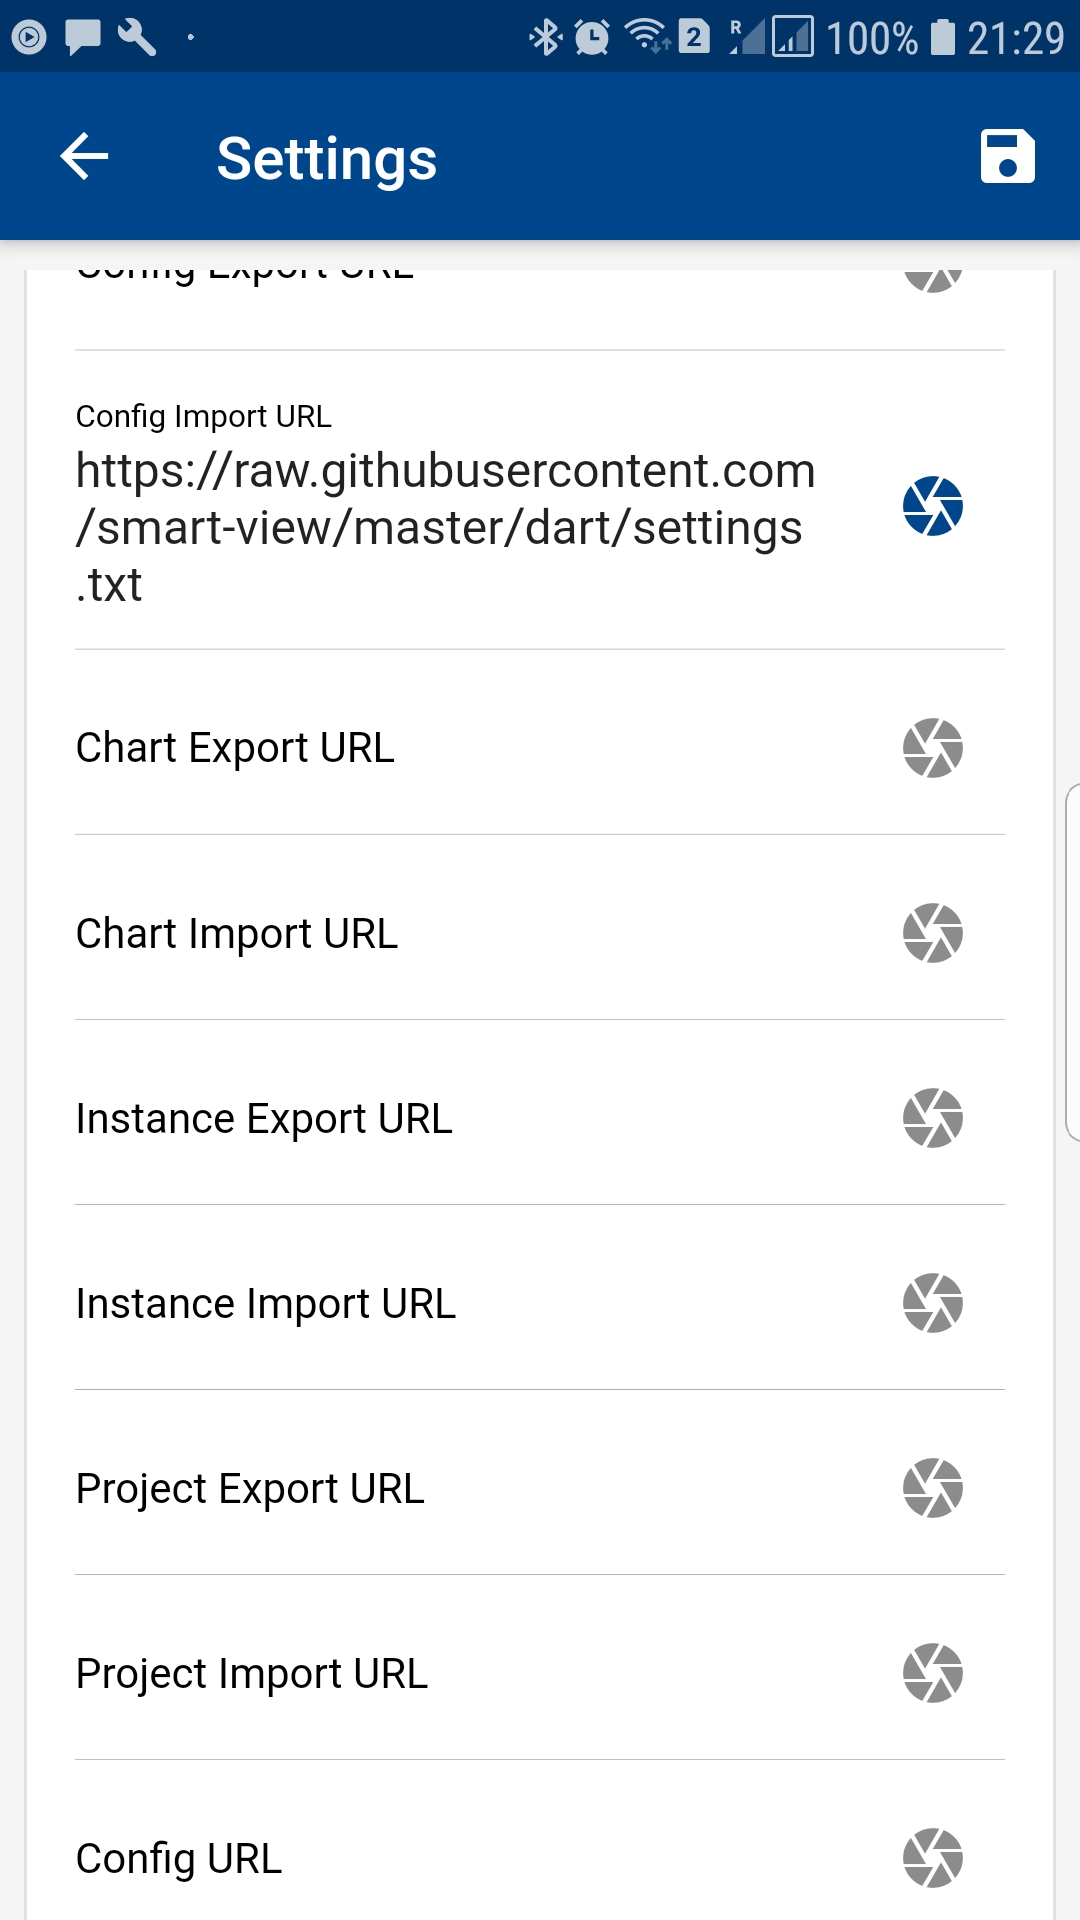
Config Import URL
Enter the configuration file's full path if you want to import the configuration file created for your organization. If you are responsible for configuring the app in your organization, you can use the export button to export the configuration to your mobile device and copy it to a shared server (ex: github.com) from where other users can import the configuration.
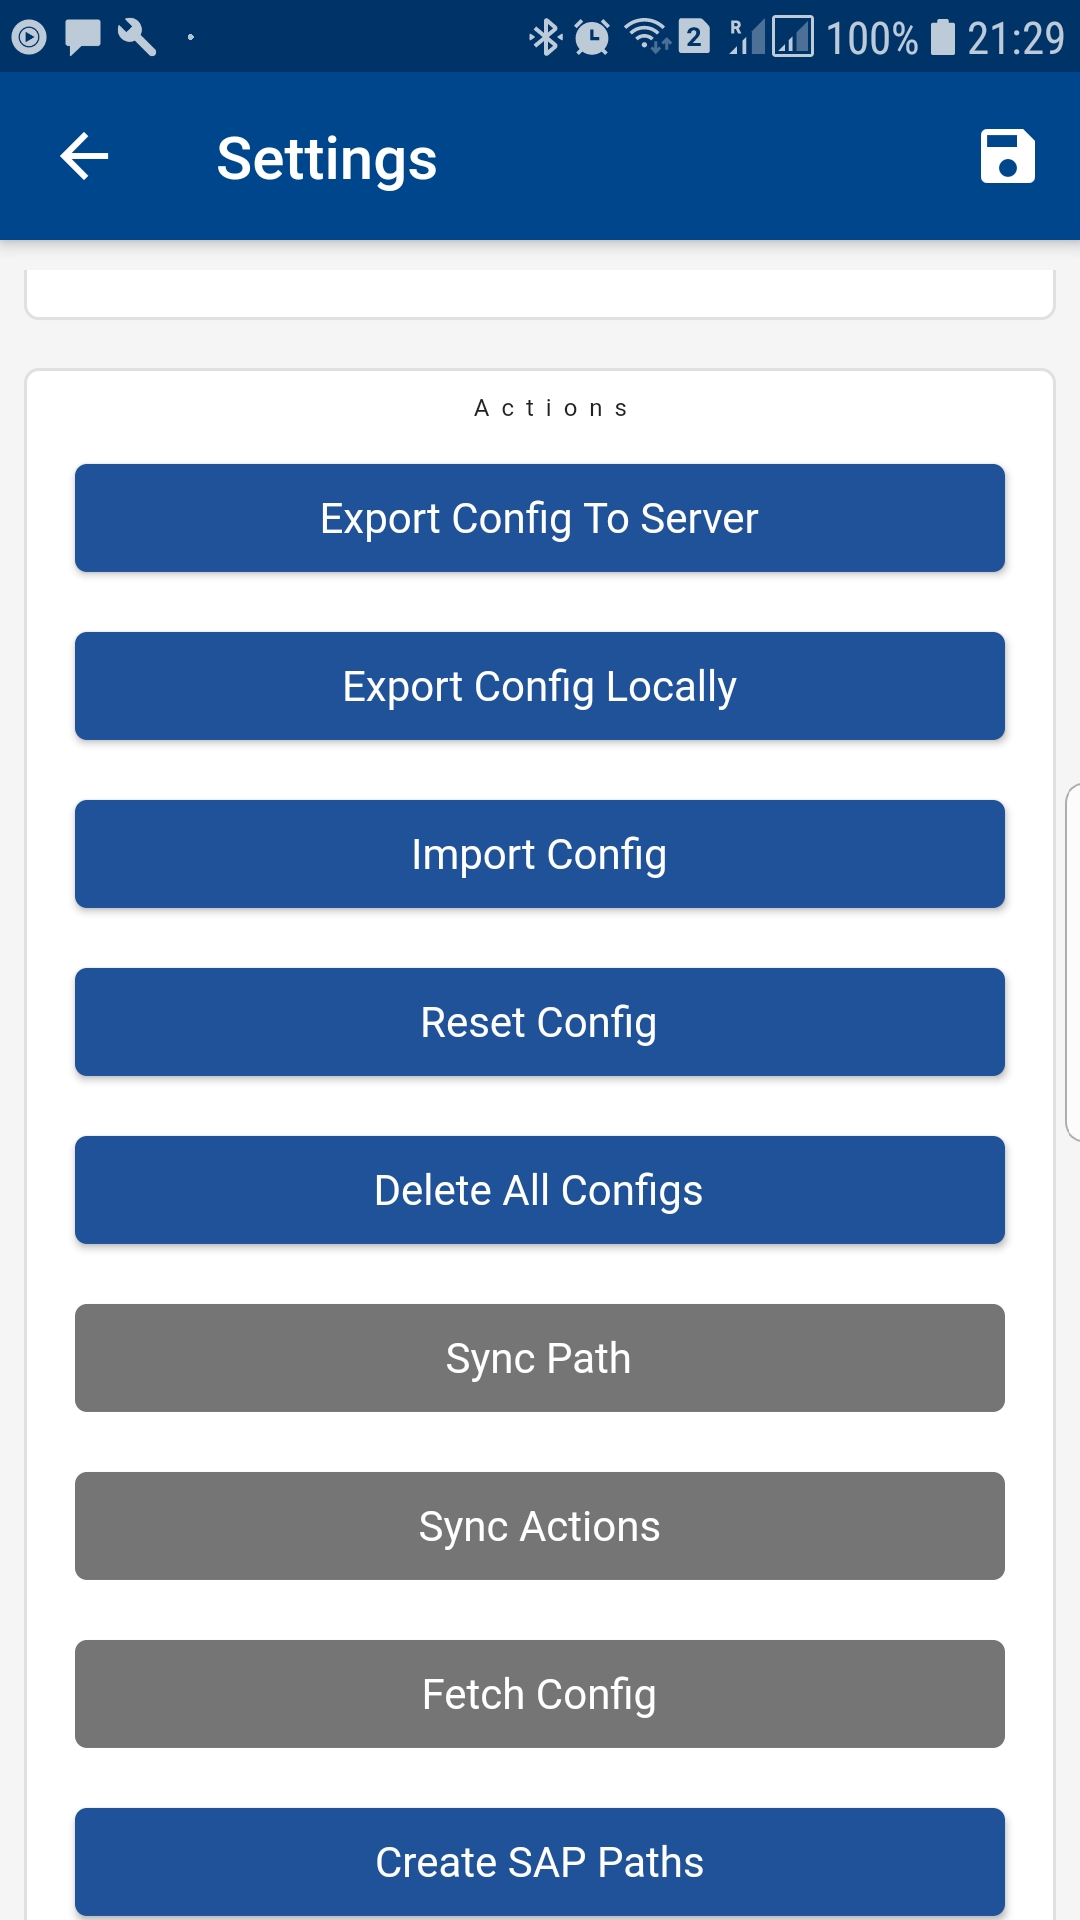
Export Config To Server
Use this button to export all the configuration directly to a server from where other users can import it.
Export Config To Server
Use this button to export all the configurations to your mobile device.
Import Config
Use this button to import configuration from the import config path to the mobile device.
TransactionFavourite
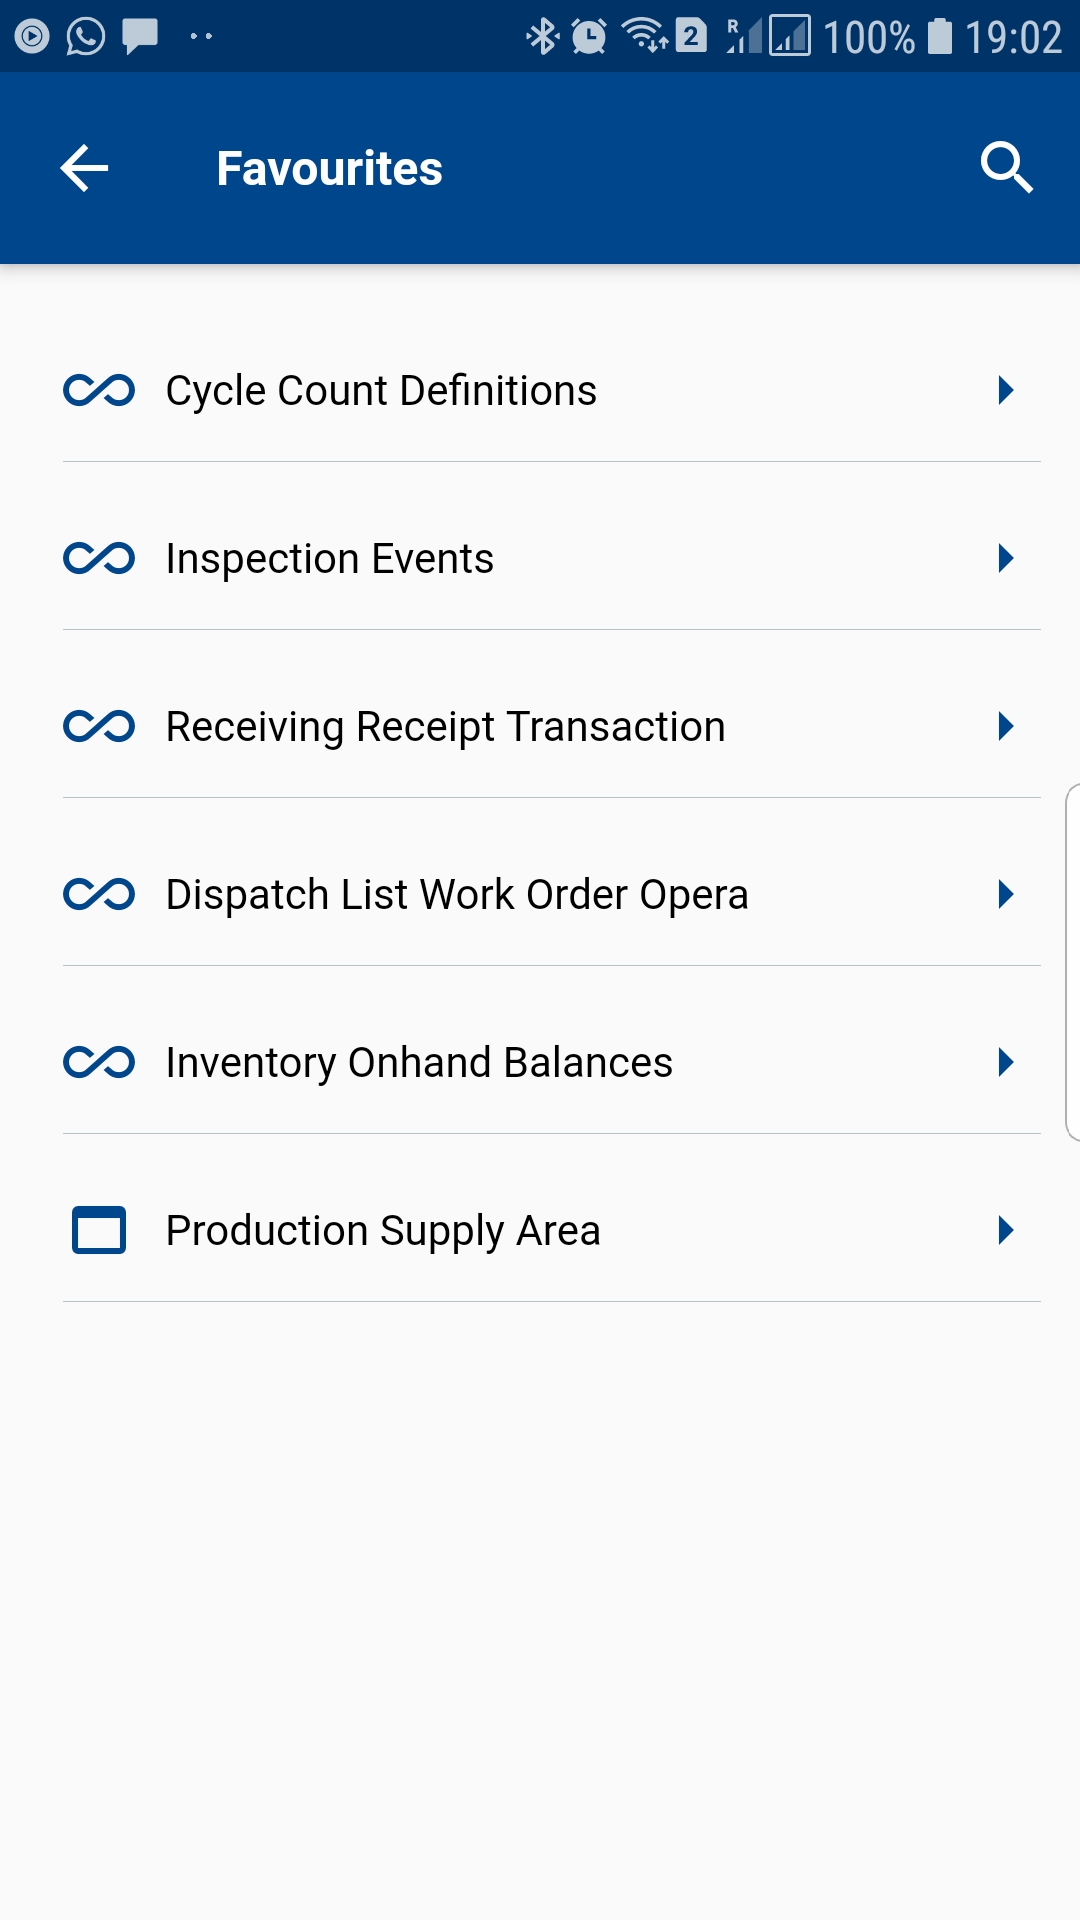
Favorite allows you to navigate to a specific form quickly. You can add any navigation menu to your favorite from the search form.
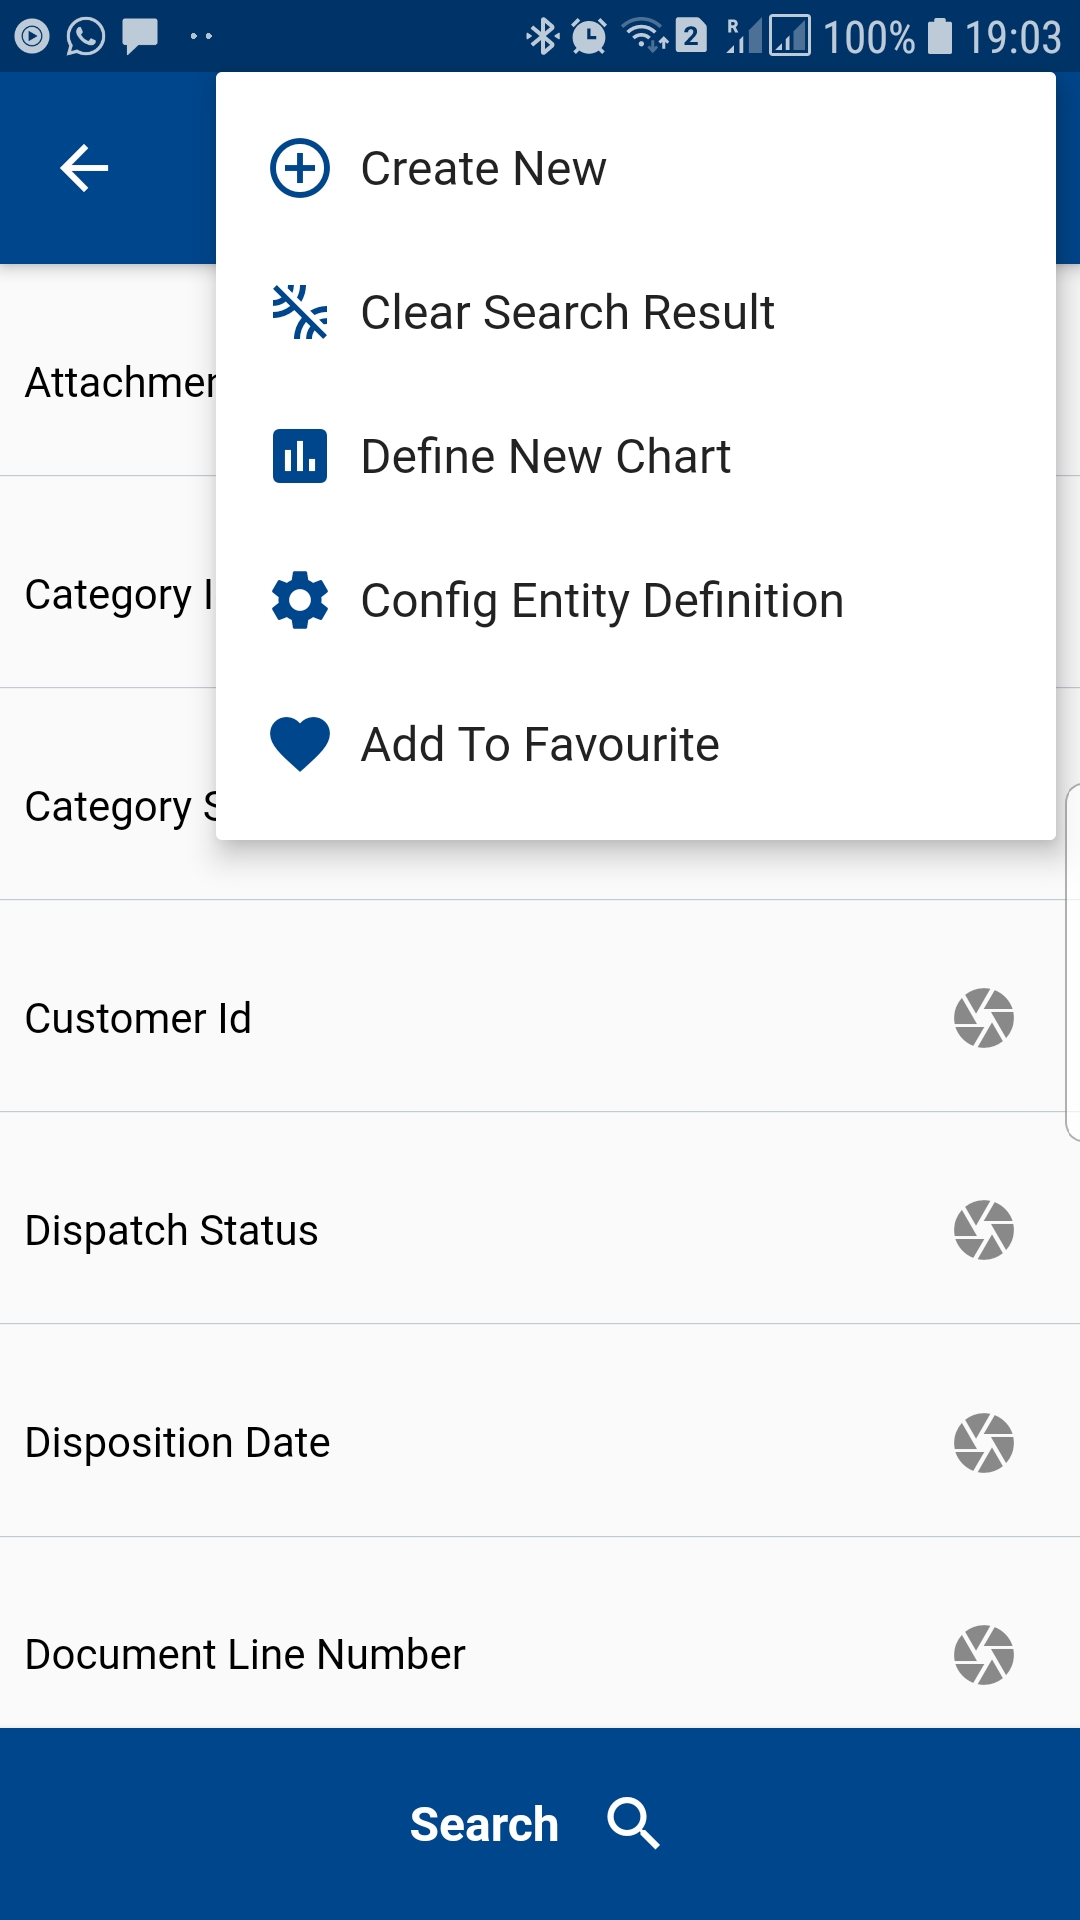
Favorite buttons are shown on all dashboard, and you can also access it from the user menu.
You can also search, update, and delete existing favorites. Click on the favorite link on the configuration screen to navigate to the favorite search screen.
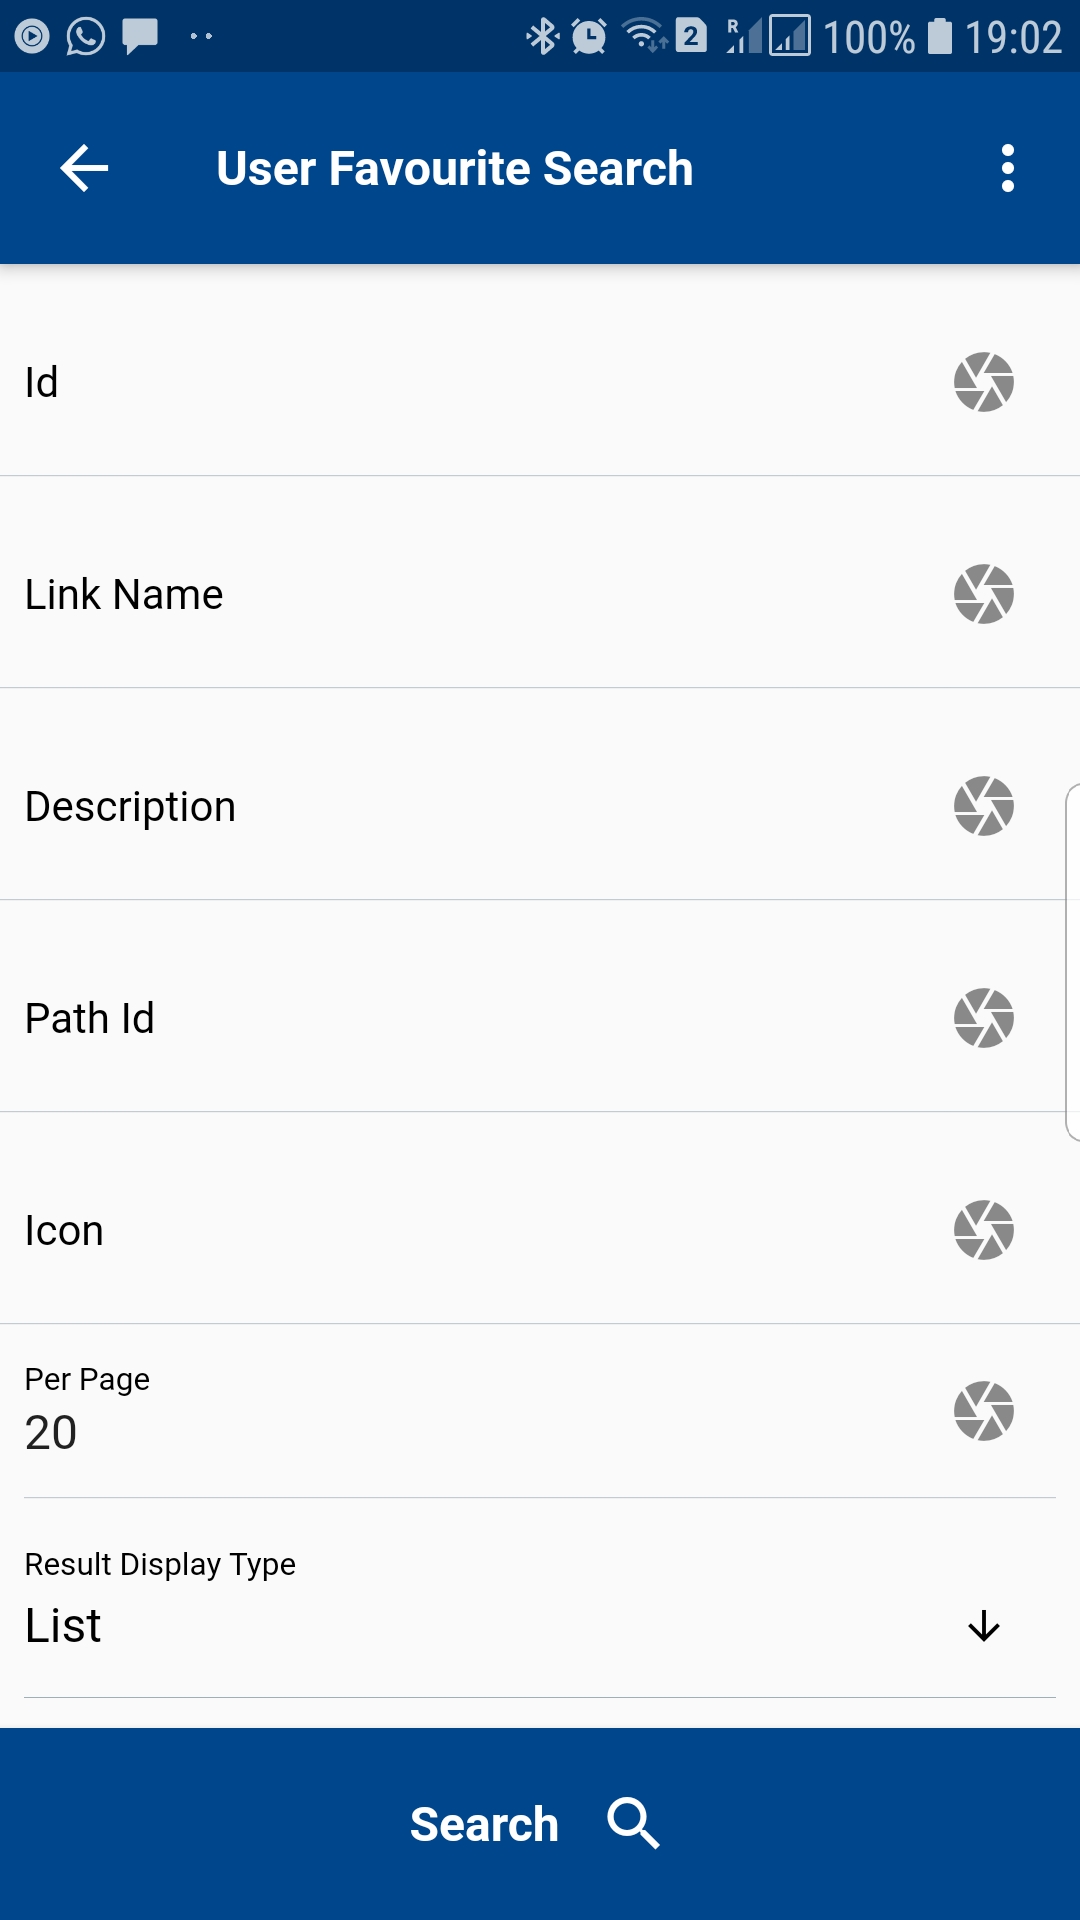
Enter any search criteria and click on the search button. The app will take you to the search result screen.
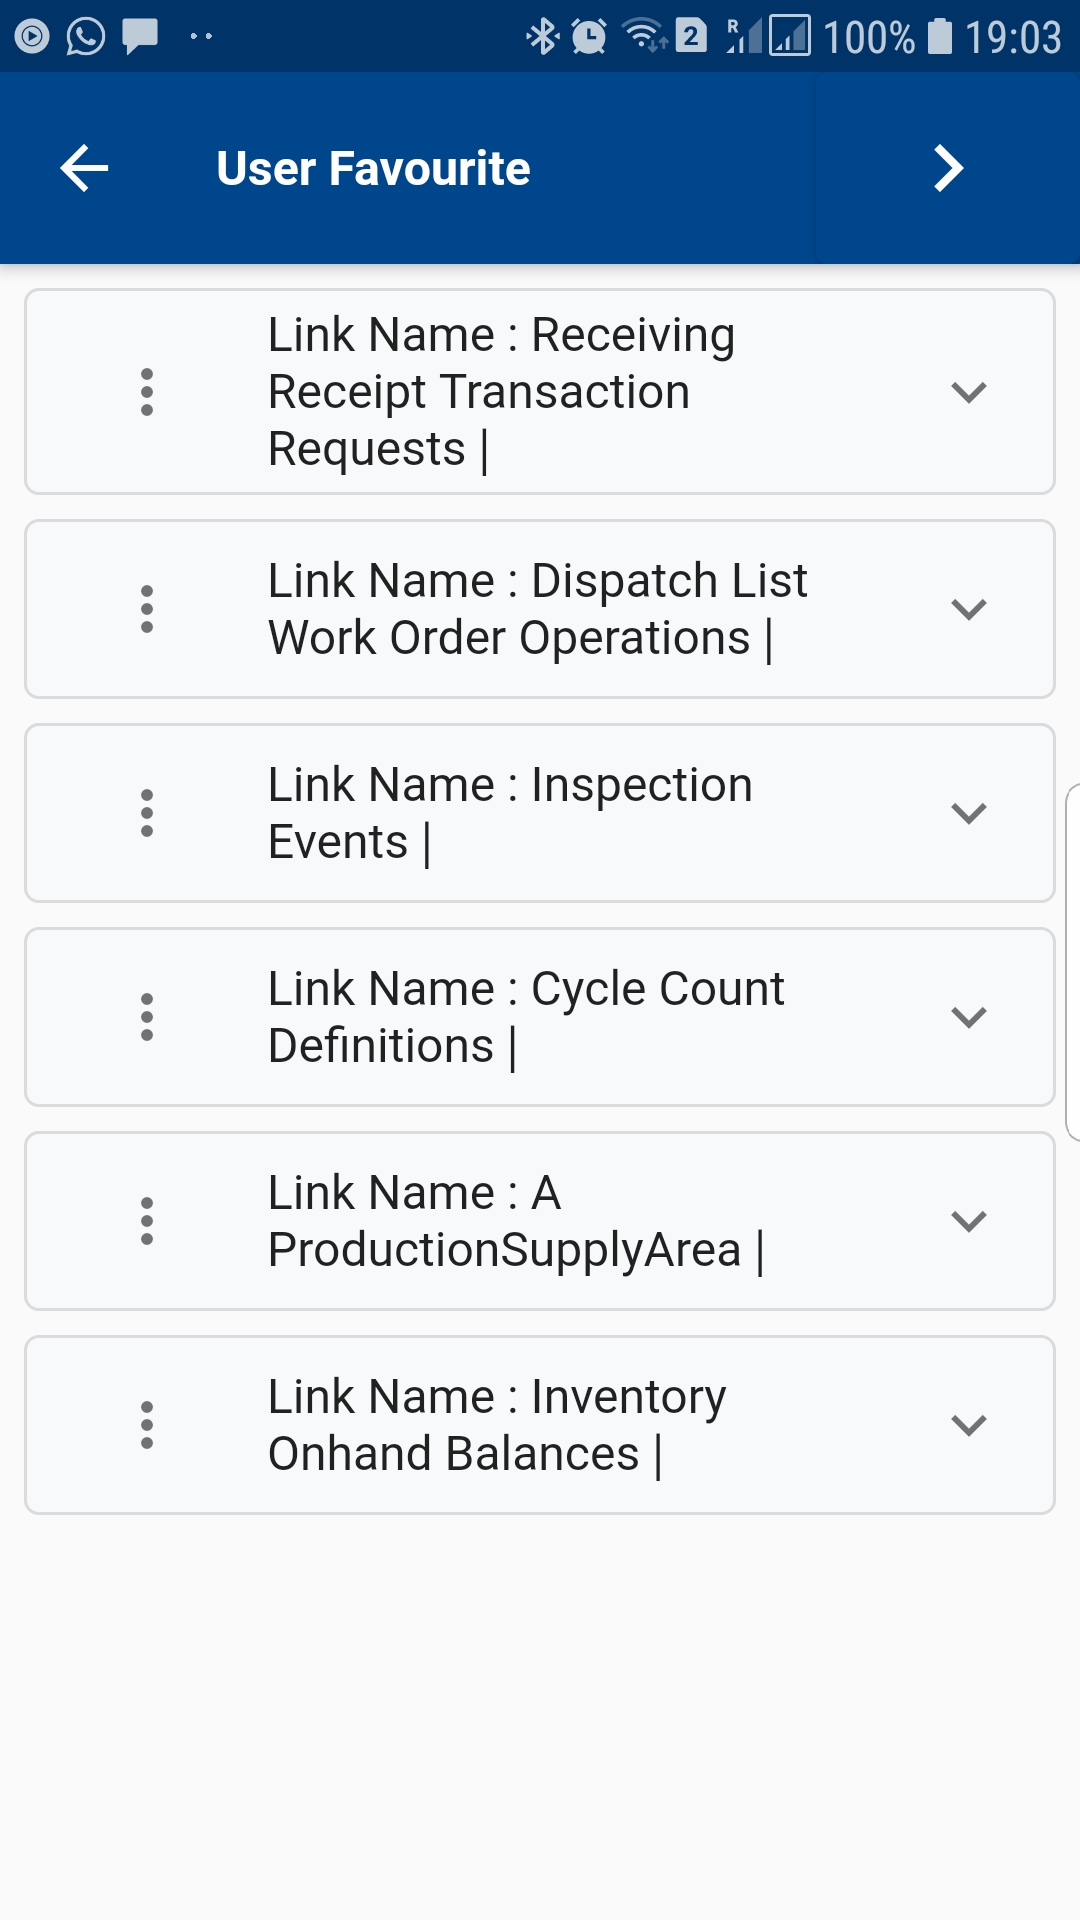
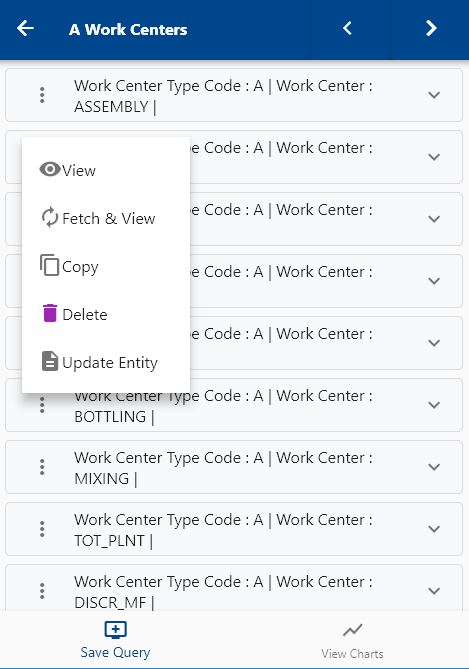
Click on the menu of any row to view or delete the specific menu.
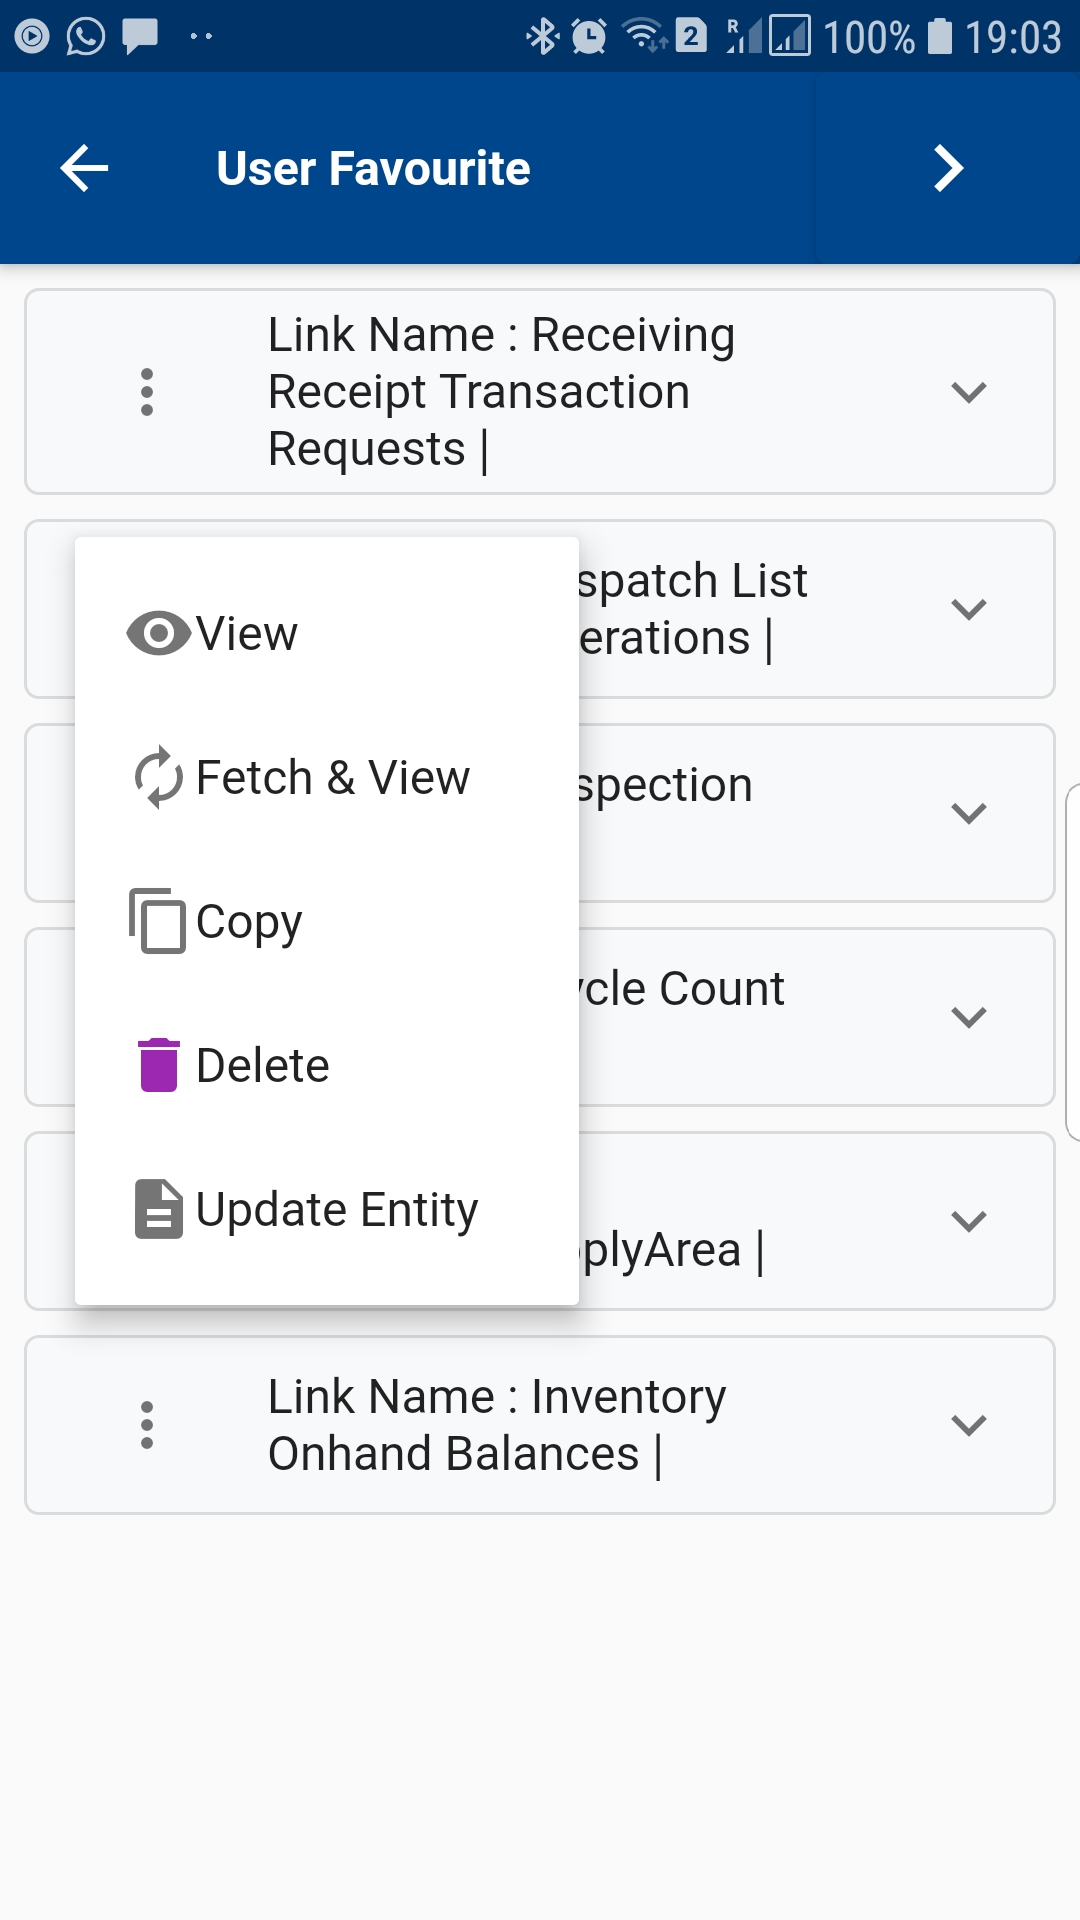
Click on the delete button to delete the favorite. Click on the view button to view the details and make modifications, such as description or icon.
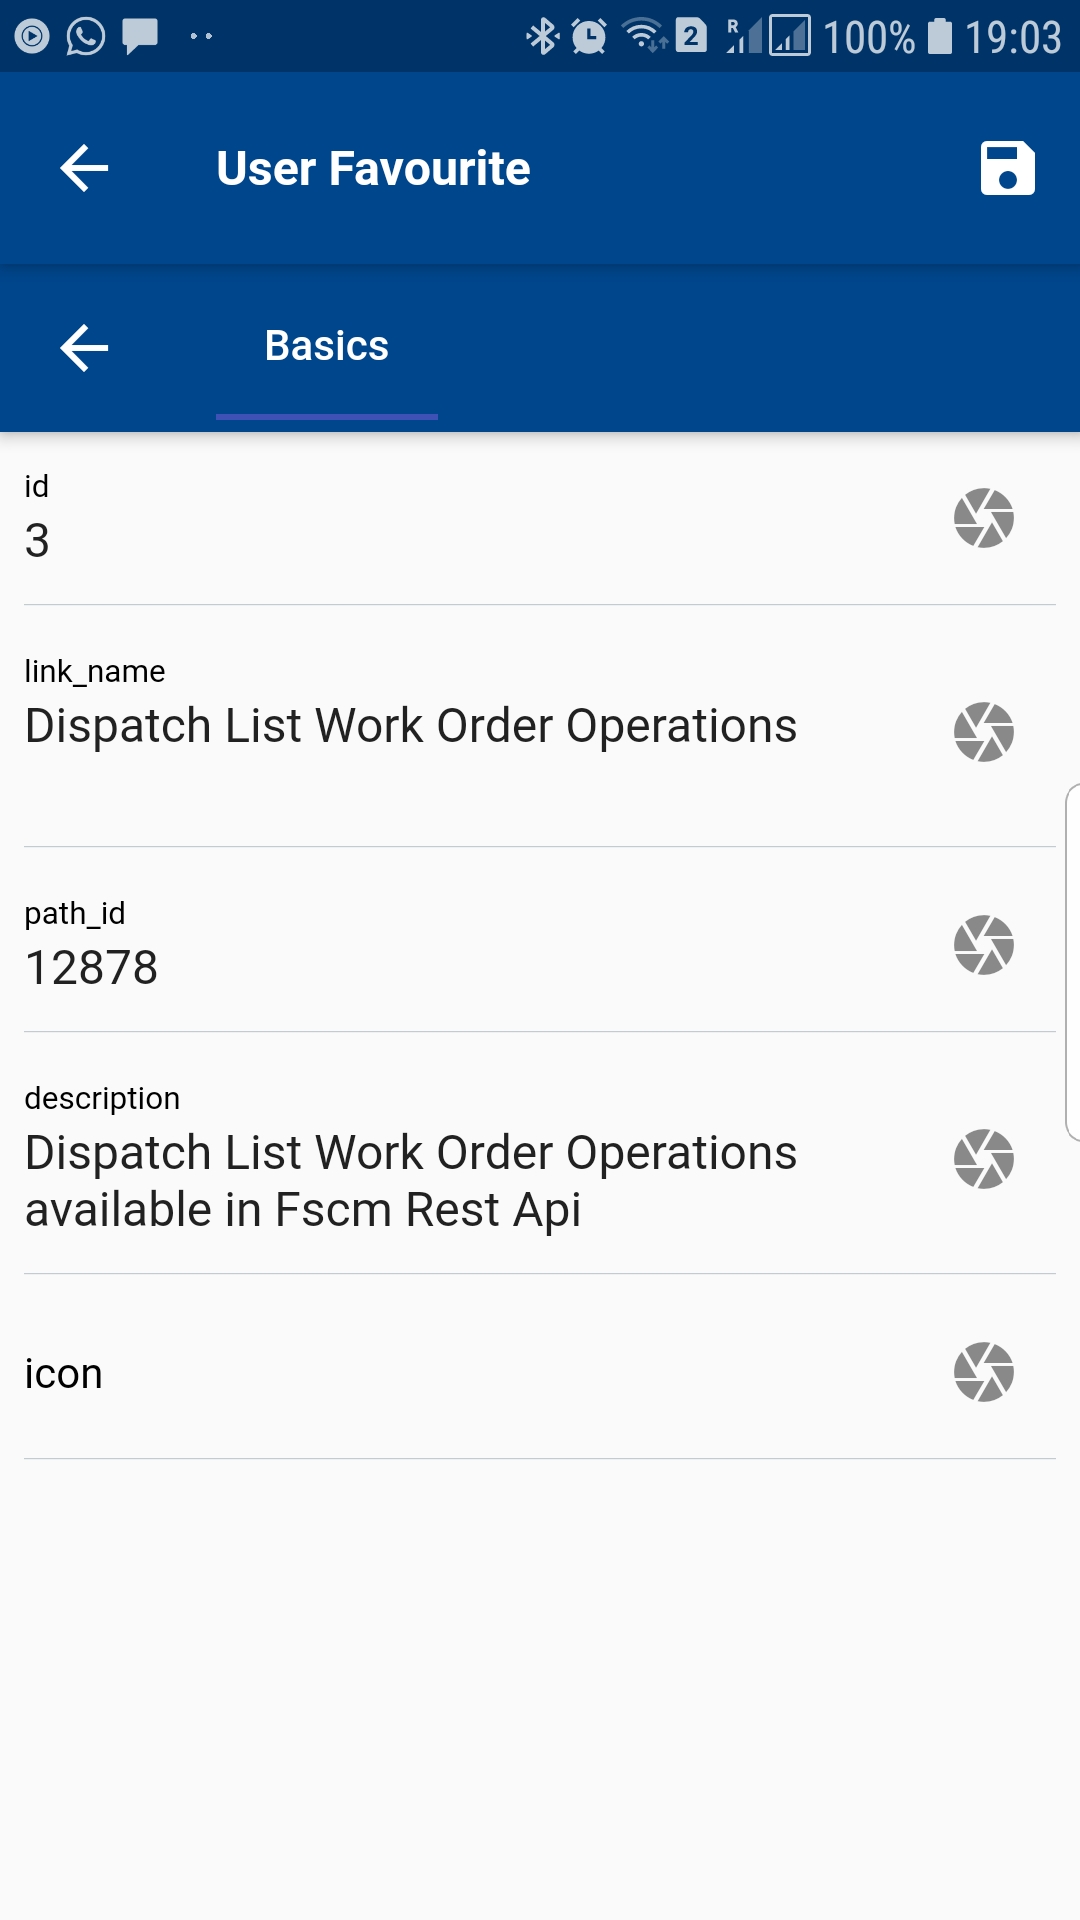
Change any field value as required and click on the Save button.
Getting StartedIssue LogMenu Path
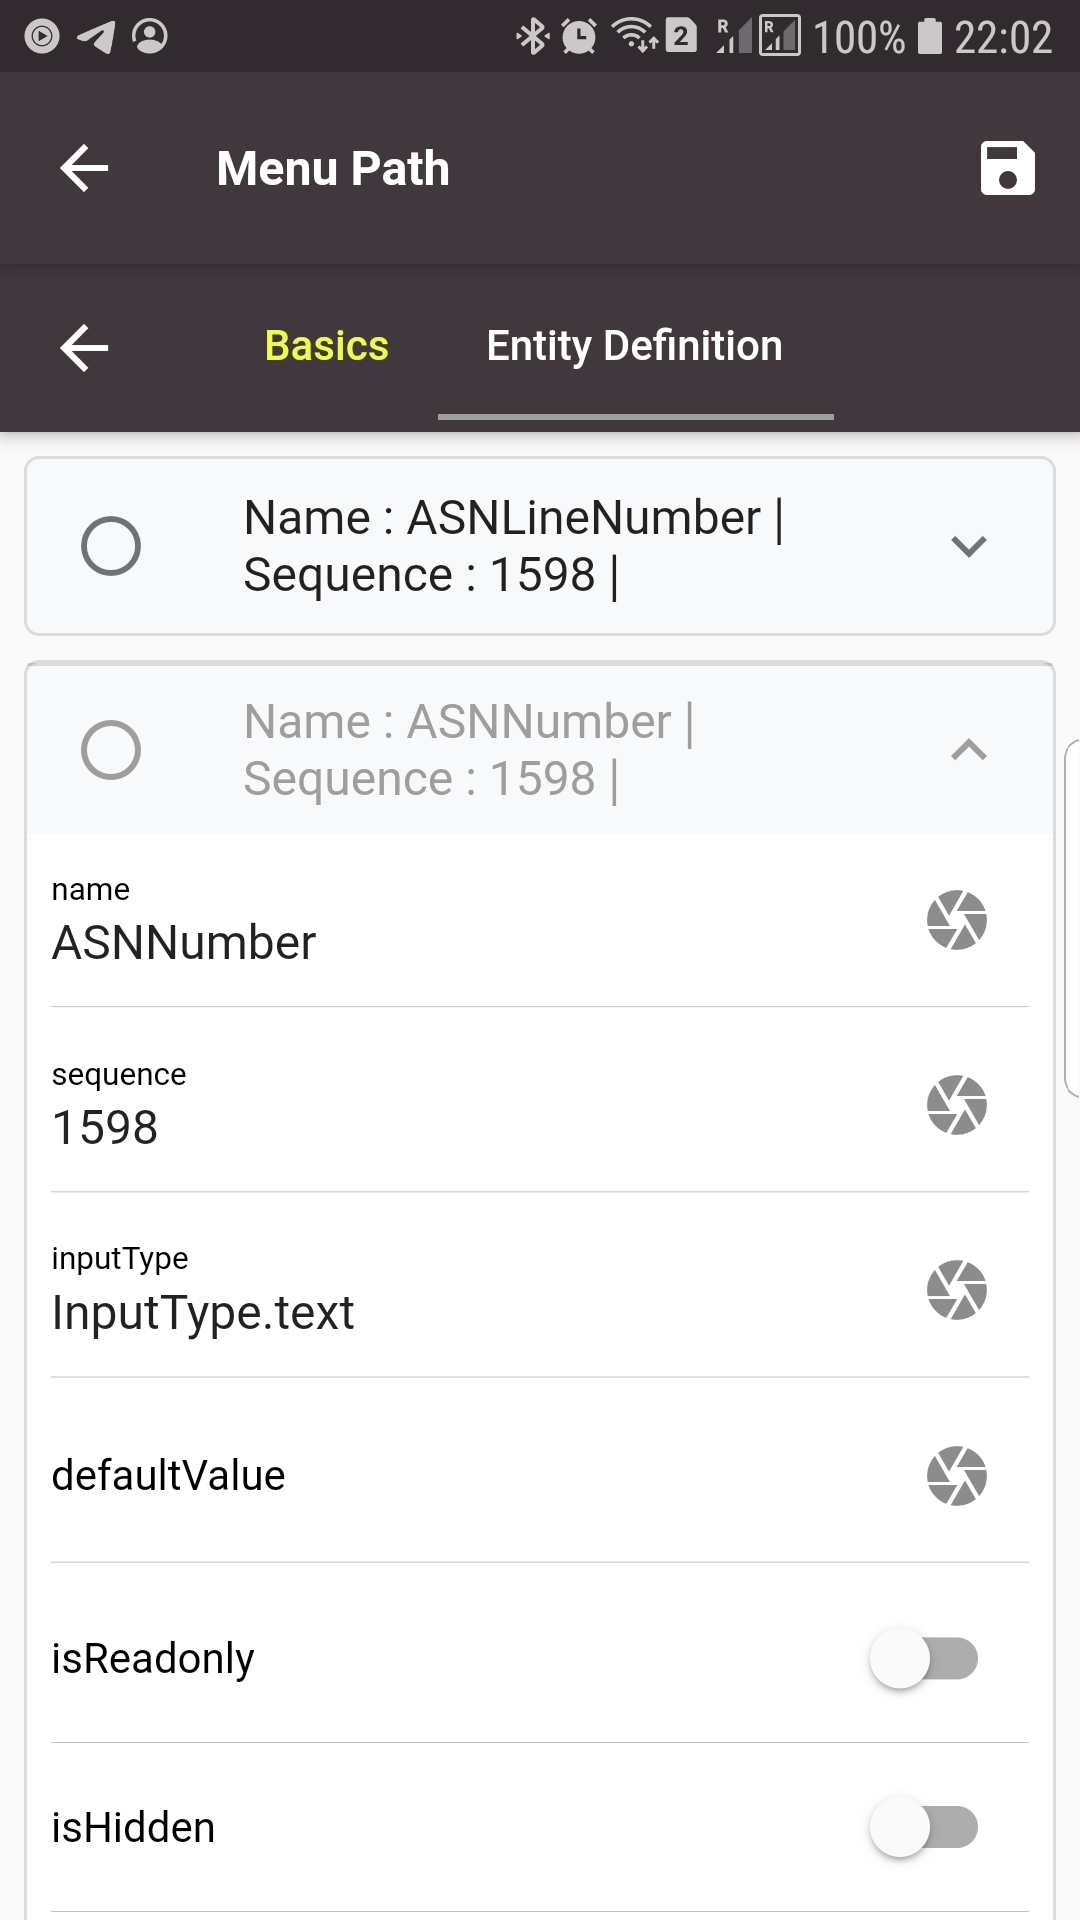
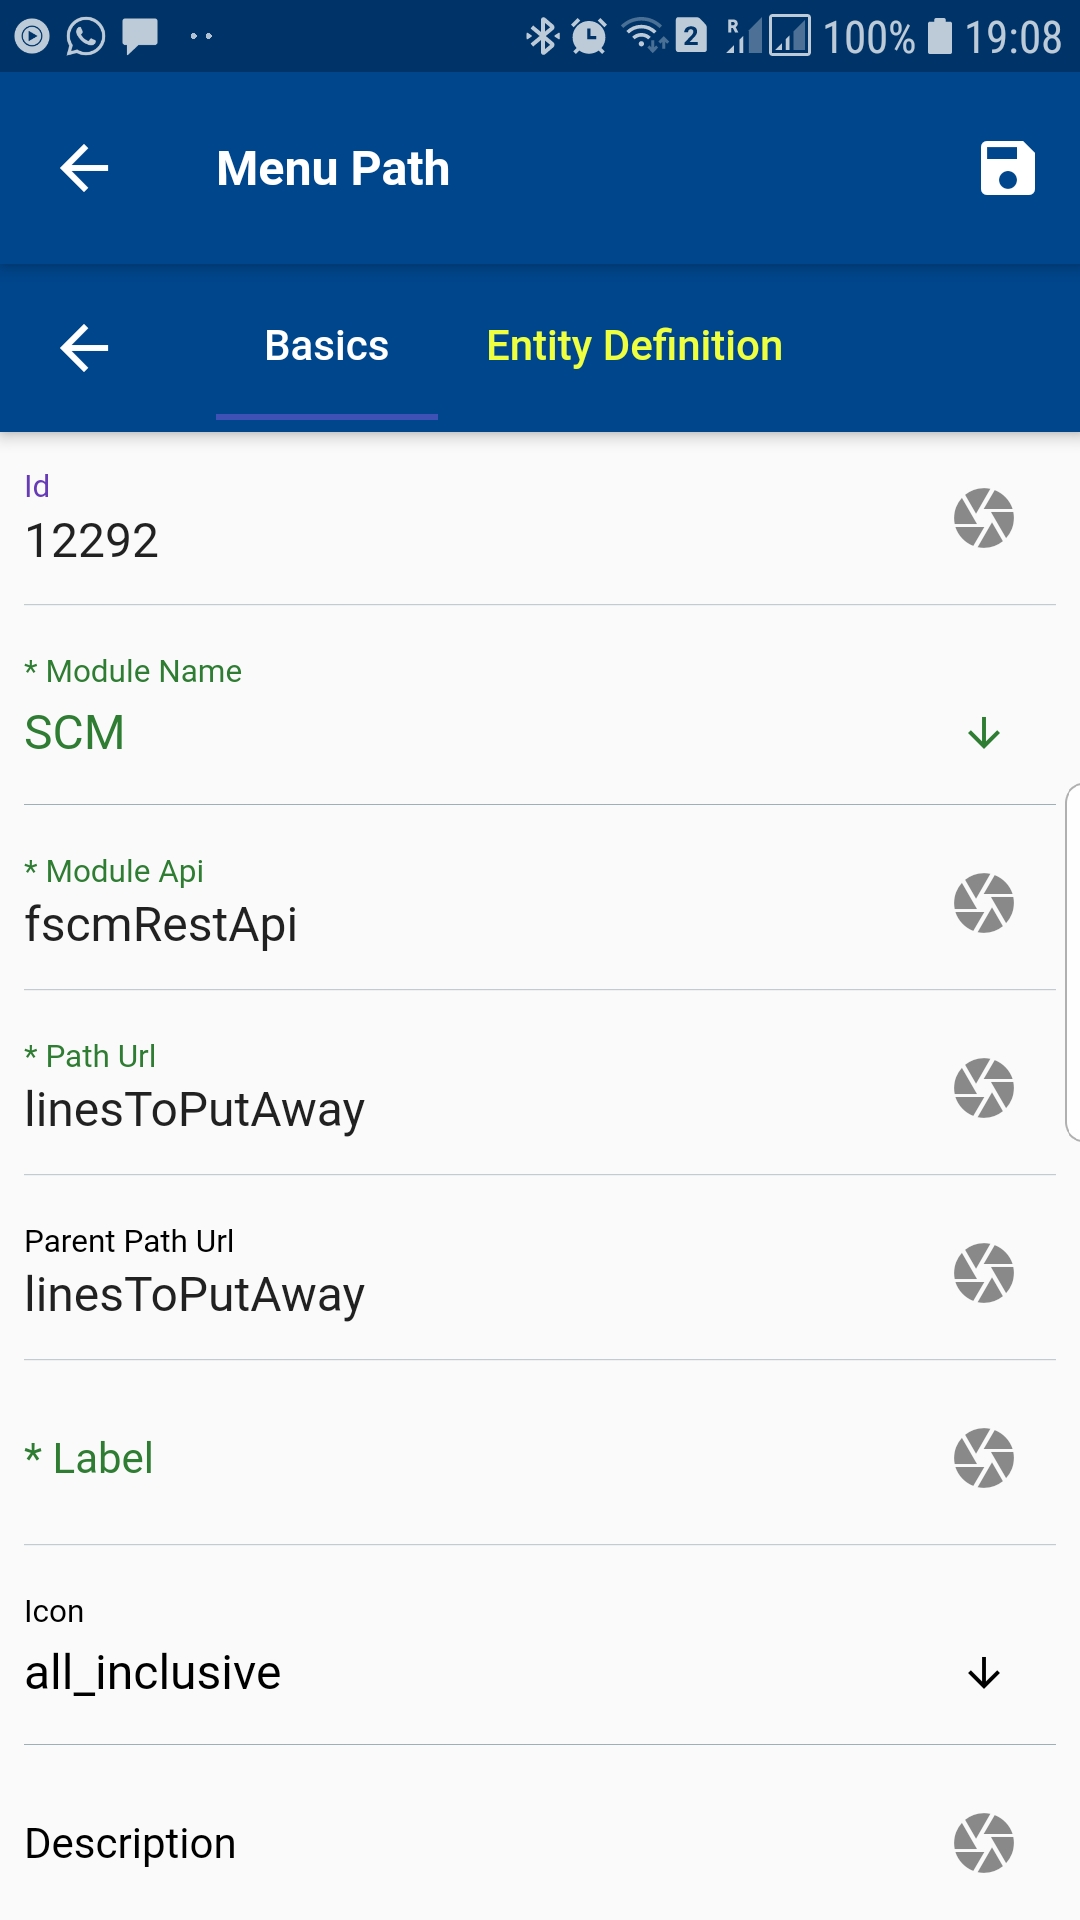
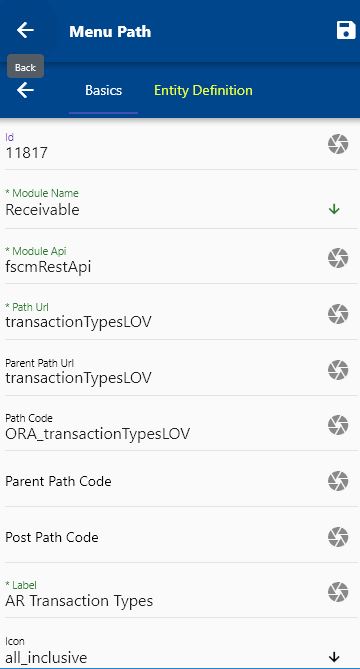
The menu path is one of the core components of the OneApp. It provides the REST path on which all the actions (Create, View, Update, Delete) takes place. It controls the look and behavior of all forms and their fields. It also controls what actions can be done one a form and what buttons are shown on the form. Ex: availableQuantityDetails in Oracle and ProcOrdConf2 in SAP. It's not the full path of the REST API.
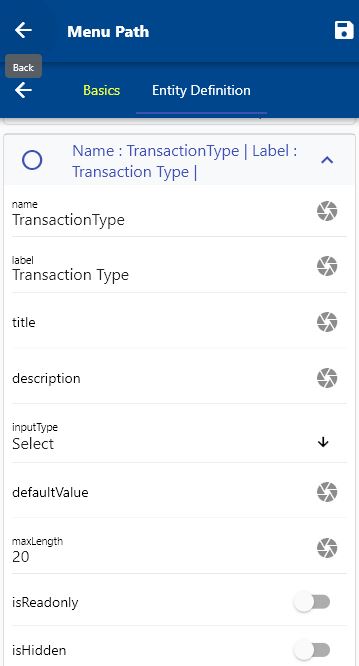
Each menu path contains several fields, such as the Subinventory menu path contains Organization Code, Organization Id, Description, etc. You can configure each of the fields as per your business requirements.
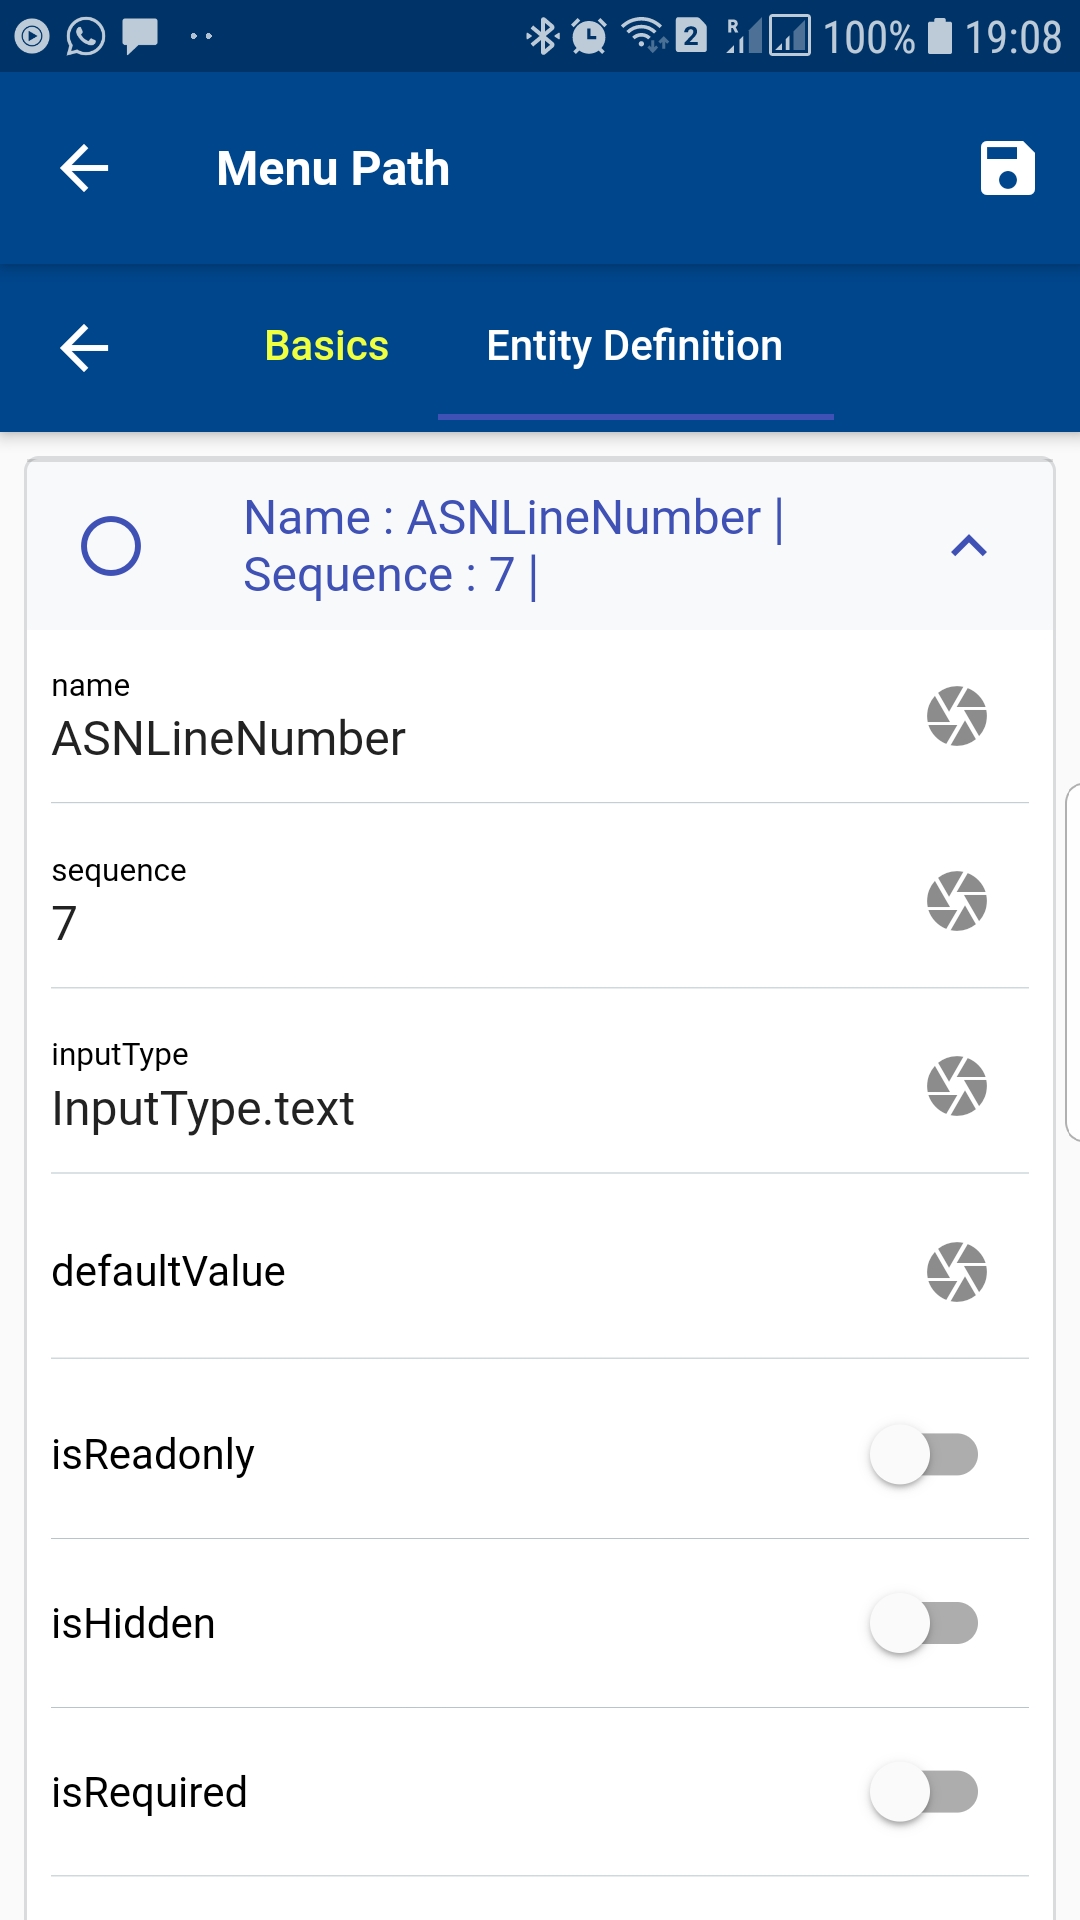
Name
Name of the field. Don't change the value if you are copying from an existing menu path.
Sequence
Forms show their fields in an ascending sequence number. So, a field with sequence number 10 will be shown before a field with sequence number 20.
InputType
Enter the type of the field: Text, Number, Select, CheckBox, Switch, Date, Date & Time, etc
Default Value
The default value for that field. Useful while creating new documents/transactions
isReadonly
Enable the checkbox to make the field read-only. Users will not be able to change the value of that field.
isHidden
Enable the checkbox to hide the field.
isRequired
Enable the checkbox to make the field mandatory. The app won't allow users to save any form without entering a value on the required fields. It will show a message in red text to the users if a form is saved without entering a value in a required field.
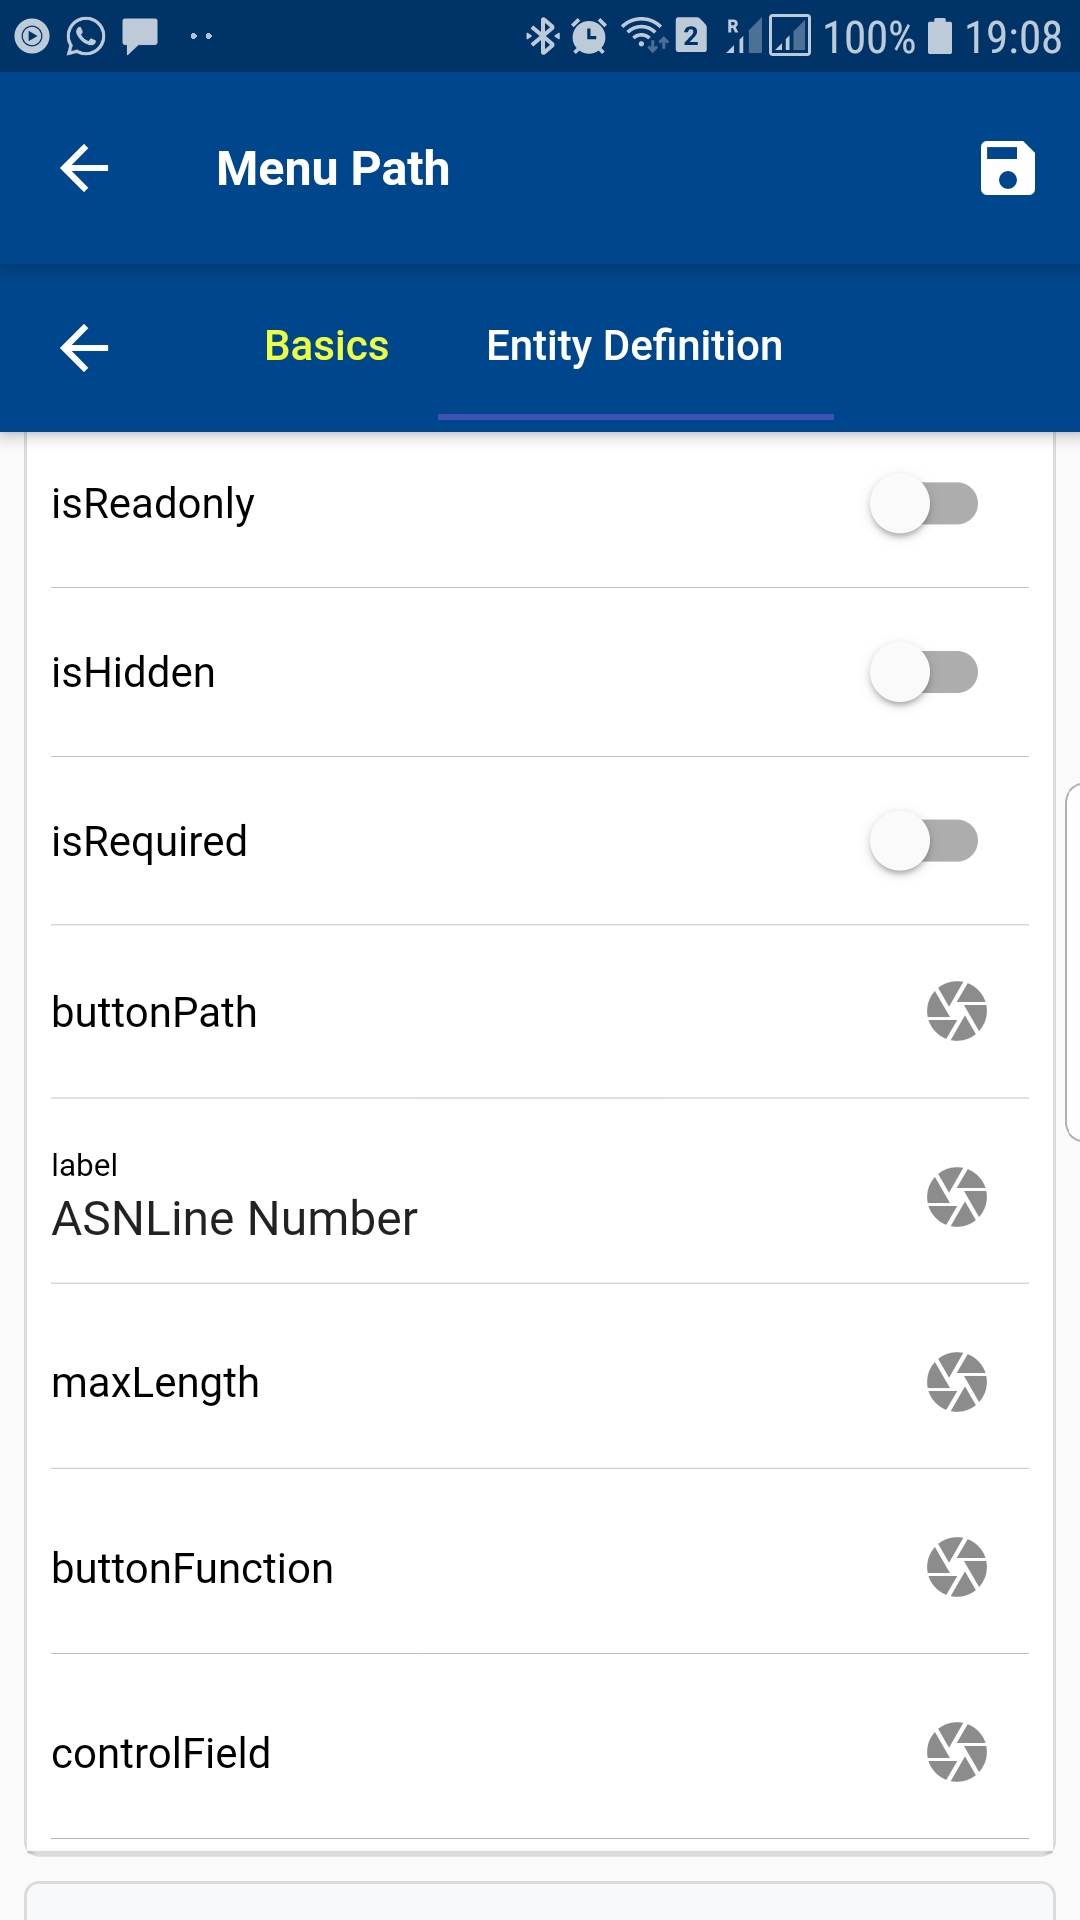
ButtonPath
Don't make any modifications to this field.
Label
Enter a label for the field. If you don't enter the label, then the app will use the name as the label.
MaxLength
Maximum allowed length of characters for the field. Not applicable for Select or CheckBoxes.
ButtonFunction
Don't make any modifications to this field.
Control Field
If a field controls other fields on a form, enter the field's name in the control field. Ex: OrganizationCode controls sub inventories on the transaction form. So, we need to enter OrganizationCode in the control field. If we enter any value on the control field, the app will do internal validation and will update the control field with the required information. Don't make any modifications to existing menu paths if you are not sure.
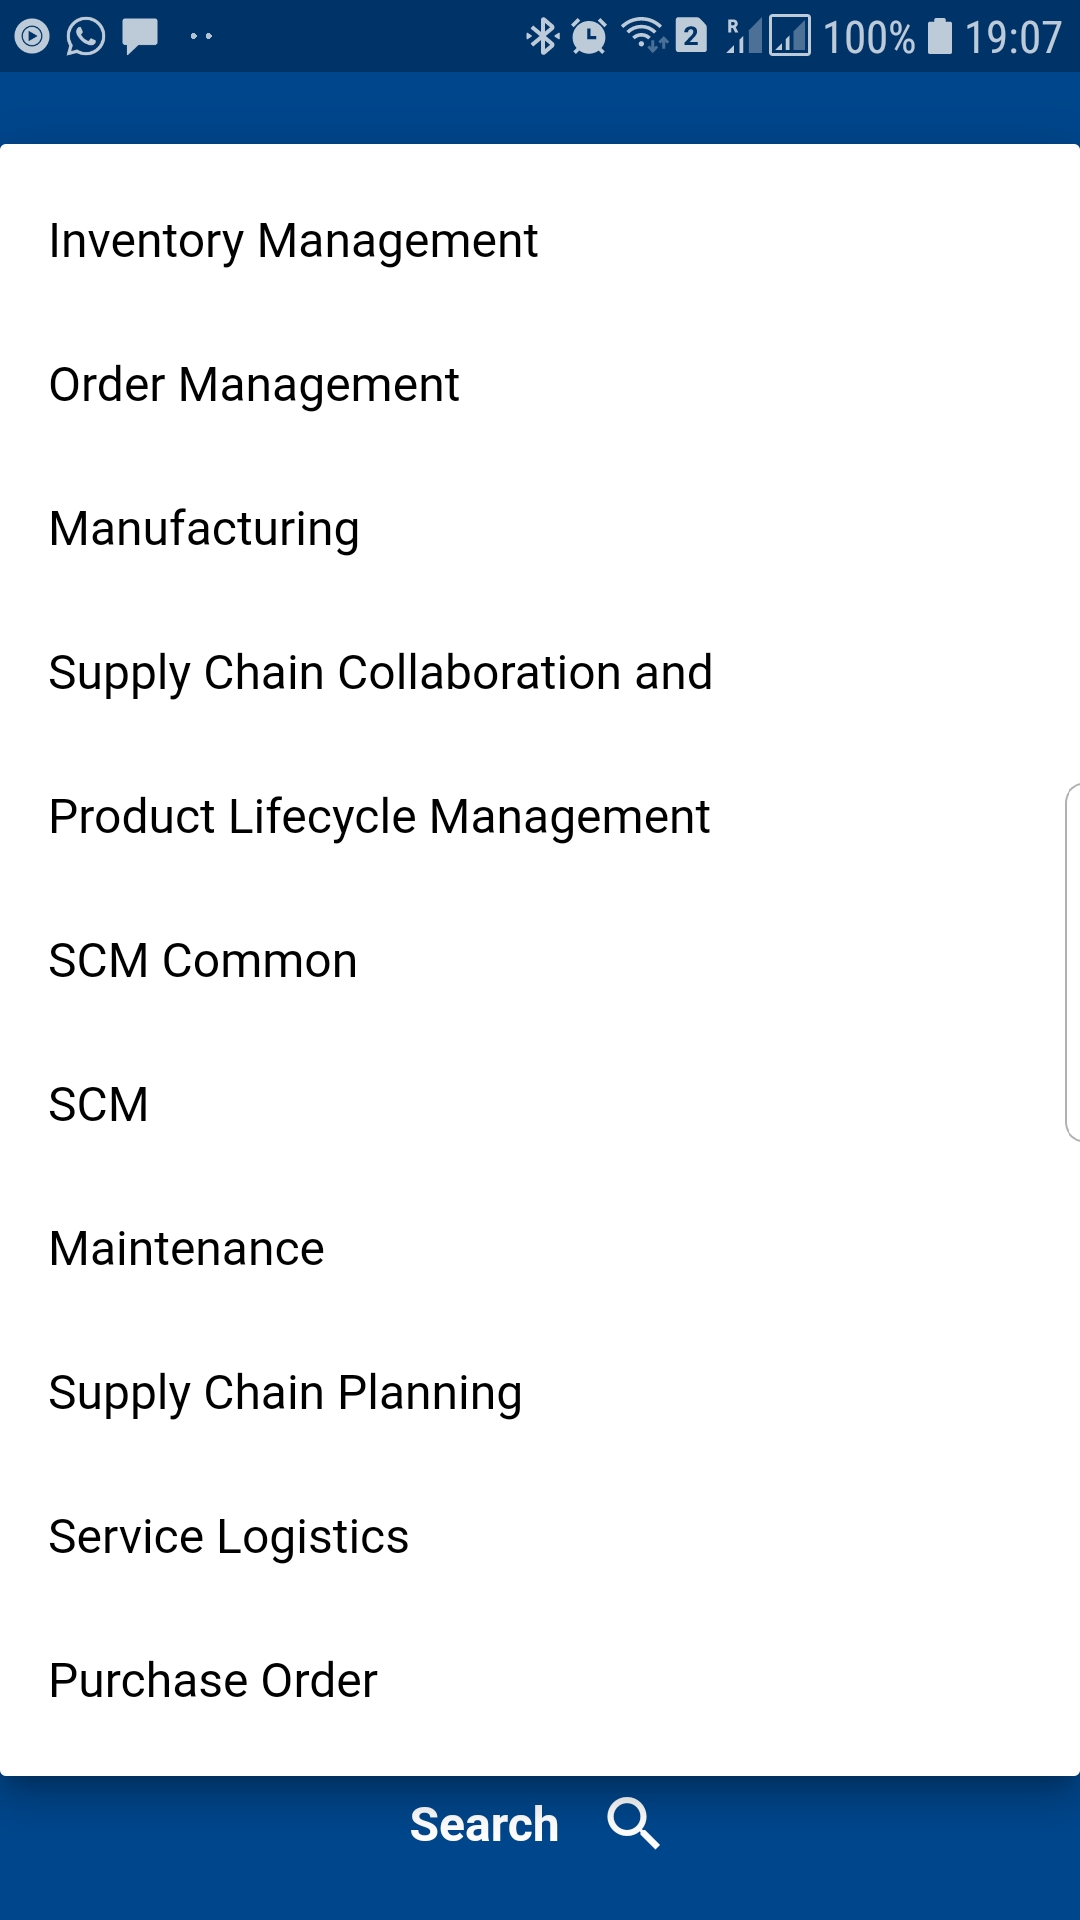
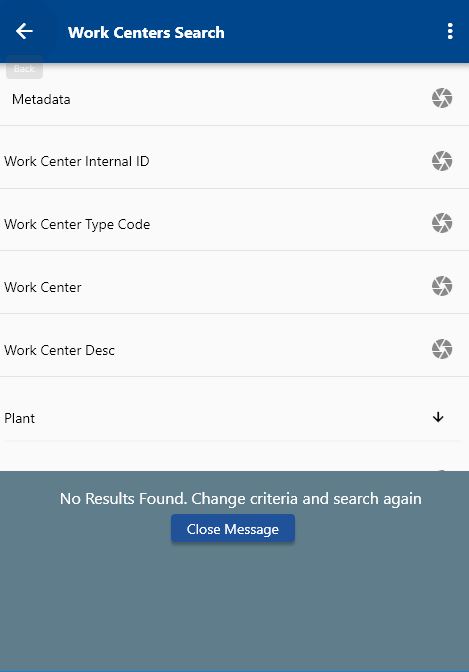
Search Menu Paths
Click on the Menu icon on the configuration page to navigate to the search menu path screen. You can also navigate to the menu paths from the user menu.
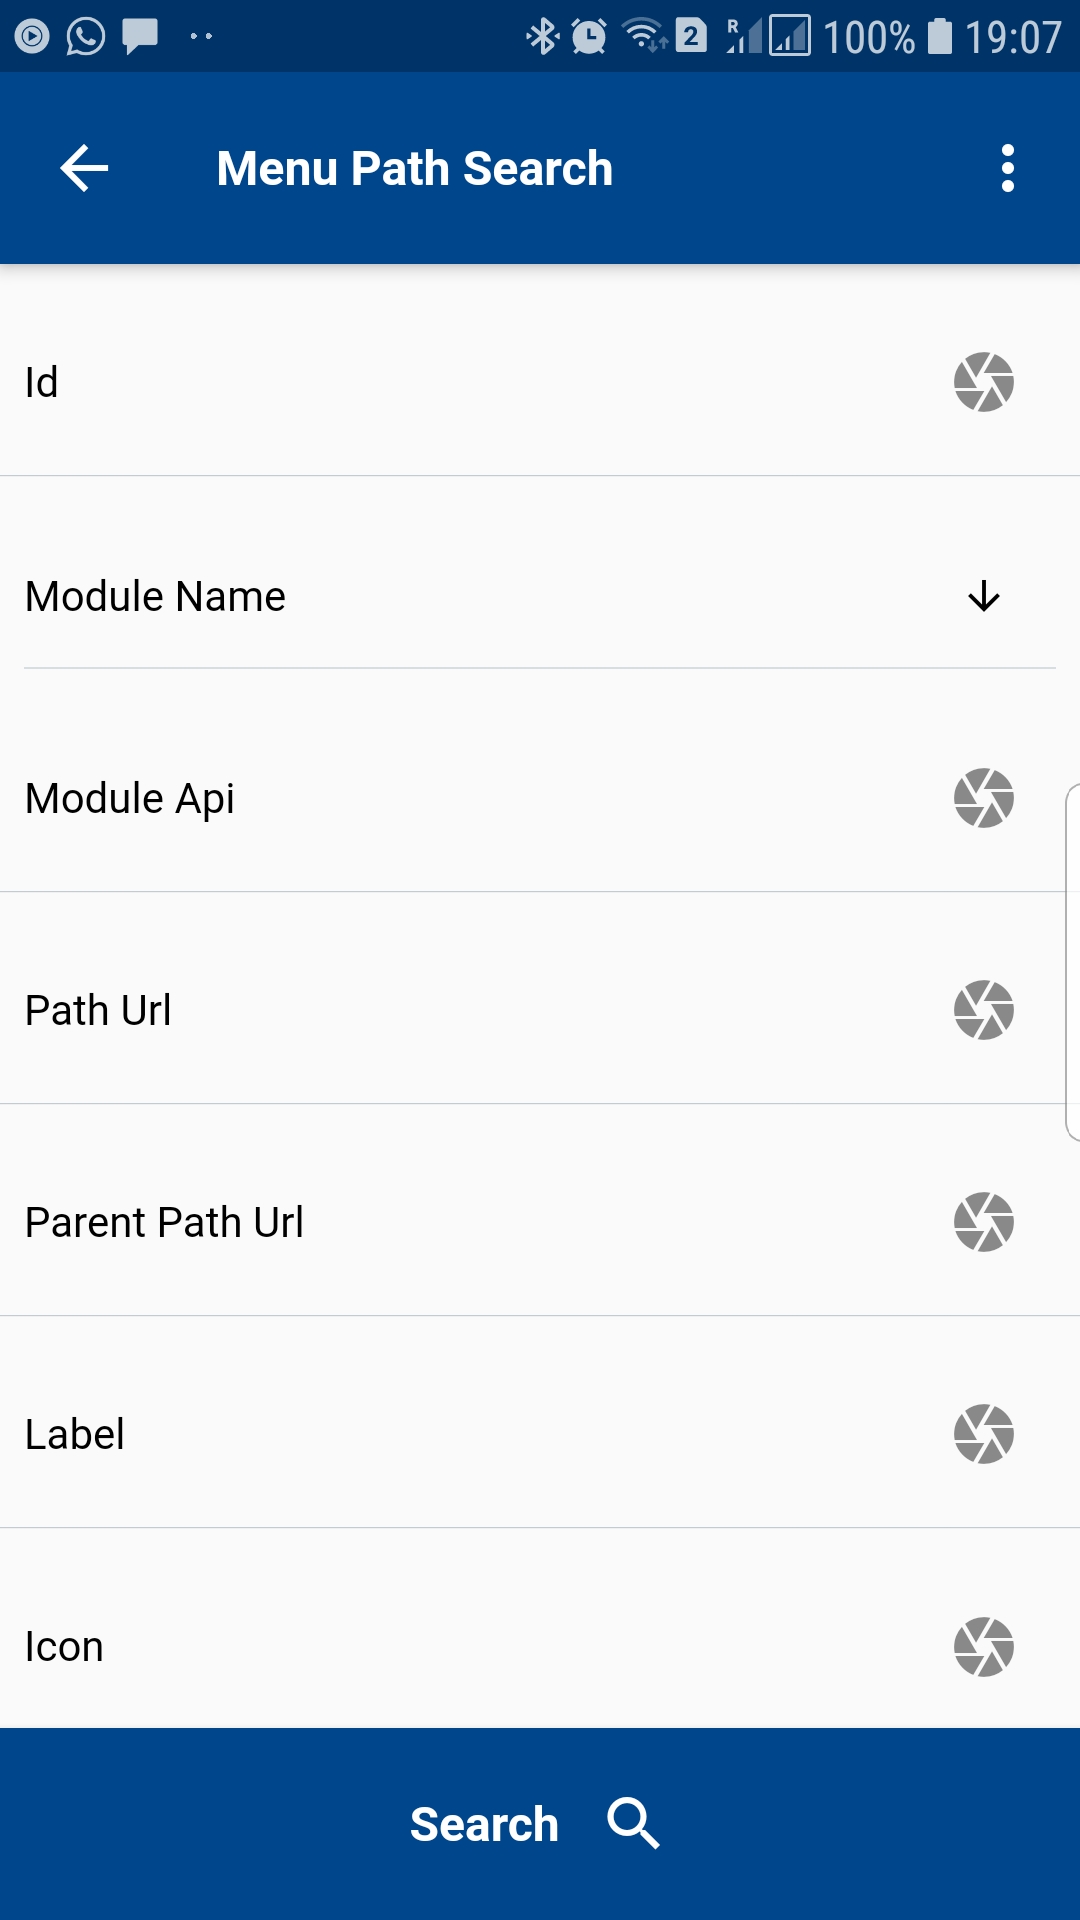
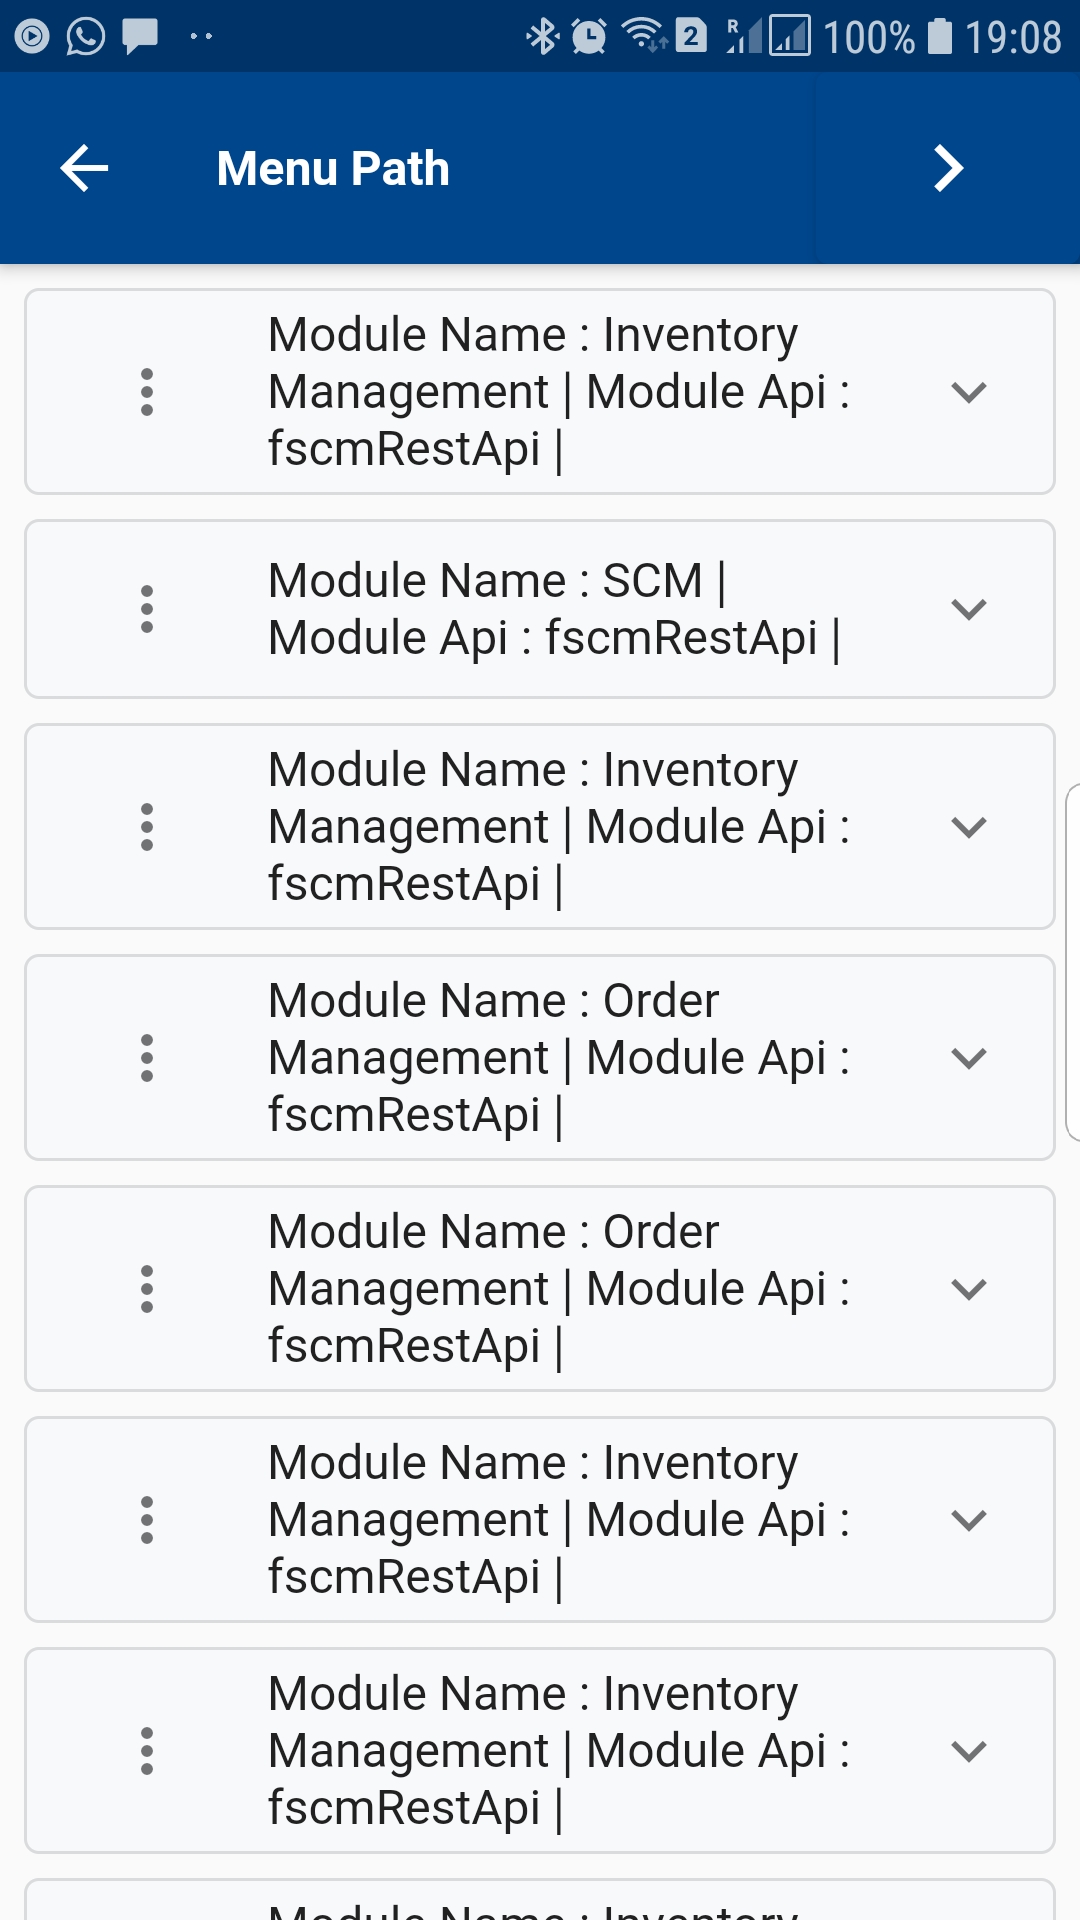
Click on the search button to search all the existing menu paths. If you want to search a specific menu path, then enter the corresponding menu path details in the search fields and click on the search button.
Example: To search all the menu paths under material management, select the module material management and click on the search button
You can select the result format - table or list before clicking on the search button—the value defaults from your settings.
The app will take you to the result screen.
View/Edit a Menu Path
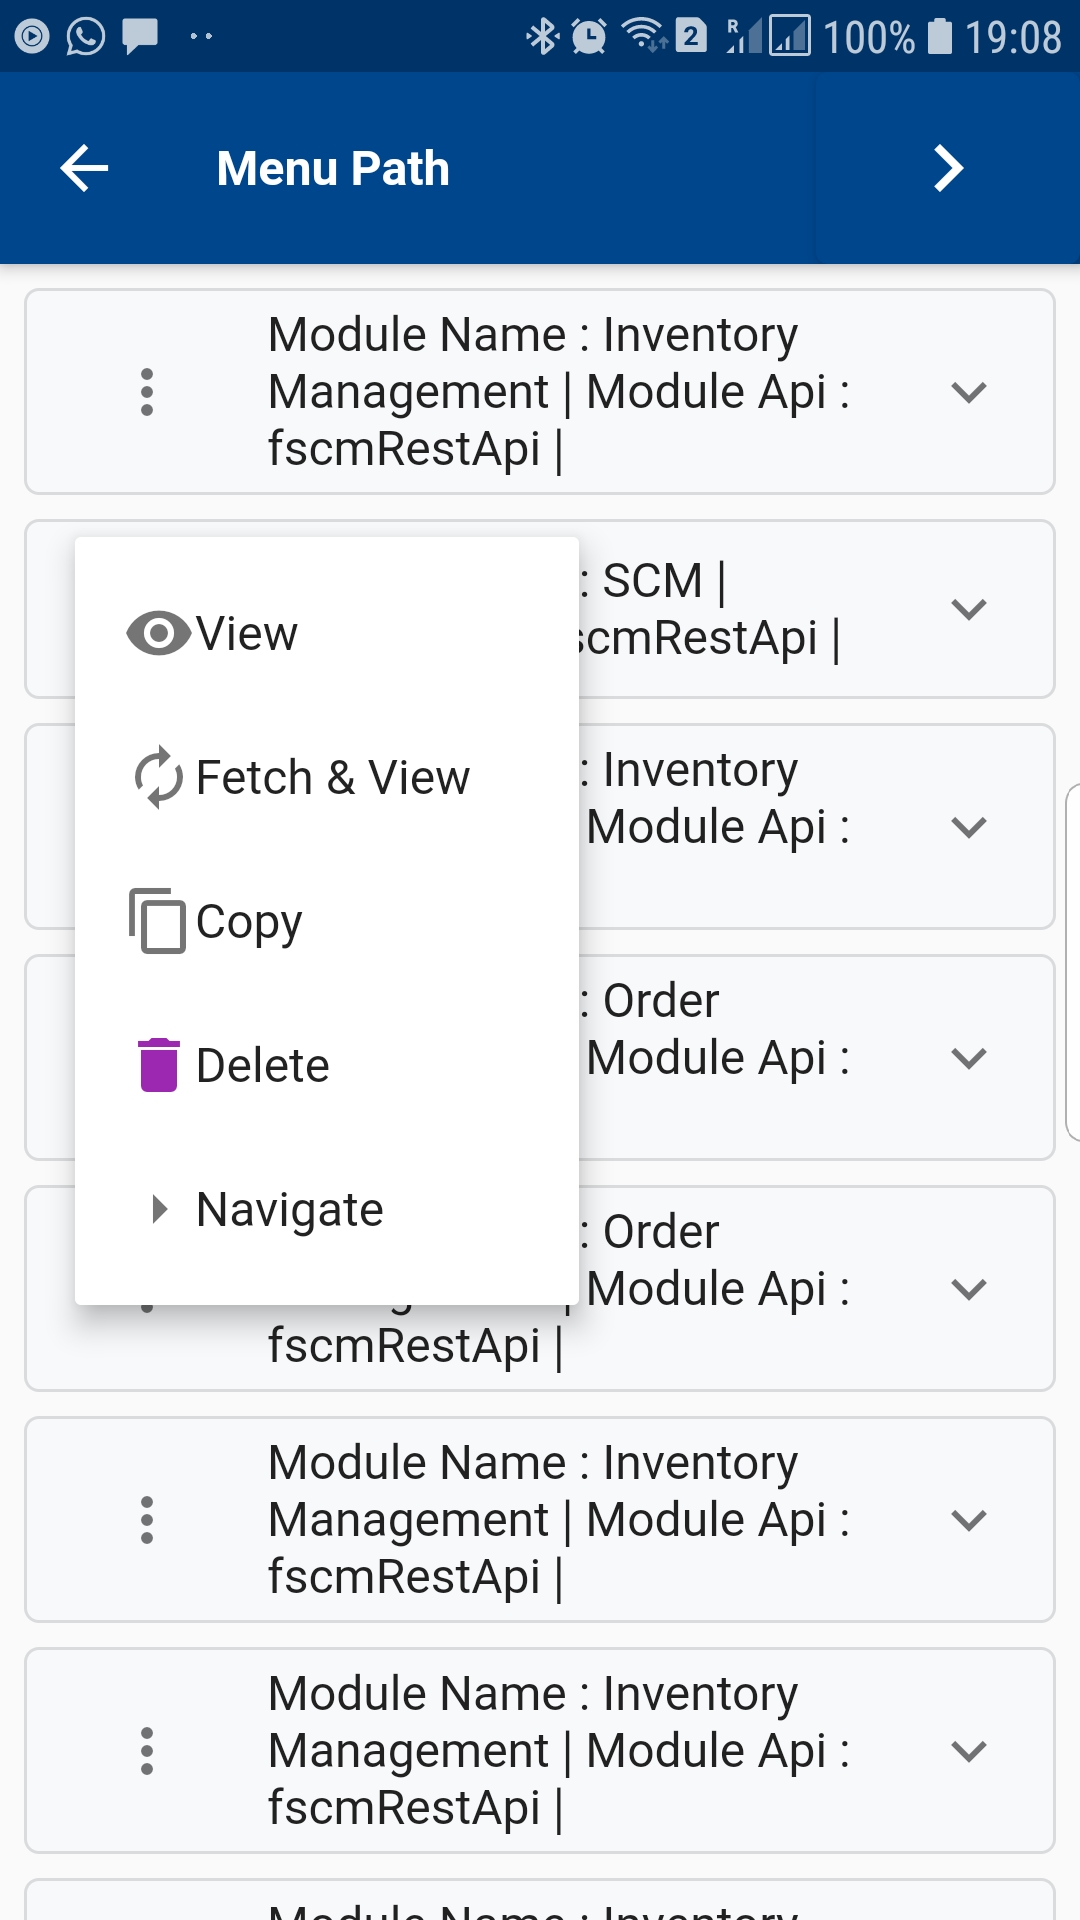
Click on View / Fetch-View to view and update the details of a menu path. *There is no difference between View / Fetch-View, for a menu path, as all the data are stored locally. However, for documents and transactions (such as POs, WOs, Item., etc.) Fetch-View always fetches data from the server but View the first check if the data has been fetched for the current session. If it finds any existing data in the cache, then it shows the data.
Review the details and make modifications as required. Click on the Save button at the top right corner to save the menu path details.
Copy a Menu Path
To copy a menu path, click on the copy button on the search result screen.
The app will copy all the selected menu path details and take you to the view/edit form. Enter/Modify all the required information and click on save.
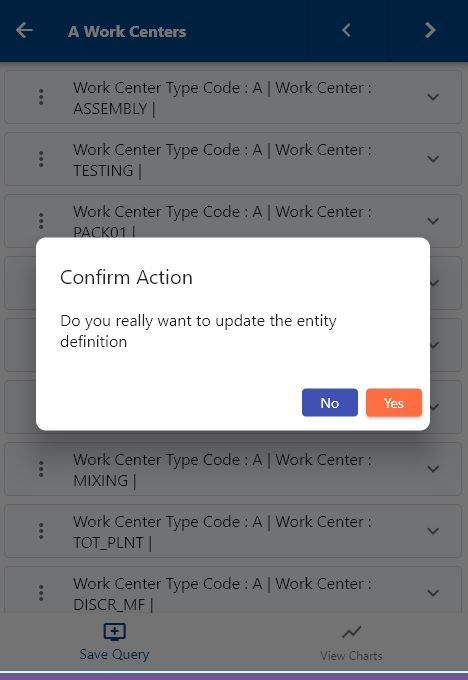
Don't try to modify the entity definition field on the first tab directly. The value is derived on all the fields from the Entity Definition tab.
Delete a Menu Path
To delete a menu path, click on the delete button on the search result screen.
The app will show you a confirmation dialog box.
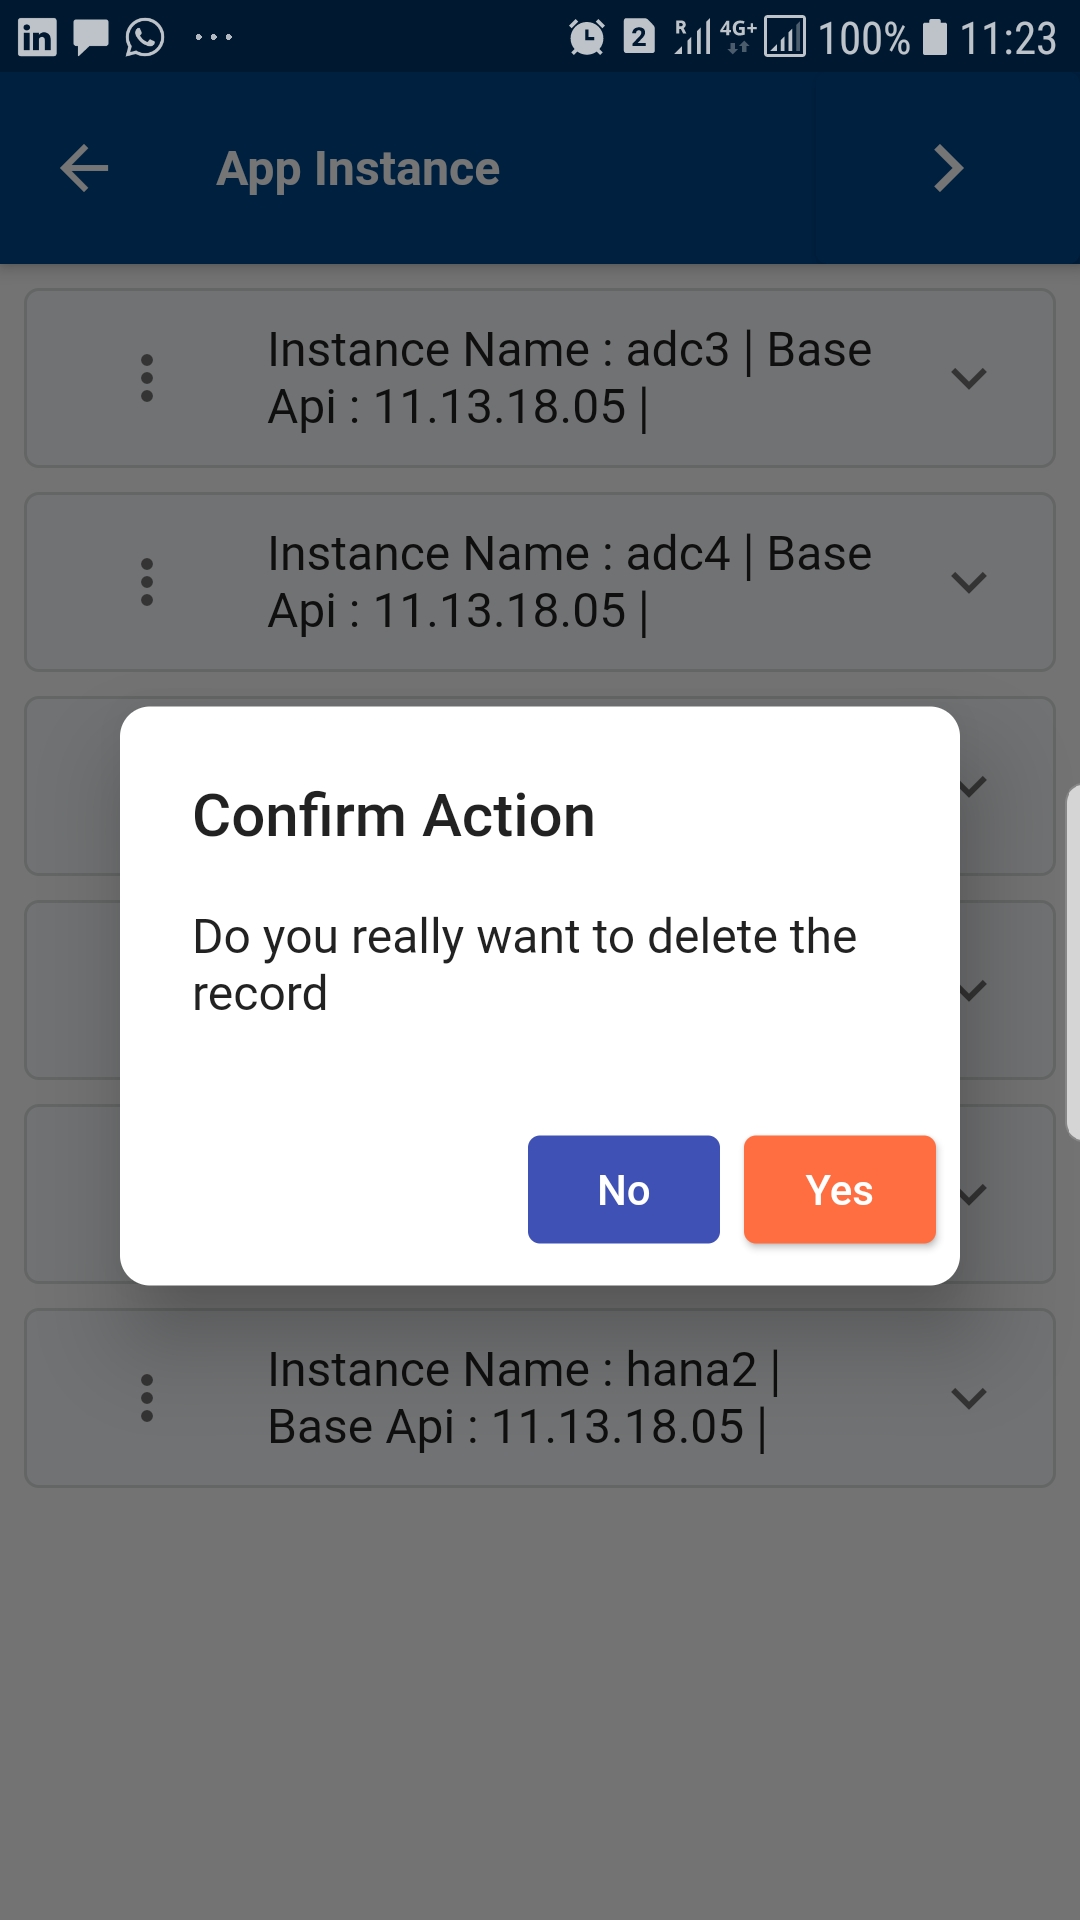
Click on "Yes" to delete the dashboard. Click on "No" to cancel the action.
Create a new Menu Path
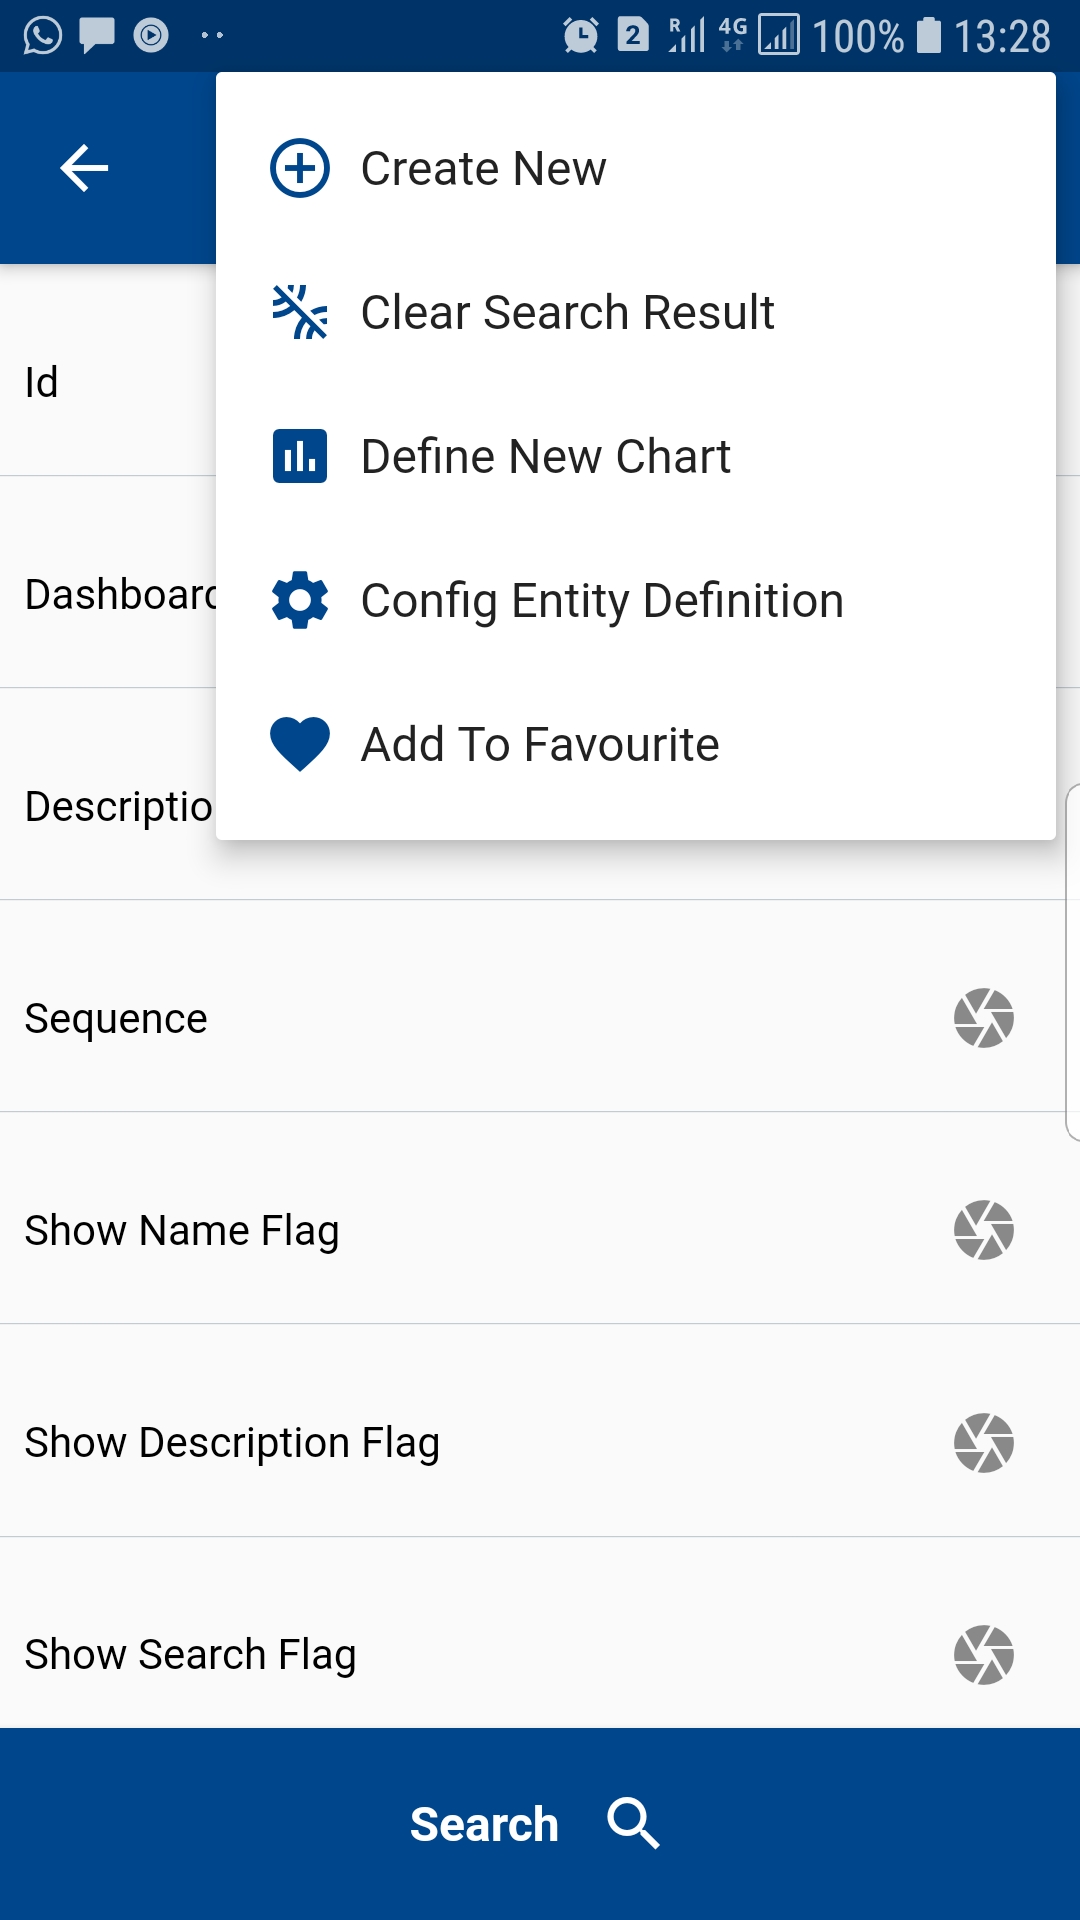
To create a Dashboard, click on the menu button (three dots ... on the right side corner) on the search screen page and select "Create New".
The app will take you to a new dashboard form(same as the view/edit form). Enter all the information and click on save. Initially, the app will show only one menu path. So, you need to select a content menu path and re-open the screen again after saving it to view the second menu path. You can select the contents you want to show on this menu path in the second menu path.
Update Entity For Blank Forms
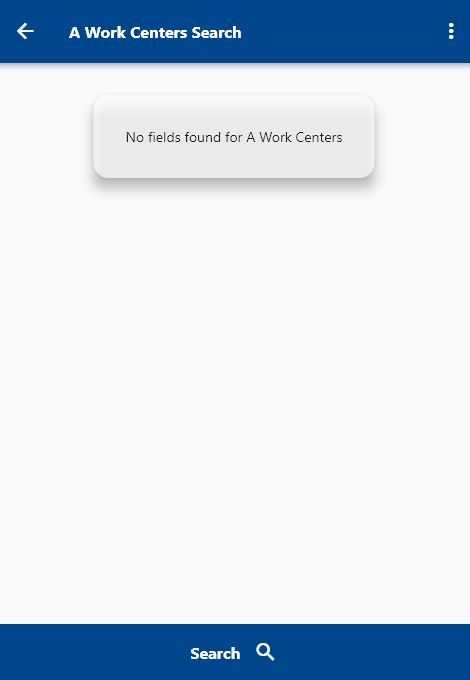
The default configuration of OneApp contains 16000+ forms. Though we have tested all the forms through an automated testing program, you might come across a form without any field/element. This occurs when the program does not find any data in our test environment to auto-create an Entity. When you open such a form, the app will try to auto-create the fields depending on the data available on your instance. However, if no data is also available in your instance, the app will show you the below message.
To use such a form, you first need to create some data in your instance or connect the app to a test environment where data is available. When you open the same form in a different instance that contains any record the app will take a few seconds to create and load the form.

Next, you can save the new form format by searching the object and clicking on update entity on search result data.
Now, if you log in to the original instance, the app will show you the form even if no data is created in that instance.
Next, export the configuration and share it with your users.
List Of Values (Select Field)
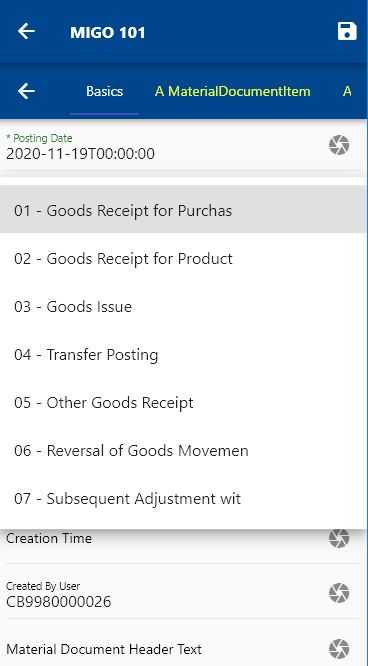
OneApp shows fields in various formats - text field, text area, date, date/time, list of values. The app shows the field depending on how it's defined on the ERP side. All the lists of values are shown as select values. However, as the select values are fetched from different REST/ODATA paths, the app caches the list of values wherever possible.
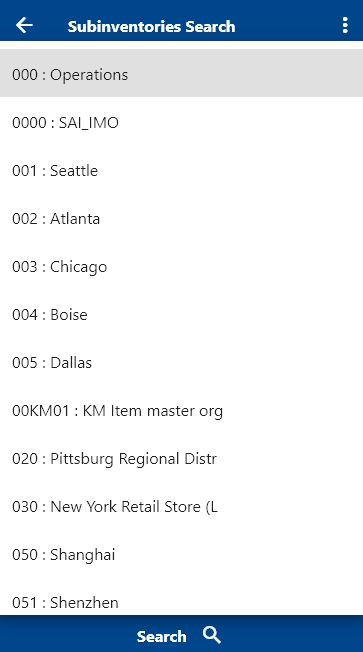
A list of values helps in data entry and constraints what value users can enter on a form. However, it also slows down the process as the app has to fetch data from different sources. That's the reason the app shows select/list of values for very limited fields (Ex: Inventory Organization, Business Units, Transaction Types, etc. in Oracle and Movement Type, Plant, etc. in Oracle). By default, around 50 entities are shown as list of values. However, you can enable LOV for any other form/field if that's important as per your business requirement.
You can enable any field to list values by choosing the field as selected in the menu definition. If you choose the field type as select, then you must enter the below fields.
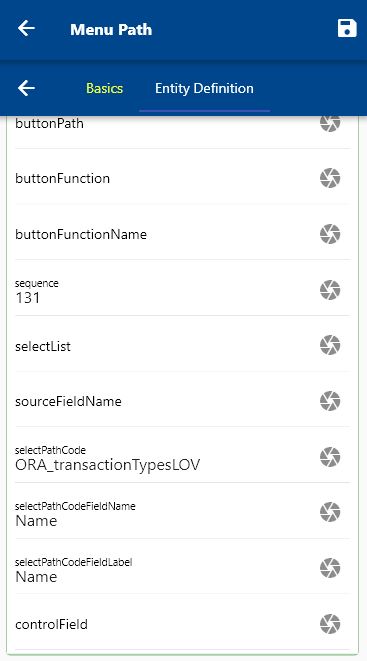
- selectPathCode - PathCode of the menu that provides the list of values
- selectPathCodeFieldName - Name of the field that user will see on the list of values. The value must be one of the fields fetched from selectPathCode
- selectPathCodeFieldLabel - Label of the field that a user will see on the list of values. The value must be one of the fields fetched from selectPathCode
Unlike SAP, where MovementType is used only for the material transaction, Oracle uses the term TransactionType in several modules (OM, INV, AR) with different purposes. Thus, it's required to use separate selectPathCode for TransactionType and all such similar fields.
Charts
You can view any search result data as charts and also show saved query result data as charts on your dashboard. To define a chart for an entity, navigate to that entity's search screen and click on the right top corner menu.
Click on the new chart button, and the app will take you to the chart definition screen.
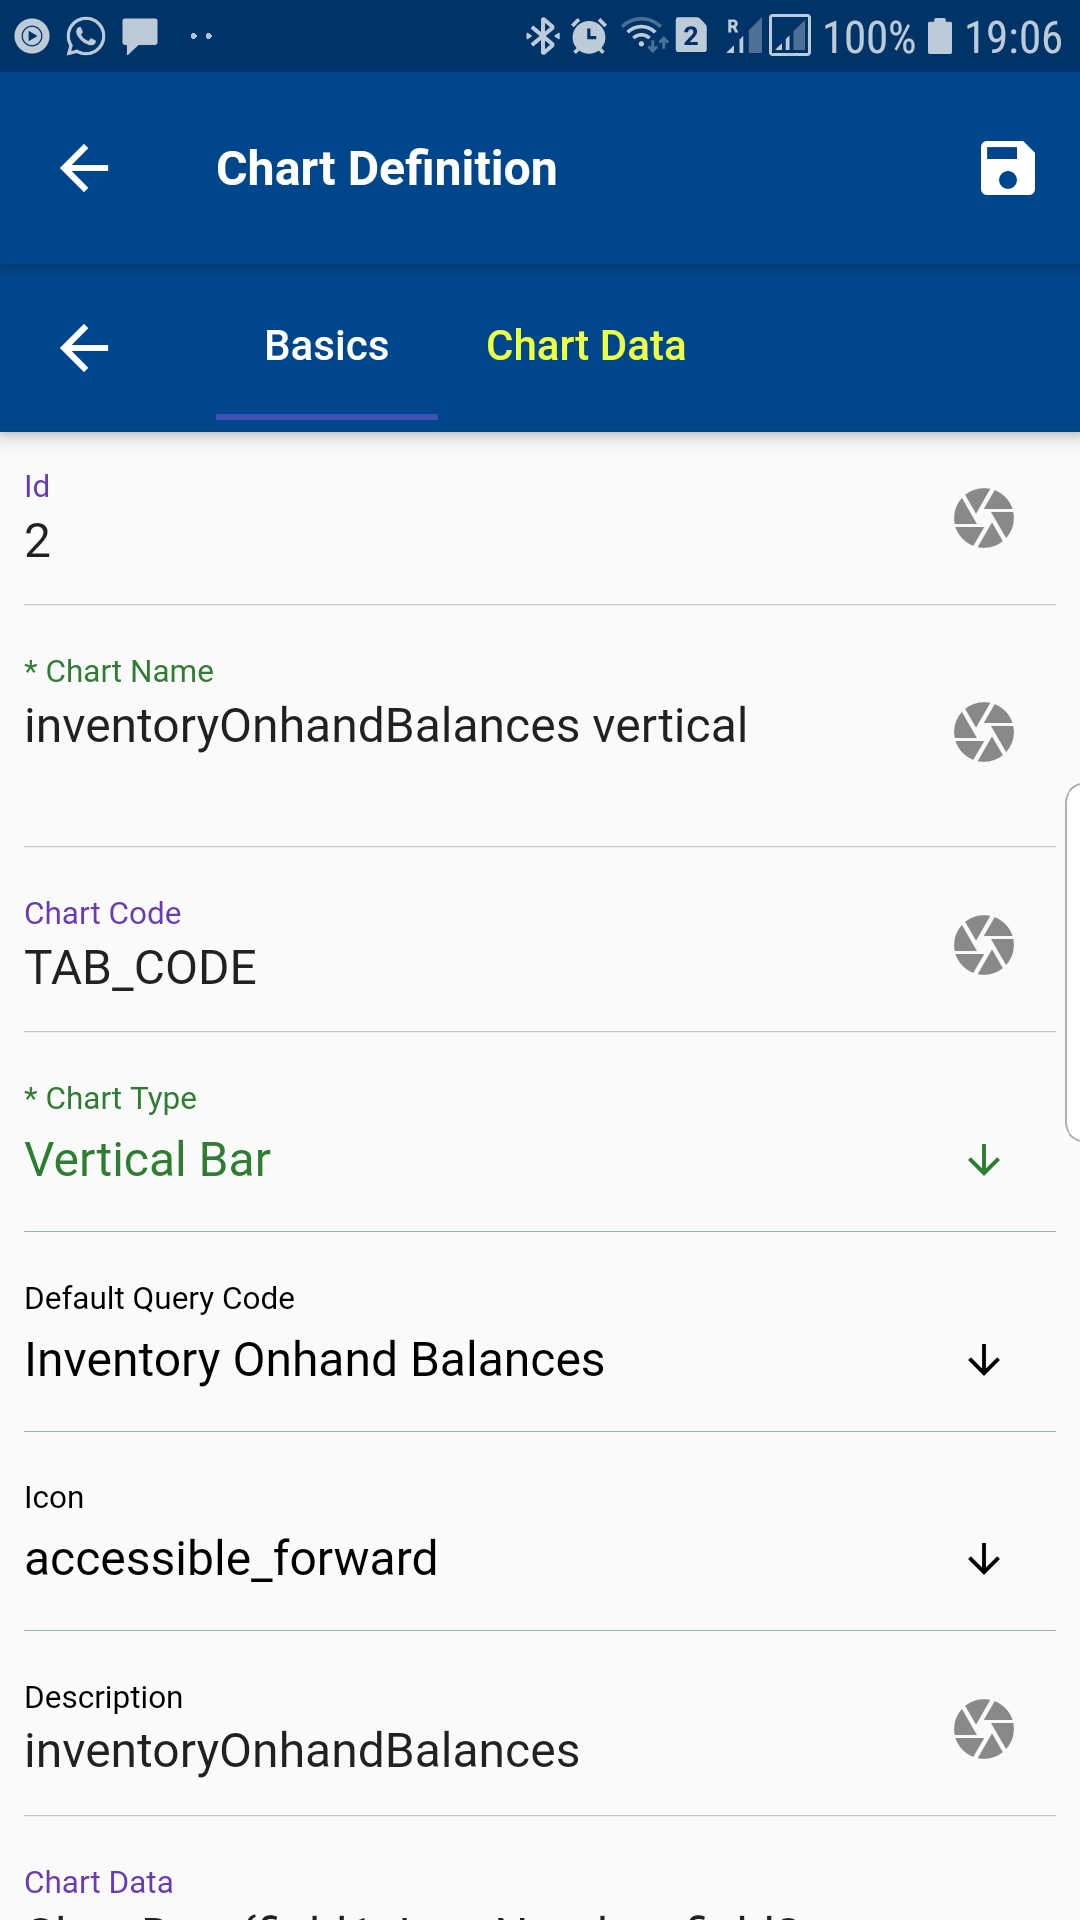
The app will default the chart name, chart type, and description, but it will also allow you to change those values.
Chart Name
use the default chart name suggested by the app or change it as per your business requirement
Chart Code
The app will auto-populate the chart code when you save it for the first time. Don't change this value.
Default Query Code
The value will remain blank when you create a new chart. After you save the chart for the first time, the field will show all available queries for that entity. Select a default query code if you want to use the chart in a tab/dashboard.
Chart Type
Select one of the available chart types
Icon
Select one of the available icons
Description
use the default description suggested by the app or change it as per your business requirement
Chart Data
The system will populate this value, depending on the fields you select on the second tab. Don't change this value.
Module API
Don't change this value.
Path URL
Don't change this value.
After entering all the values, save the chart. Next, navigate to the chart search screen from the configuration screen.
Once a chart is created, the app will show values in the default queries and the second tab (Chart Data Tab).
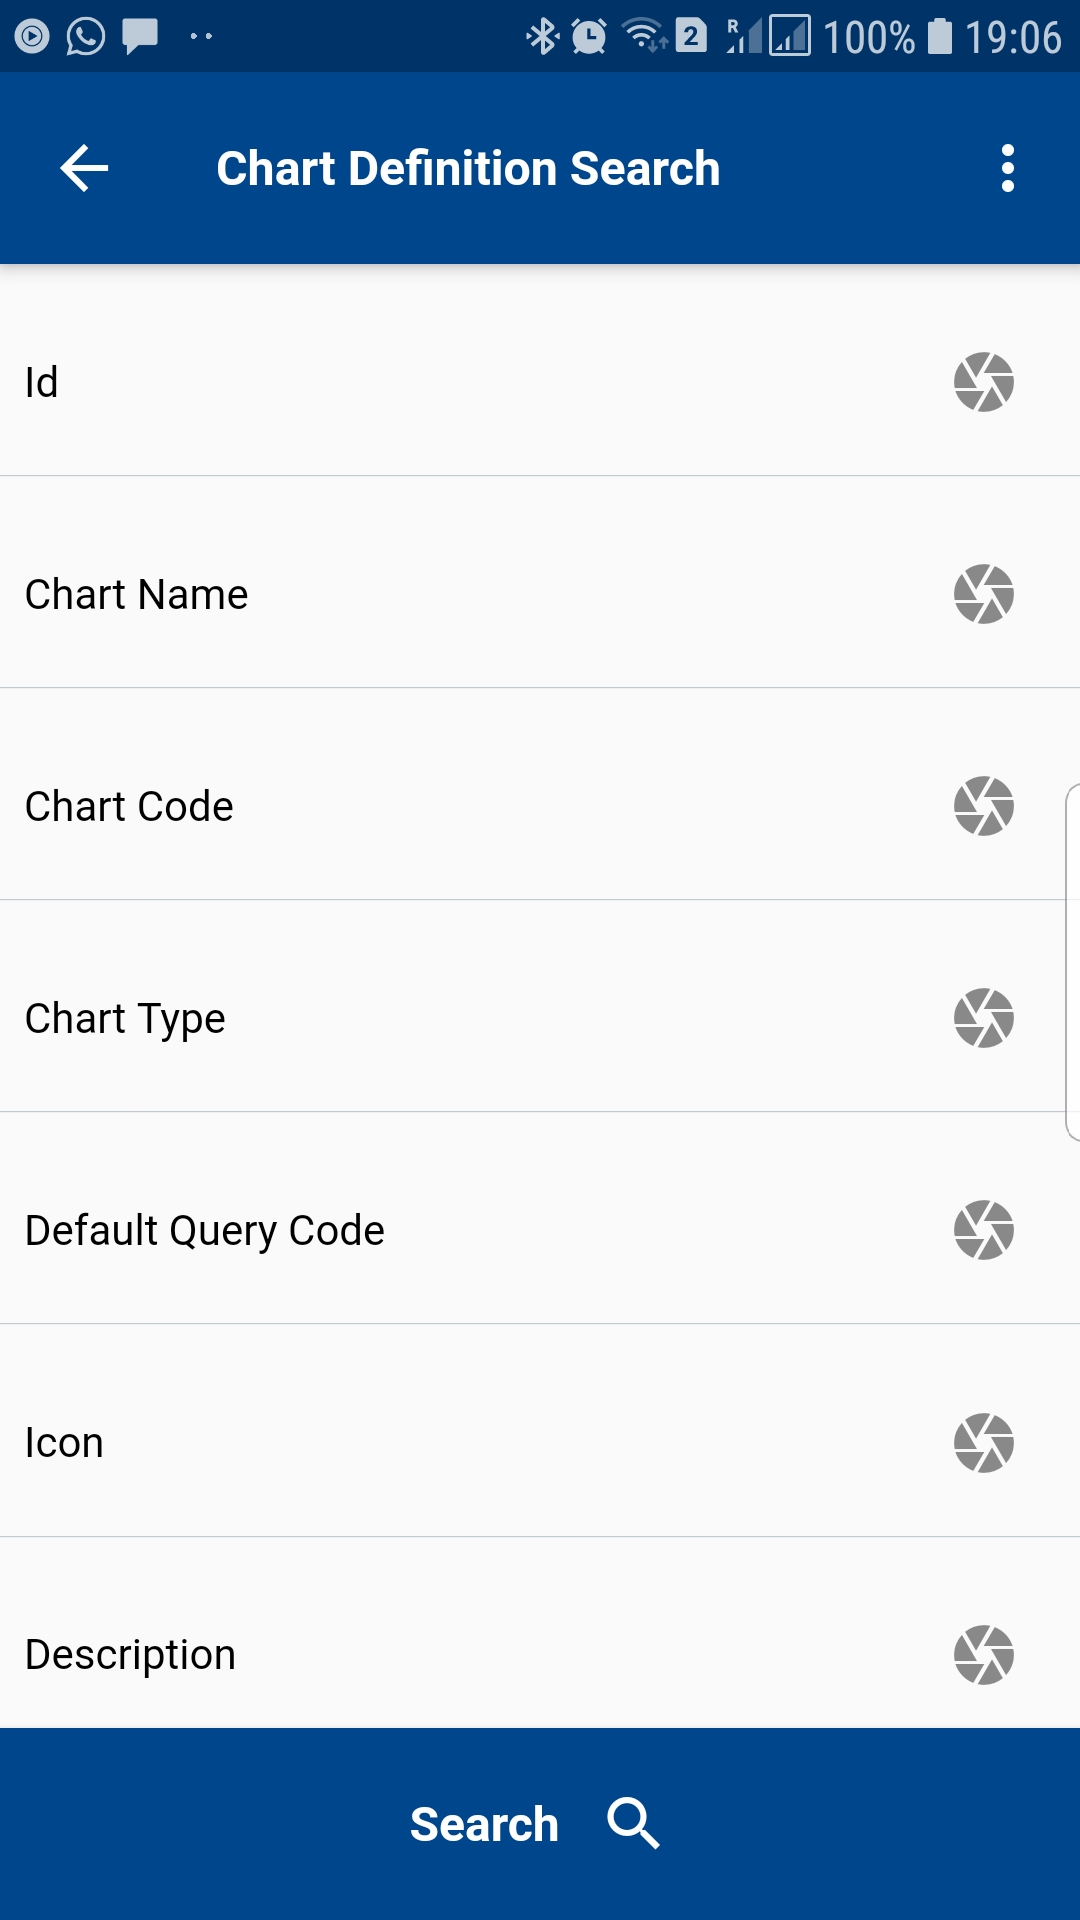
Enter any search criteria and click on the search button. The app will take you to the search result screen.
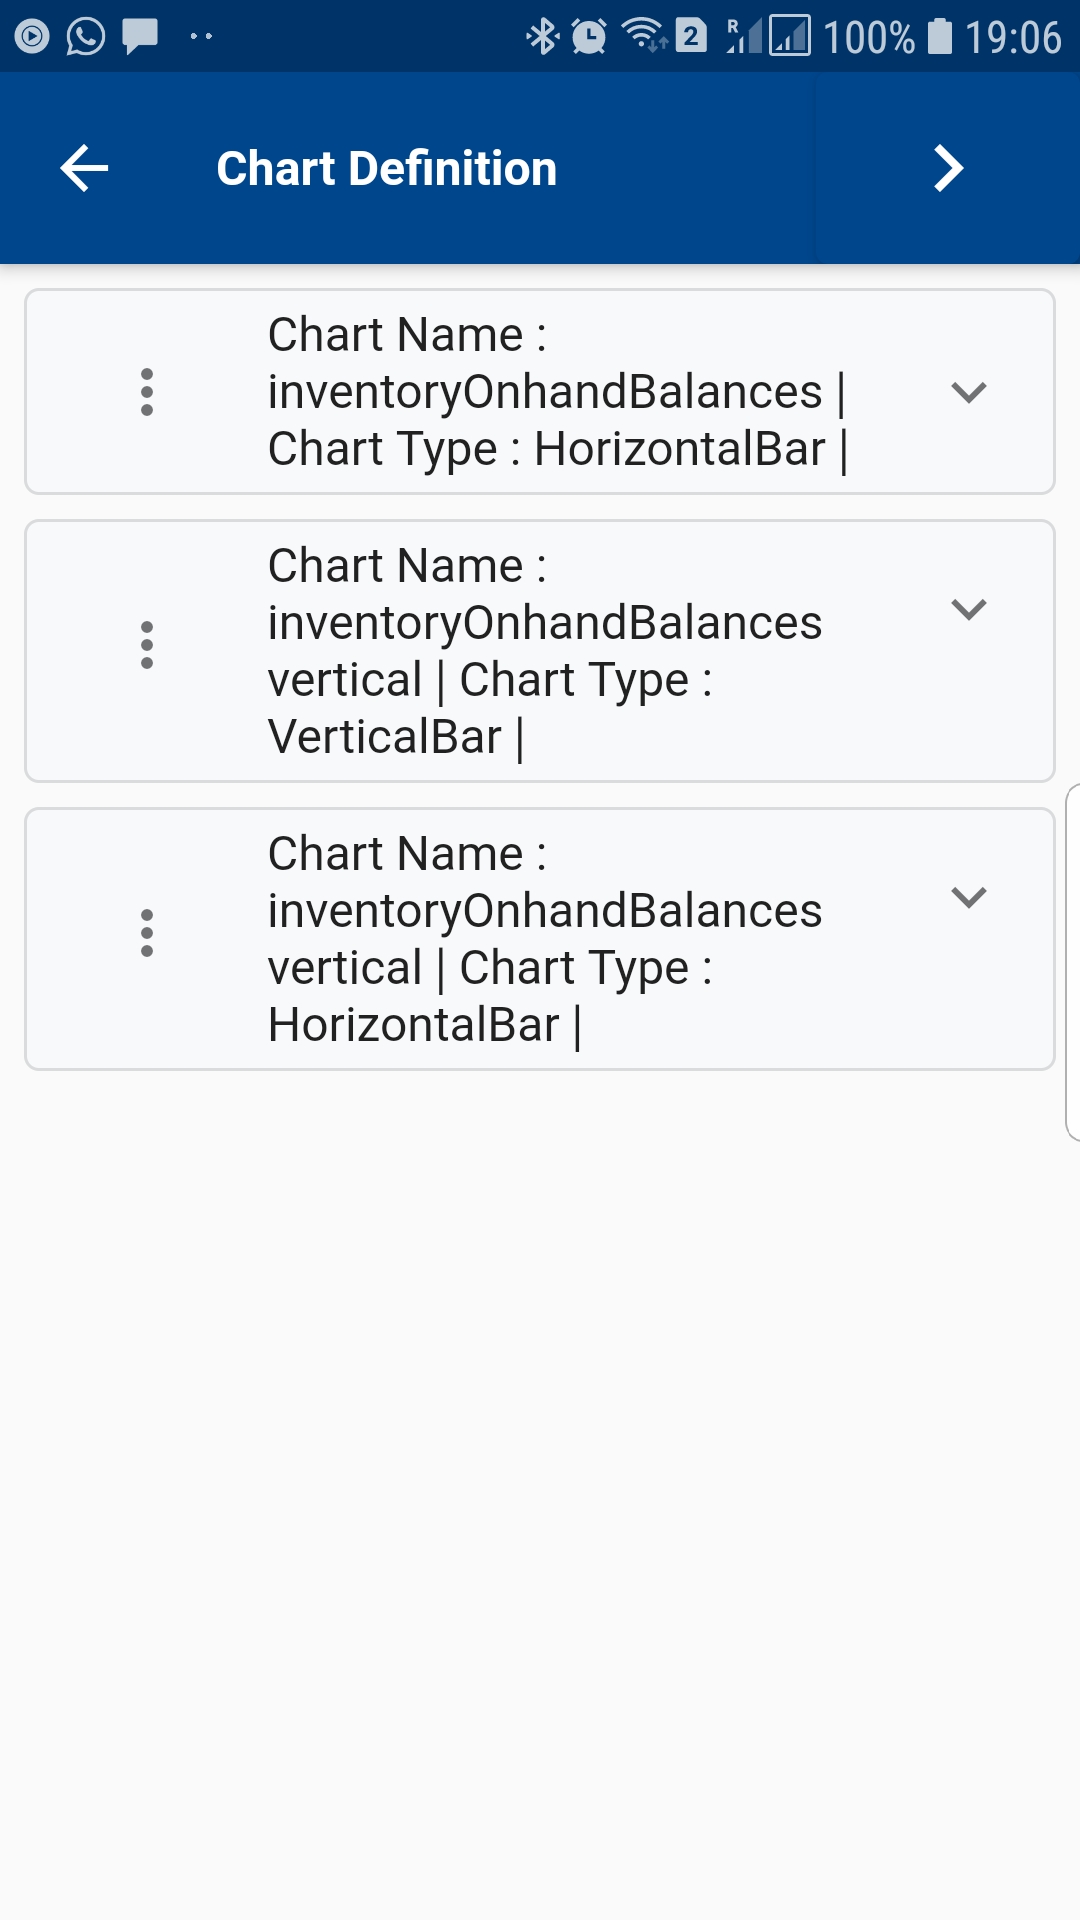
Click on the menu of any row to view or delete the specific chart.
Click on the delete button to delete the query. Click on the view button to view the details and make modifications, such as description, icon, etc.
Scroll to the chart data tab to define the chart fields and values
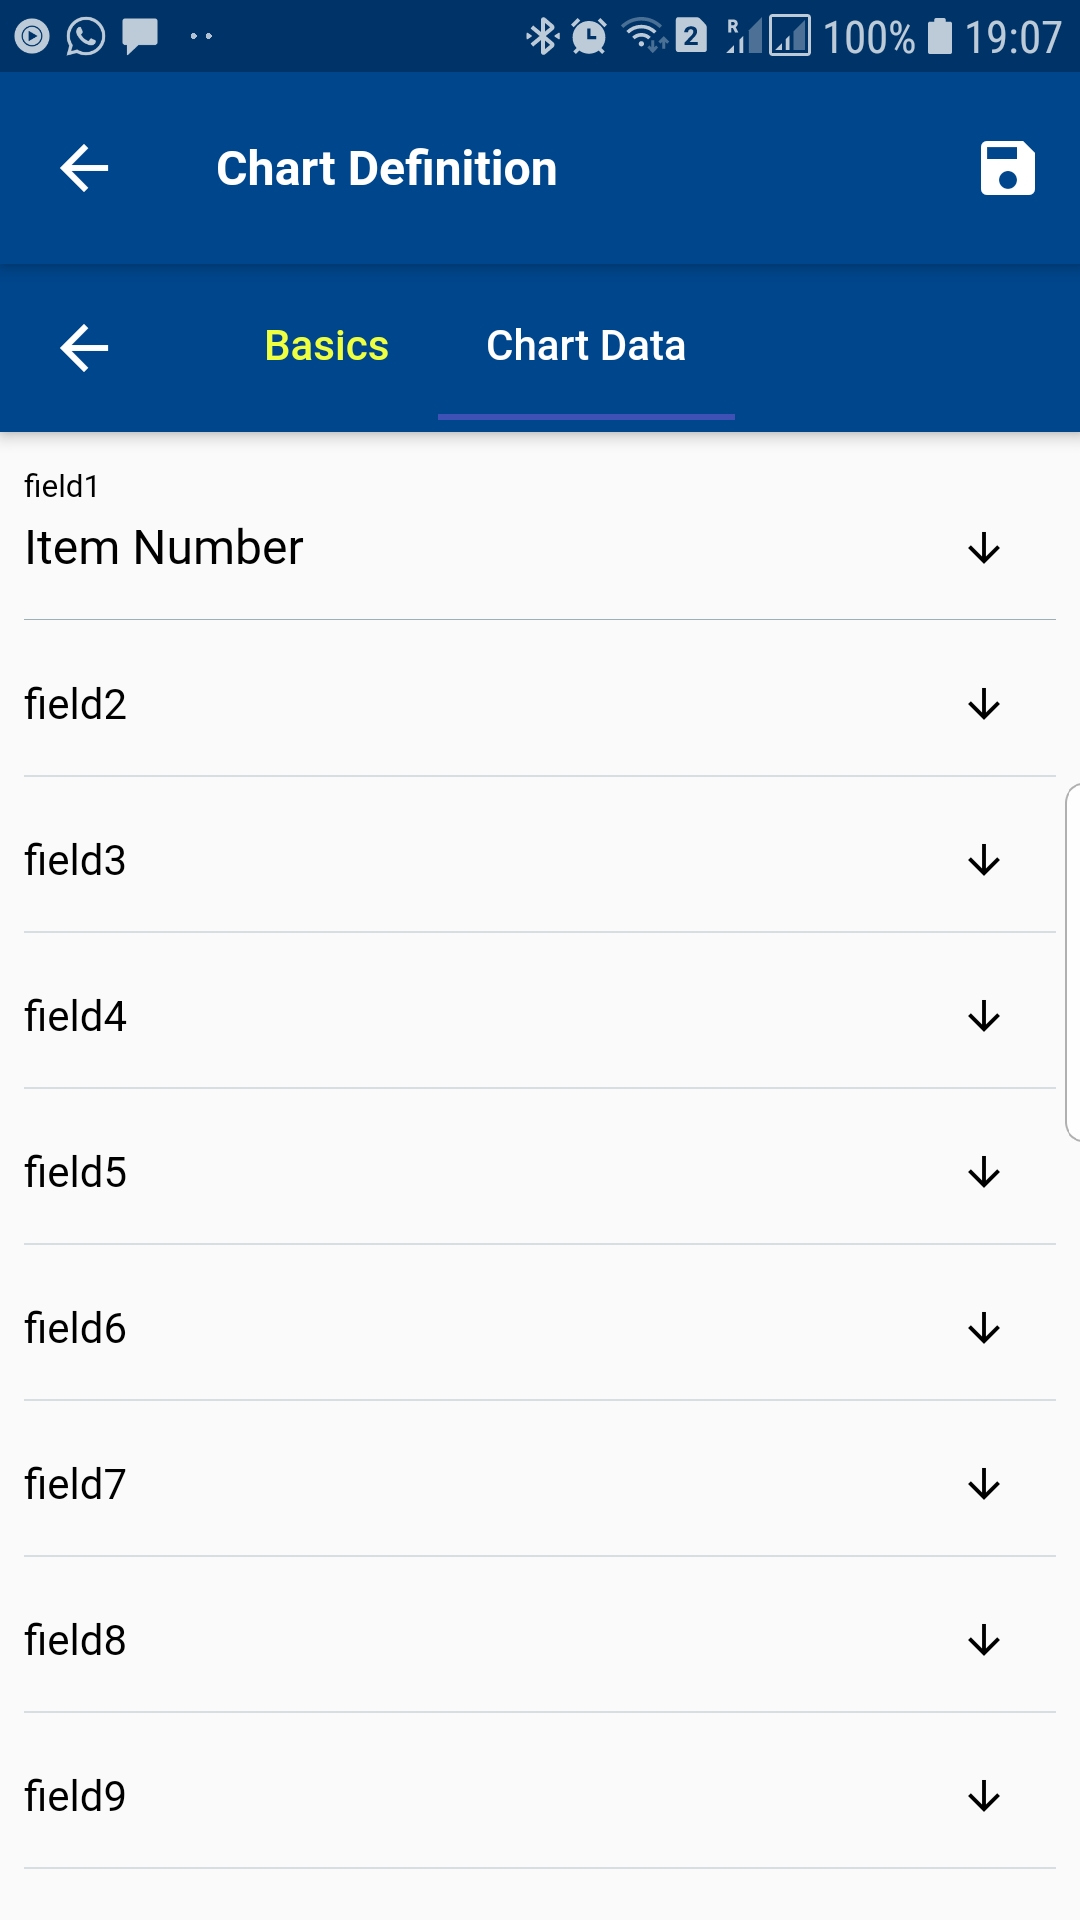
The app shows 20 different fields and values for the chart. Select the entity field names in the chart fields and values.
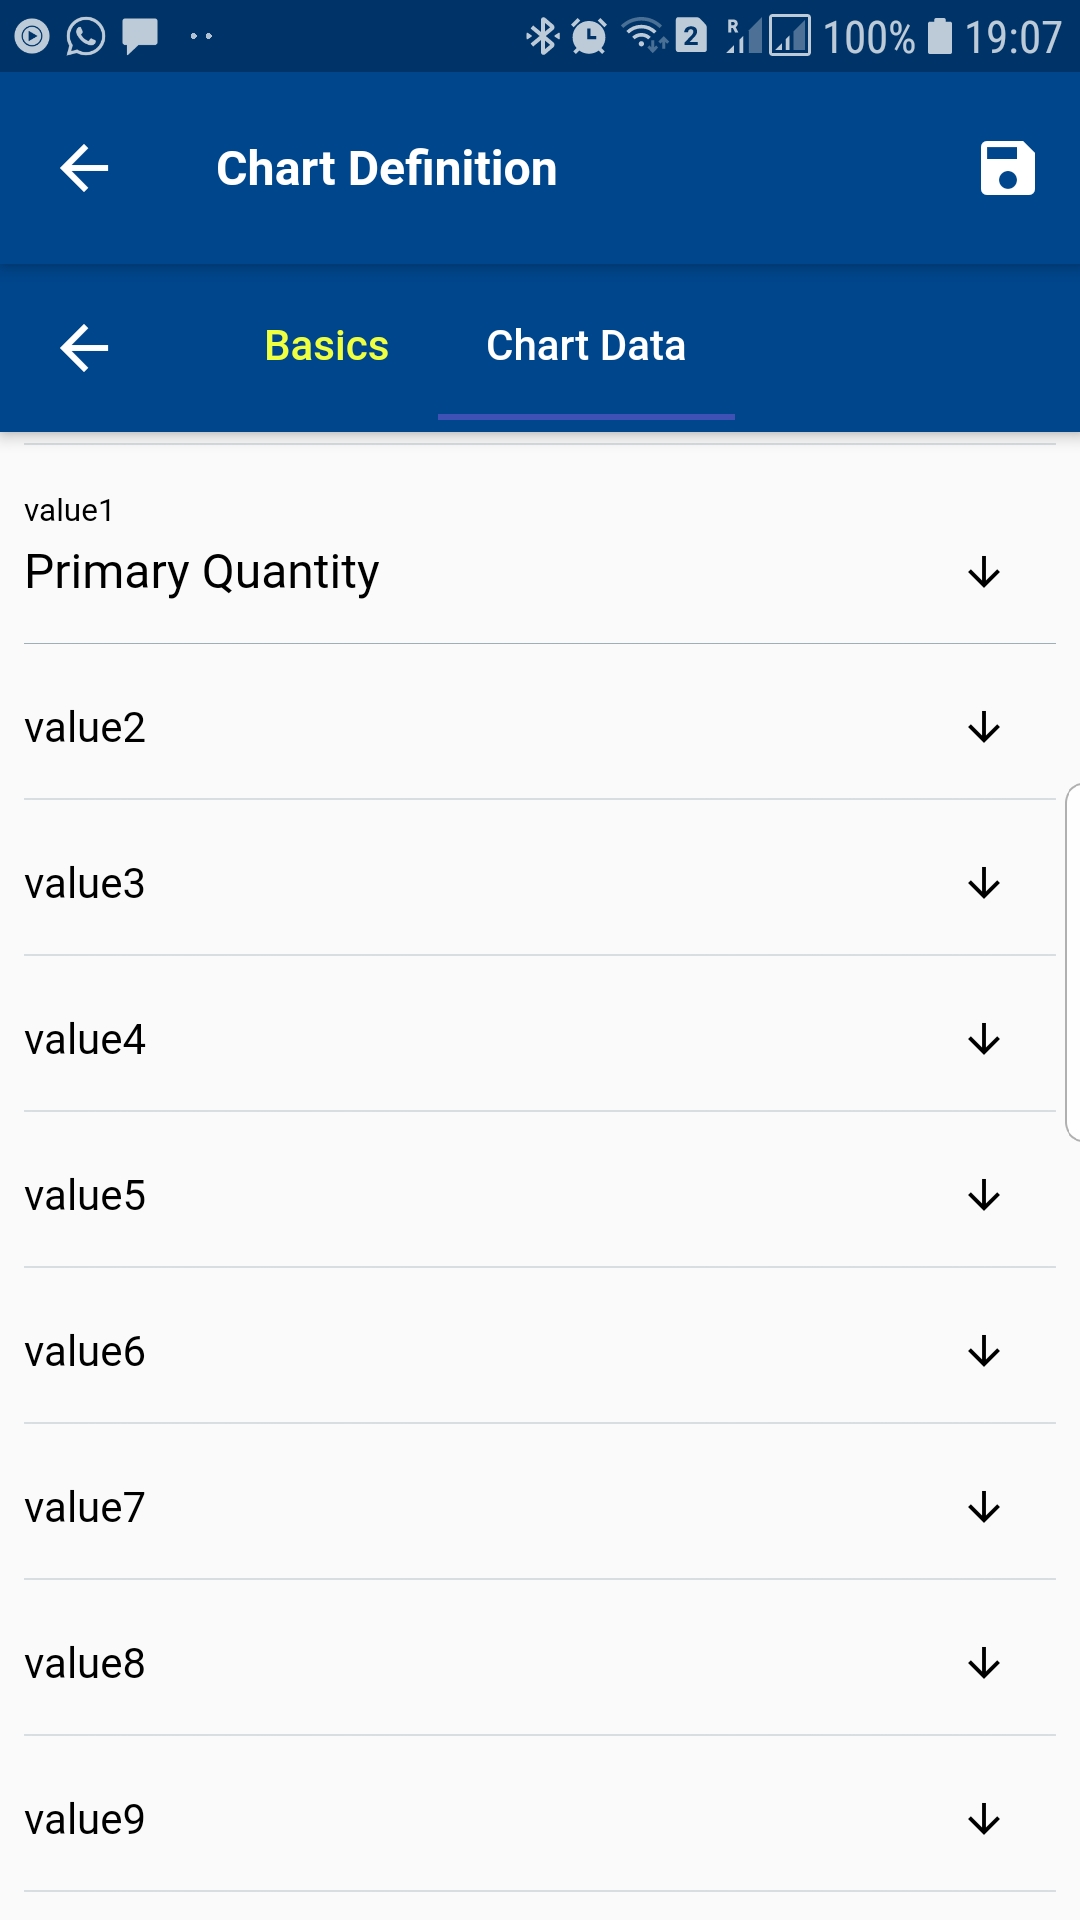
You have to scroll down to see all the value fields.
Change any field value as required and click on the Save button.
Configuring SapIssue Log