Quickstart
One-Time Configuration
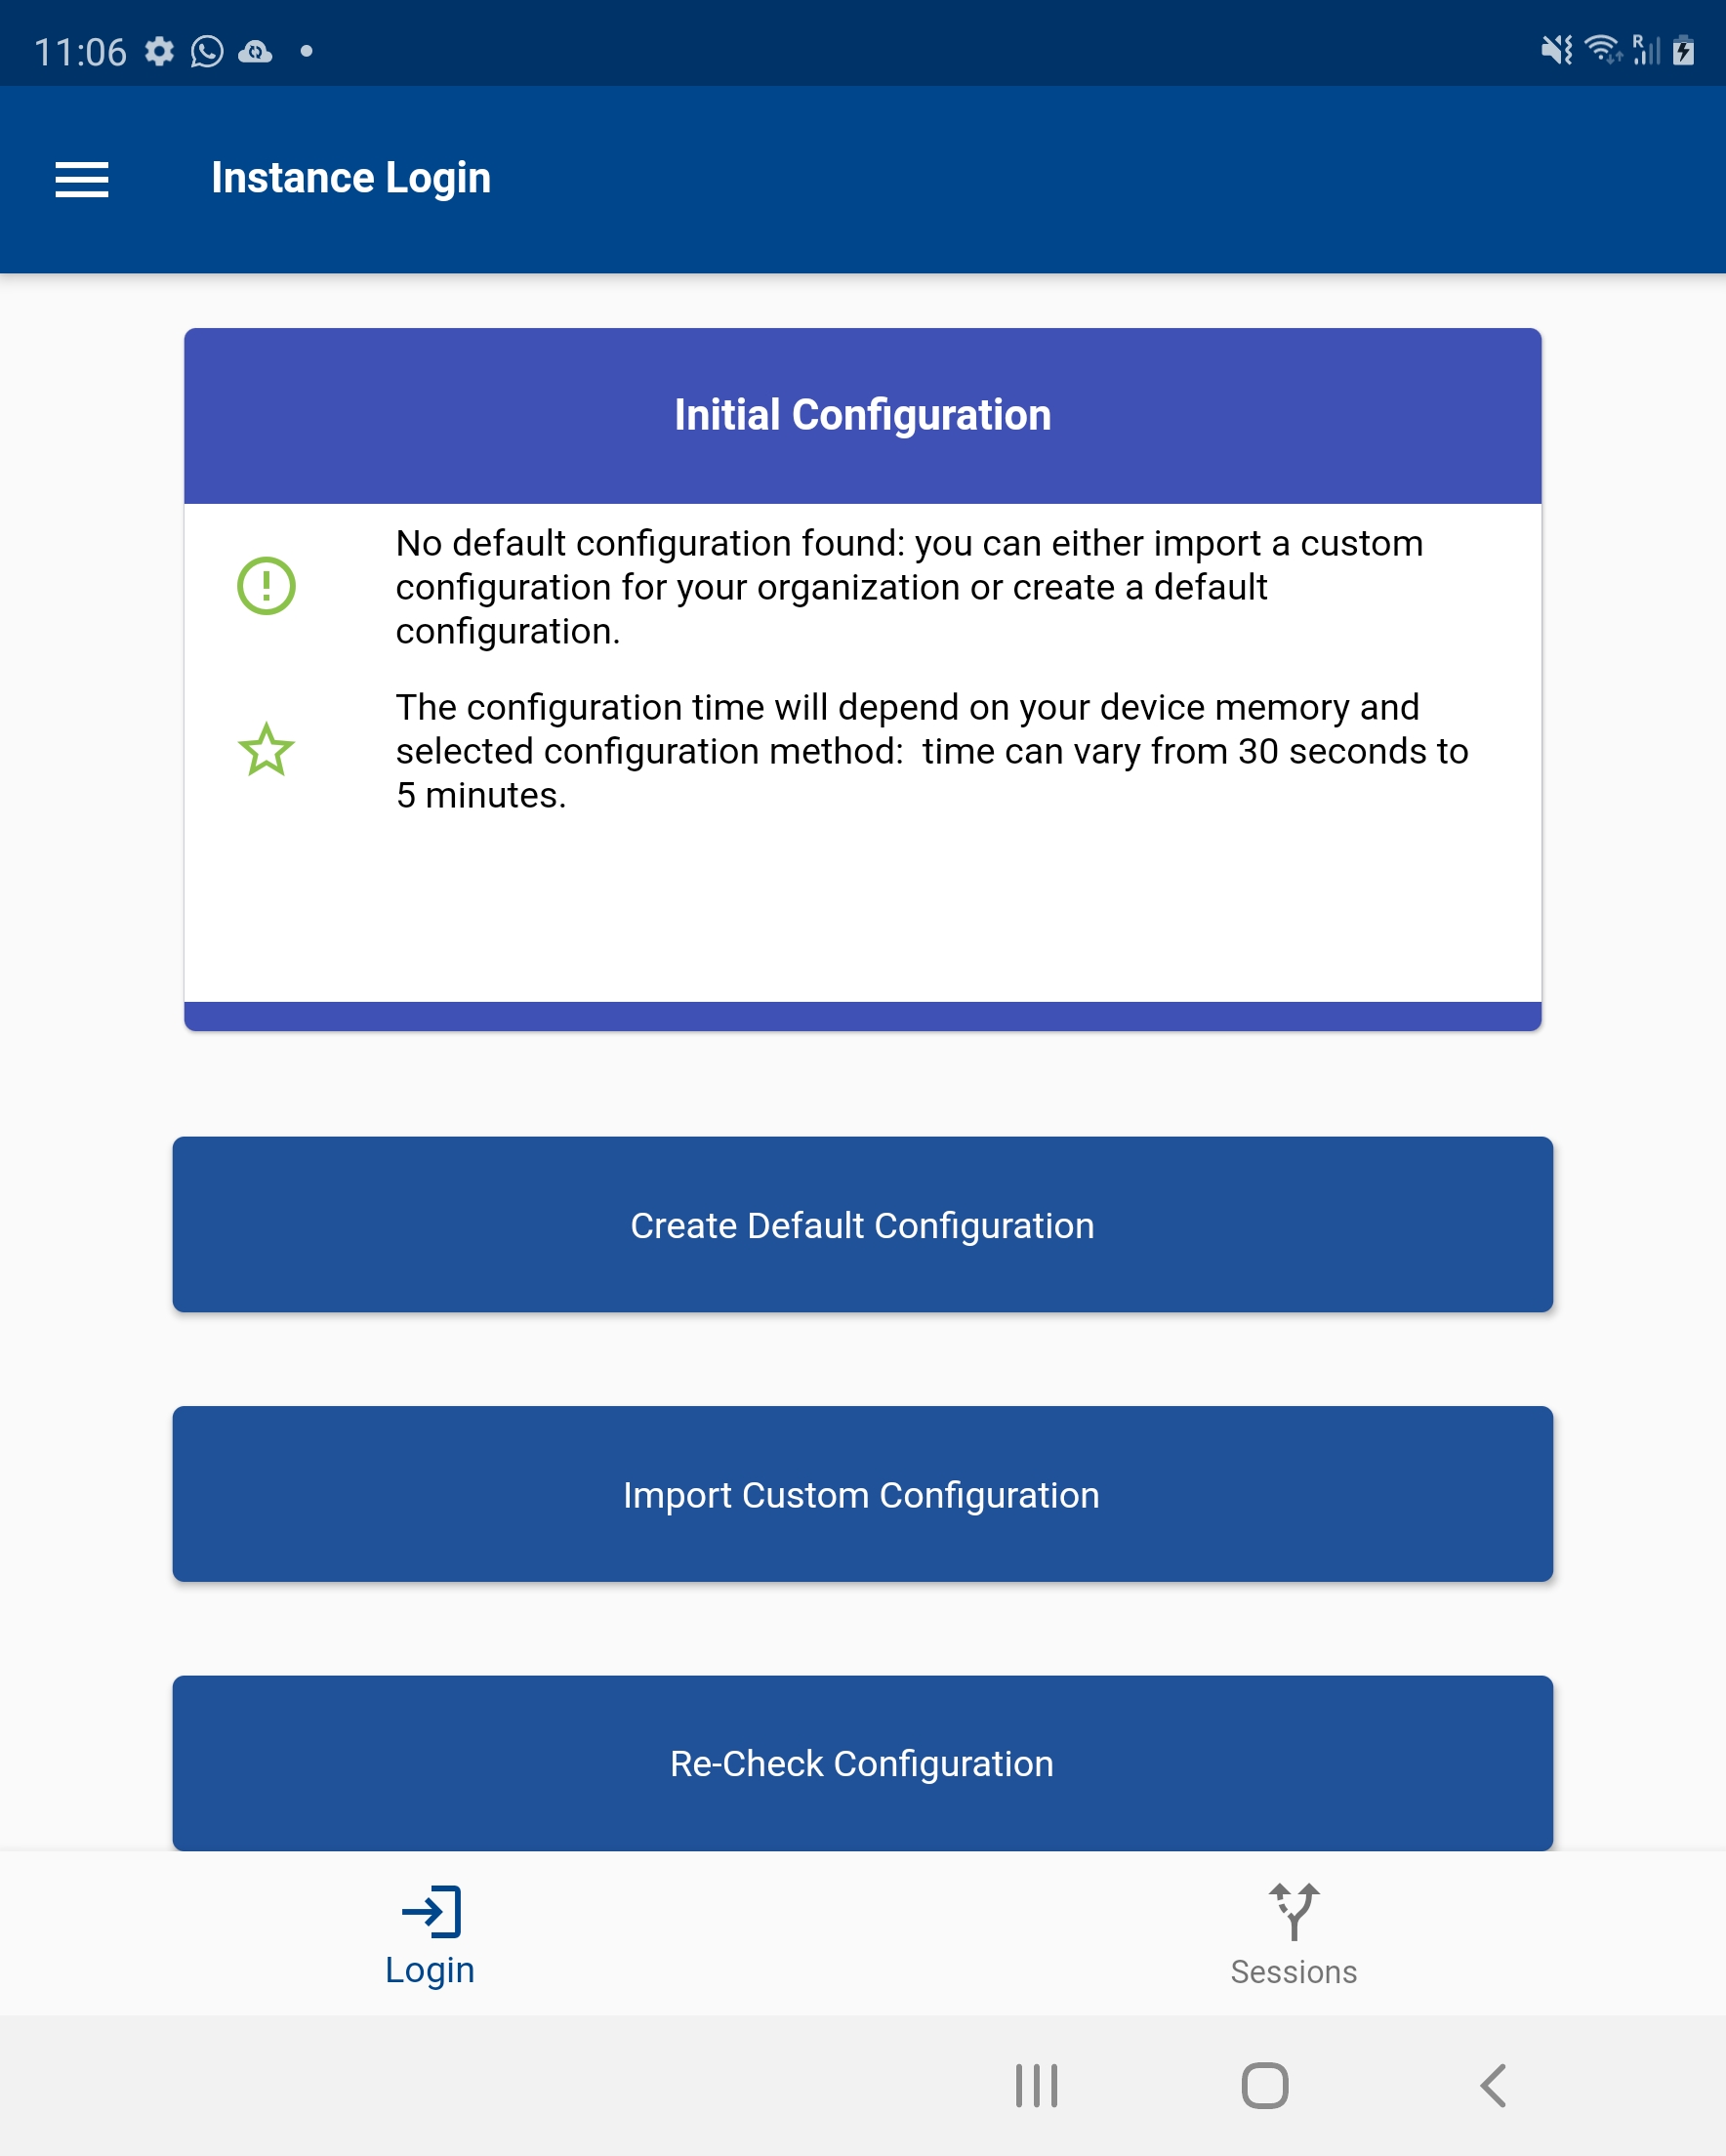
When you open the app for the first time, the app will show you the above screen. You can complete the configuration in 2 different ways.
-
If you have received a configuration file link and guide from your admin, then follow the steps as per the guide
-
Else tap/click on the "Create Default Configuration" button that will load the default configuration.
If you are from Oracle 11i/R12 background, you can consider the default configuration the same as a vision instance installation; it will create all navigation paths with some sample charts, queries, and dashboard. For those from SAP ECC background, you can consider default configuration as an IDES installation.
If you tap/click on "Import Custom Configuration," then the app will take you to the below screen where you need to enter the configuration file path.
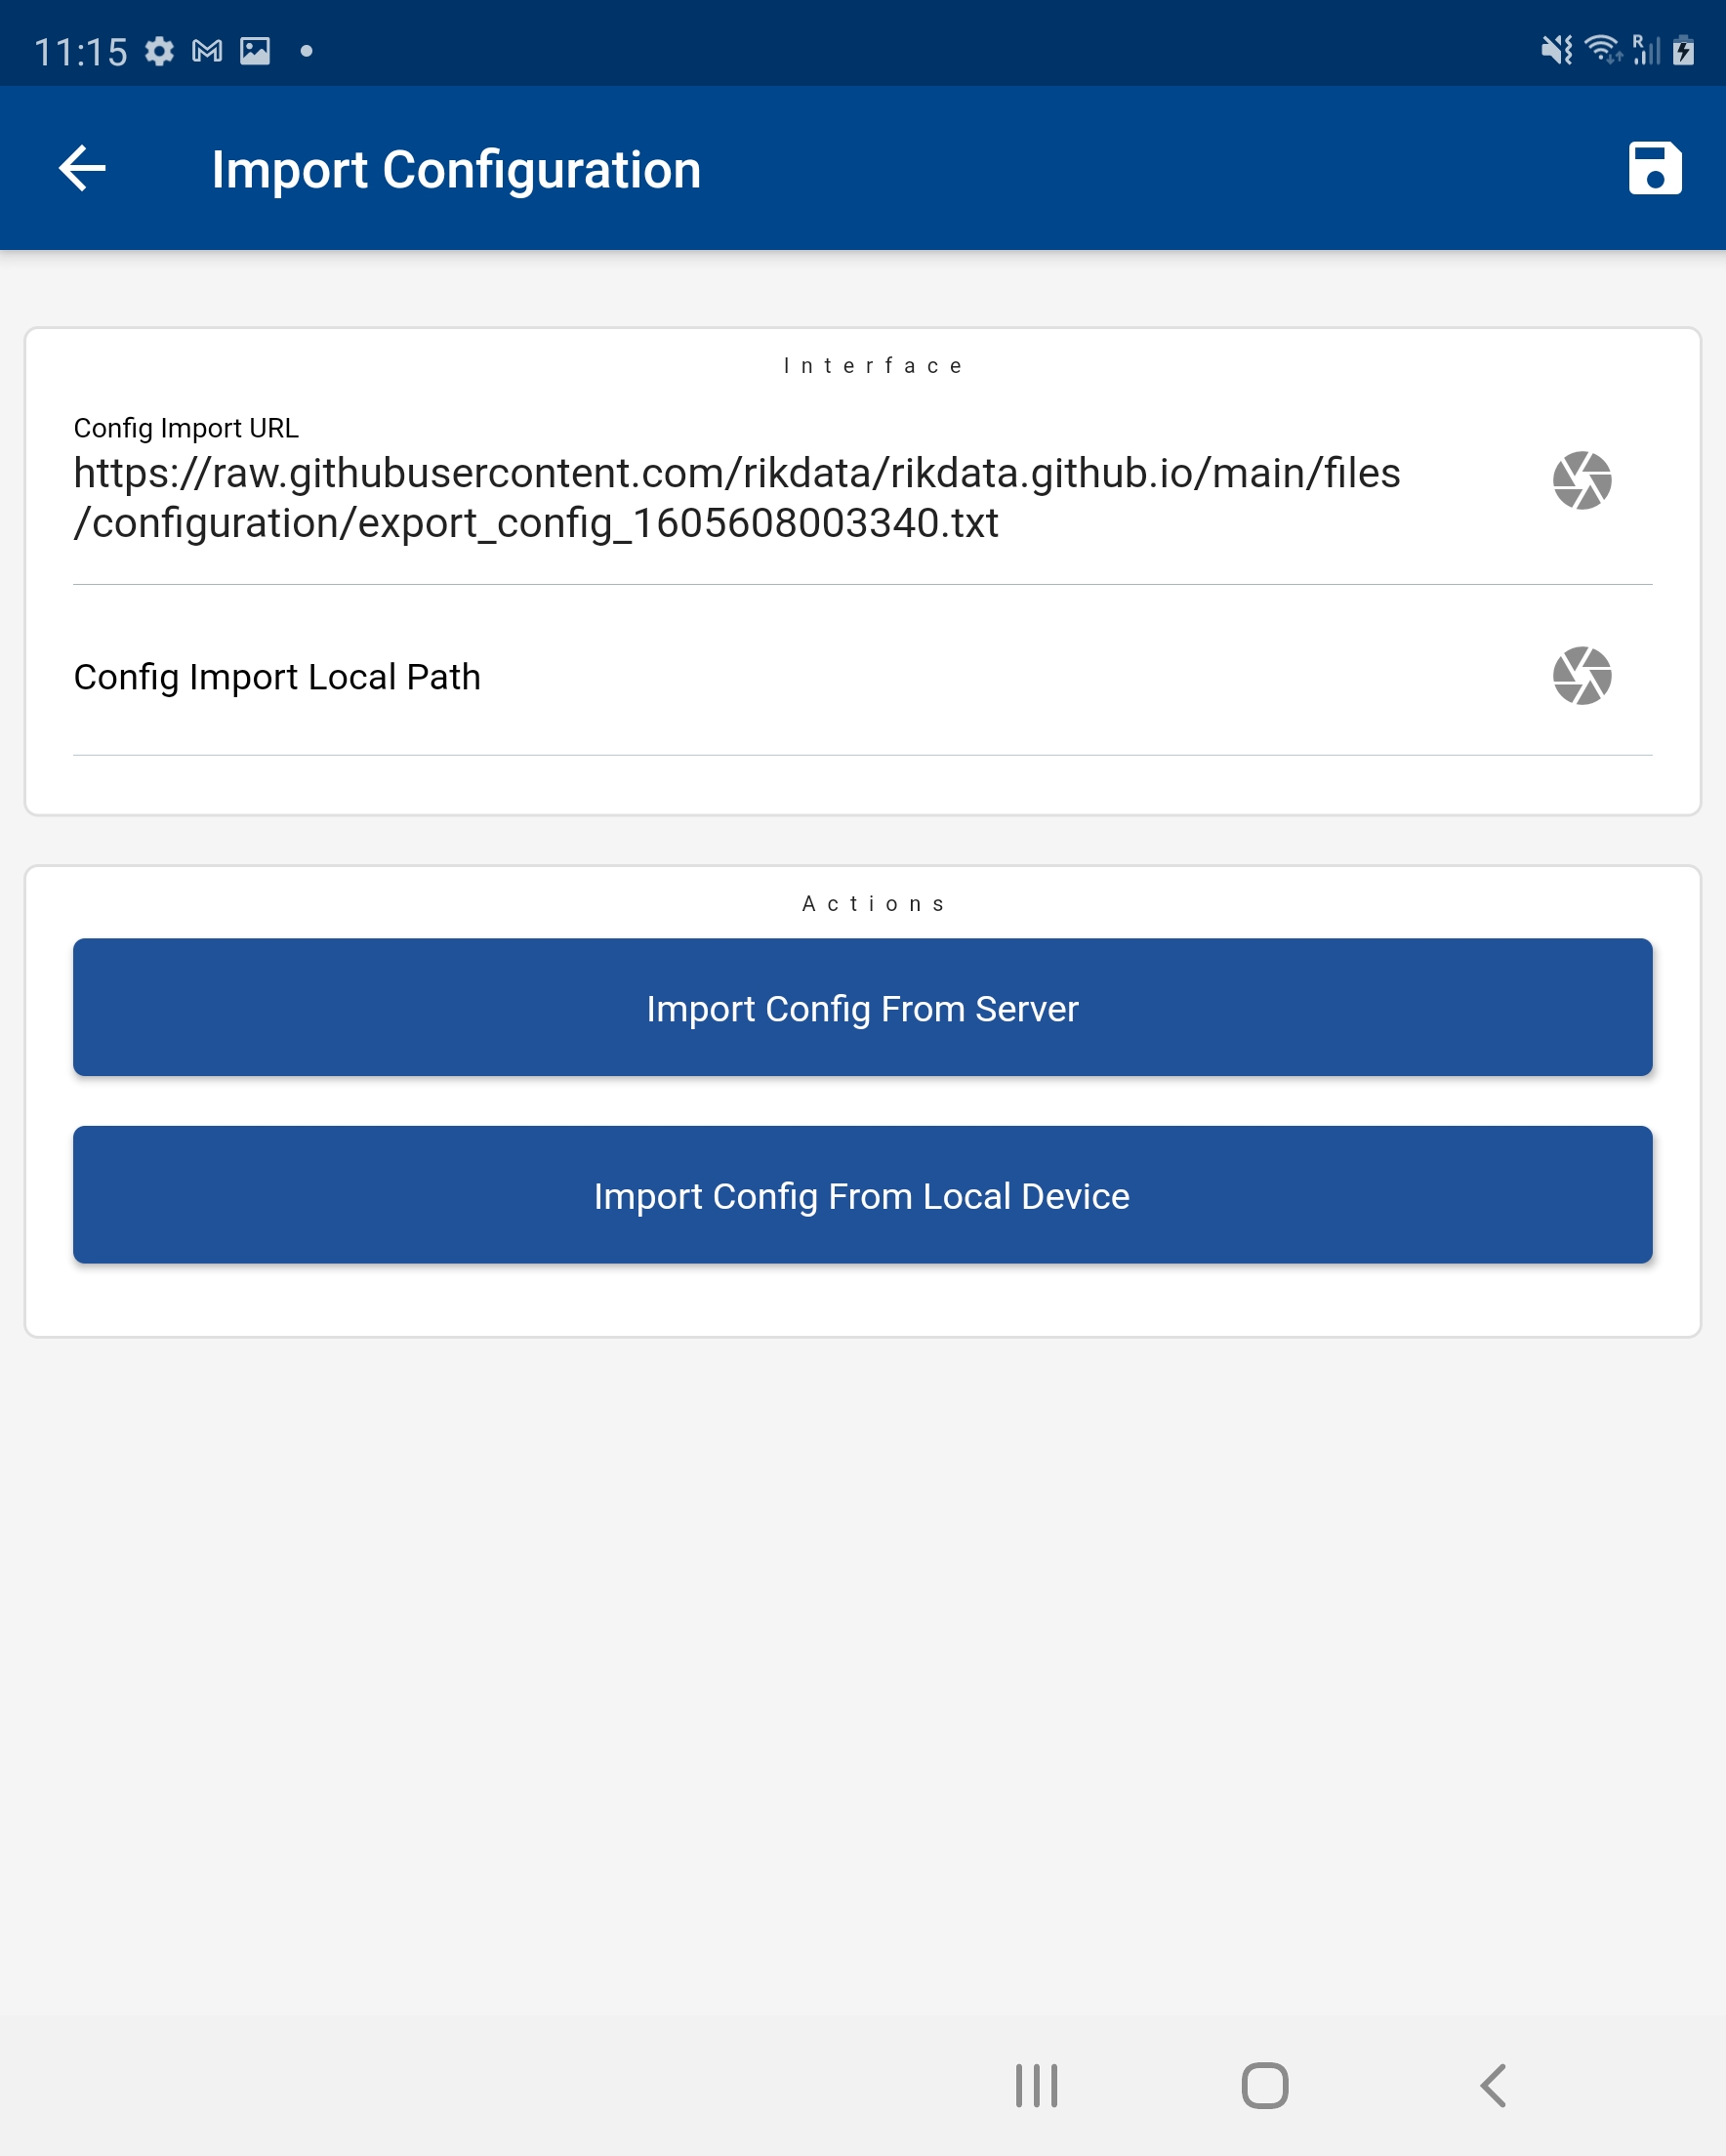
You can import the configuration file from your local folder (both on phones and on windows) or import it from an external server. Enter the path and tap/click on the corresponding button.
If you decide to upload the file to GitHub or any local server, make sure the get path sends the raw data. In the case of GitHub, share the raw file path, not the normal file path.
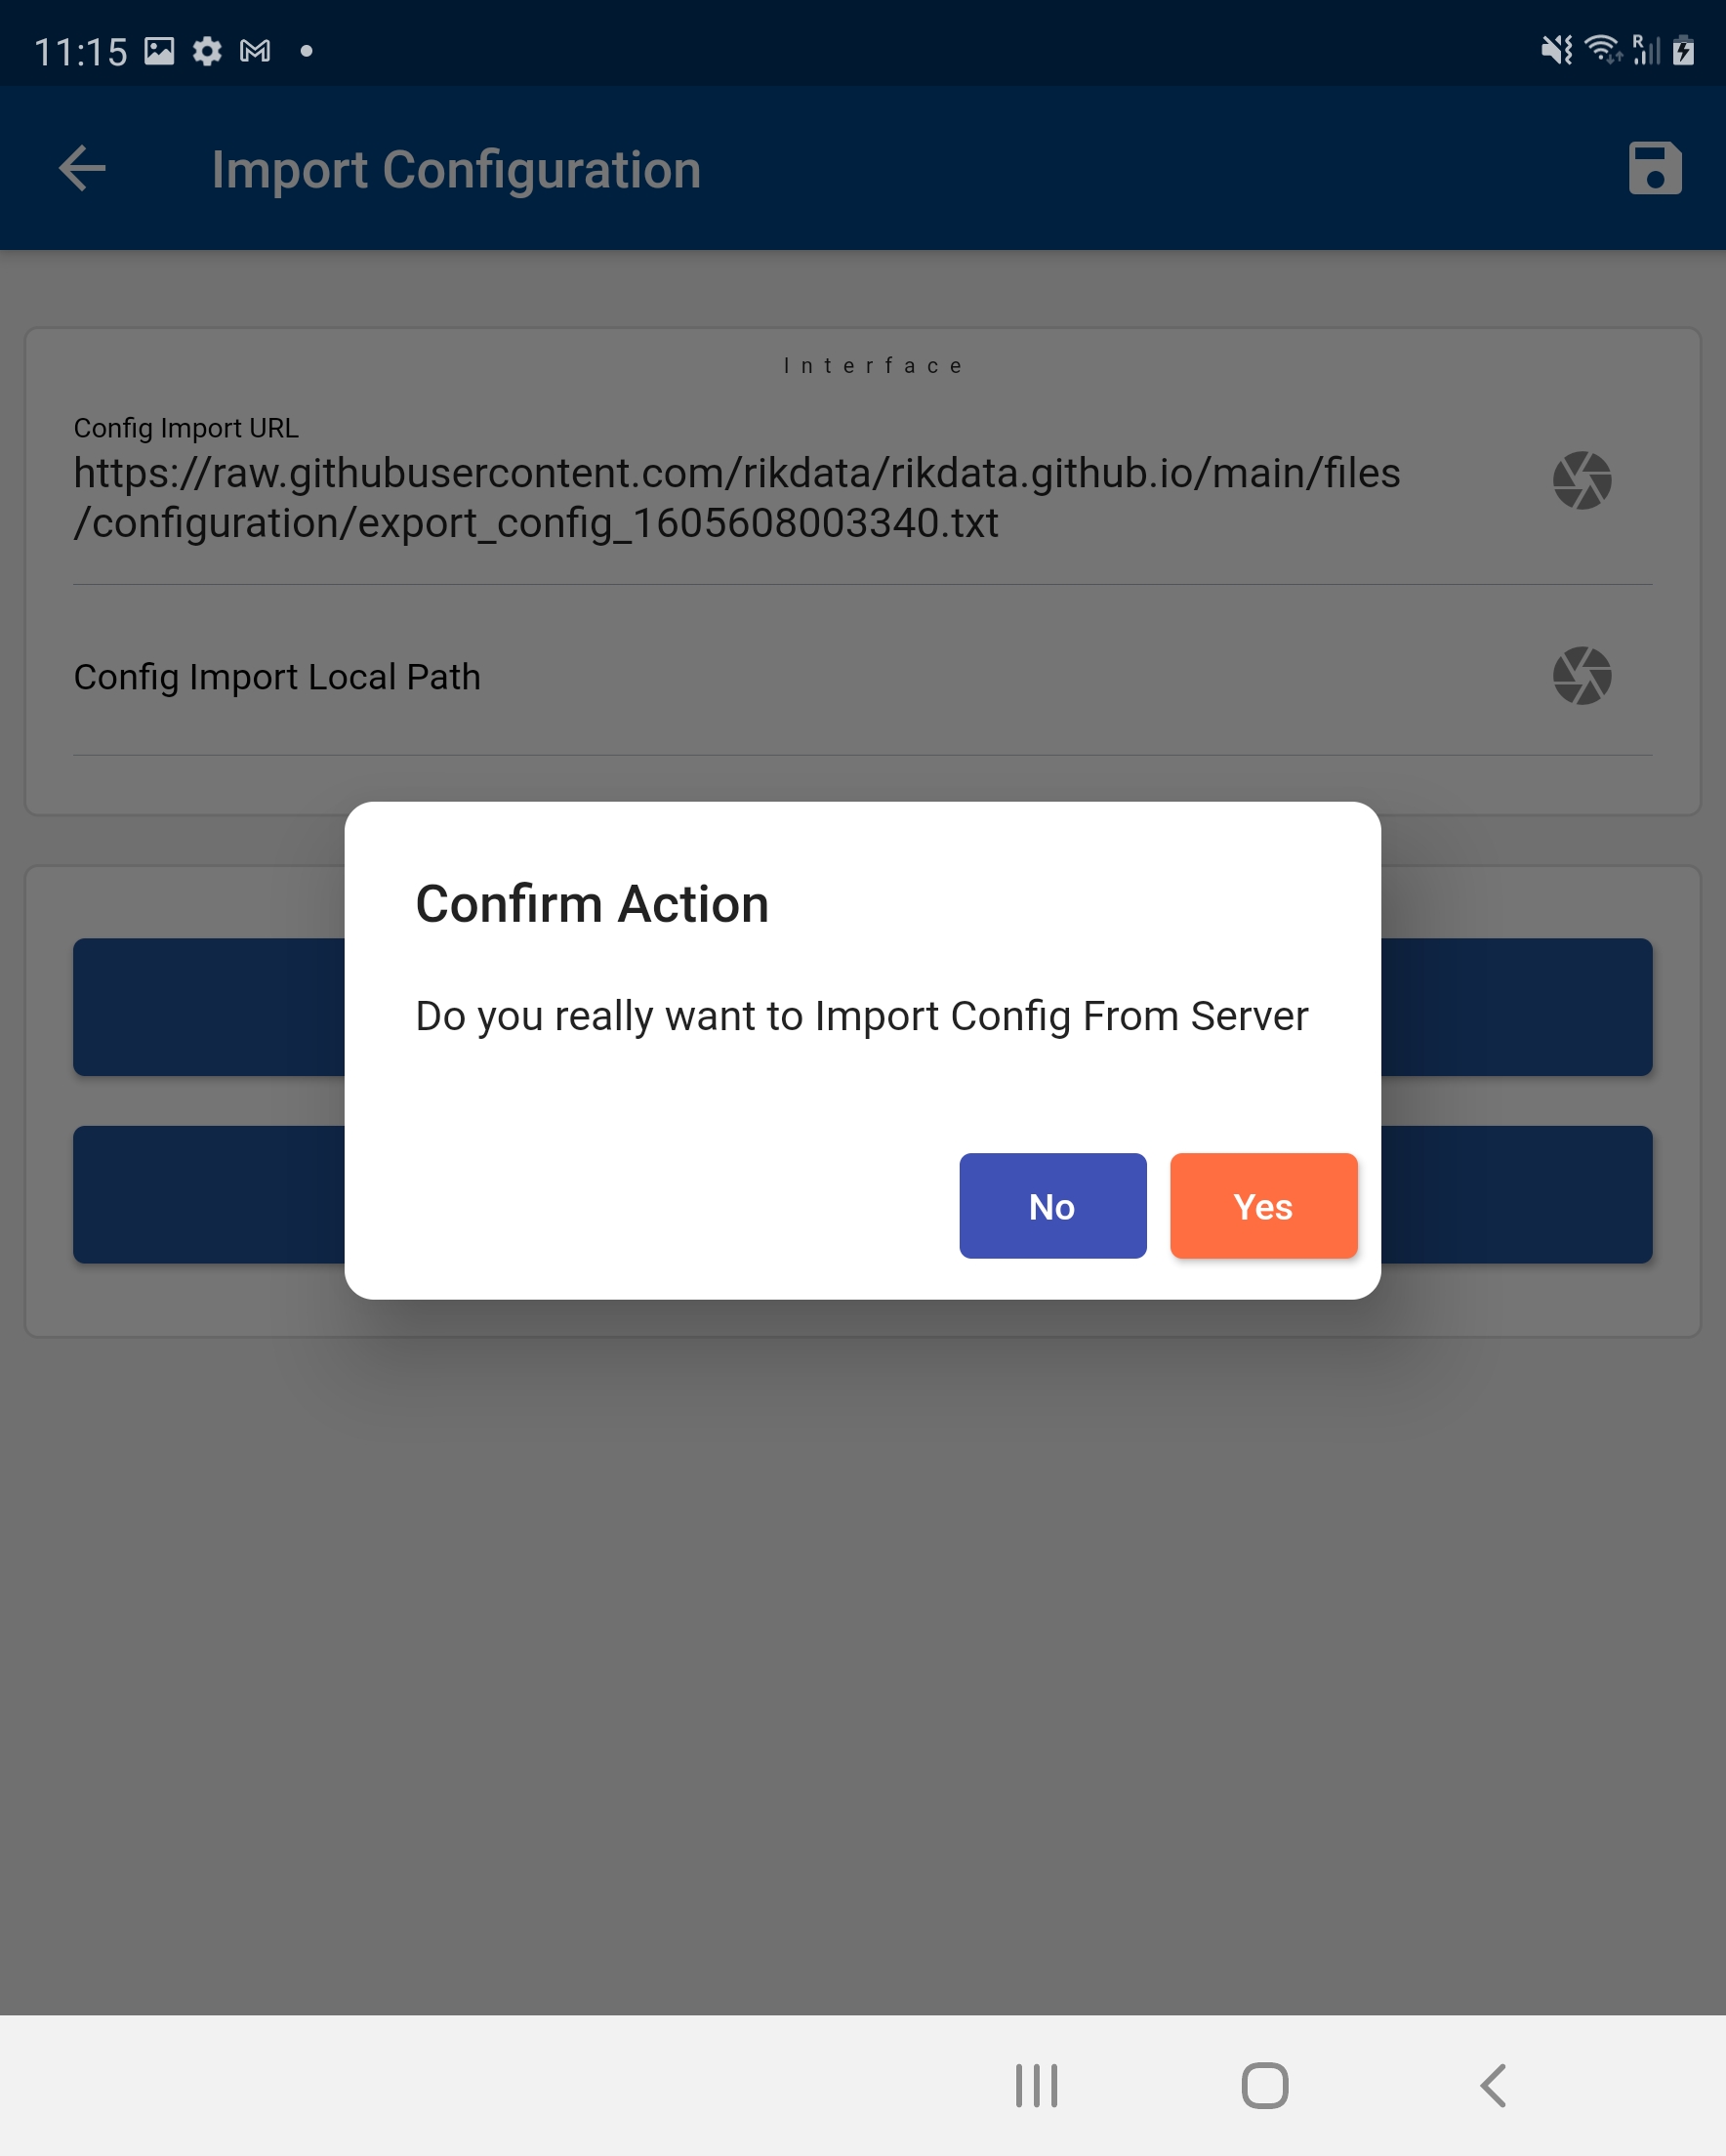
The app will ask for your confirmation. Click on Yes to start the configuration.
If you tap/click on "Create Default Configuration," then the app will take you to the below screen where you need to select the application name.
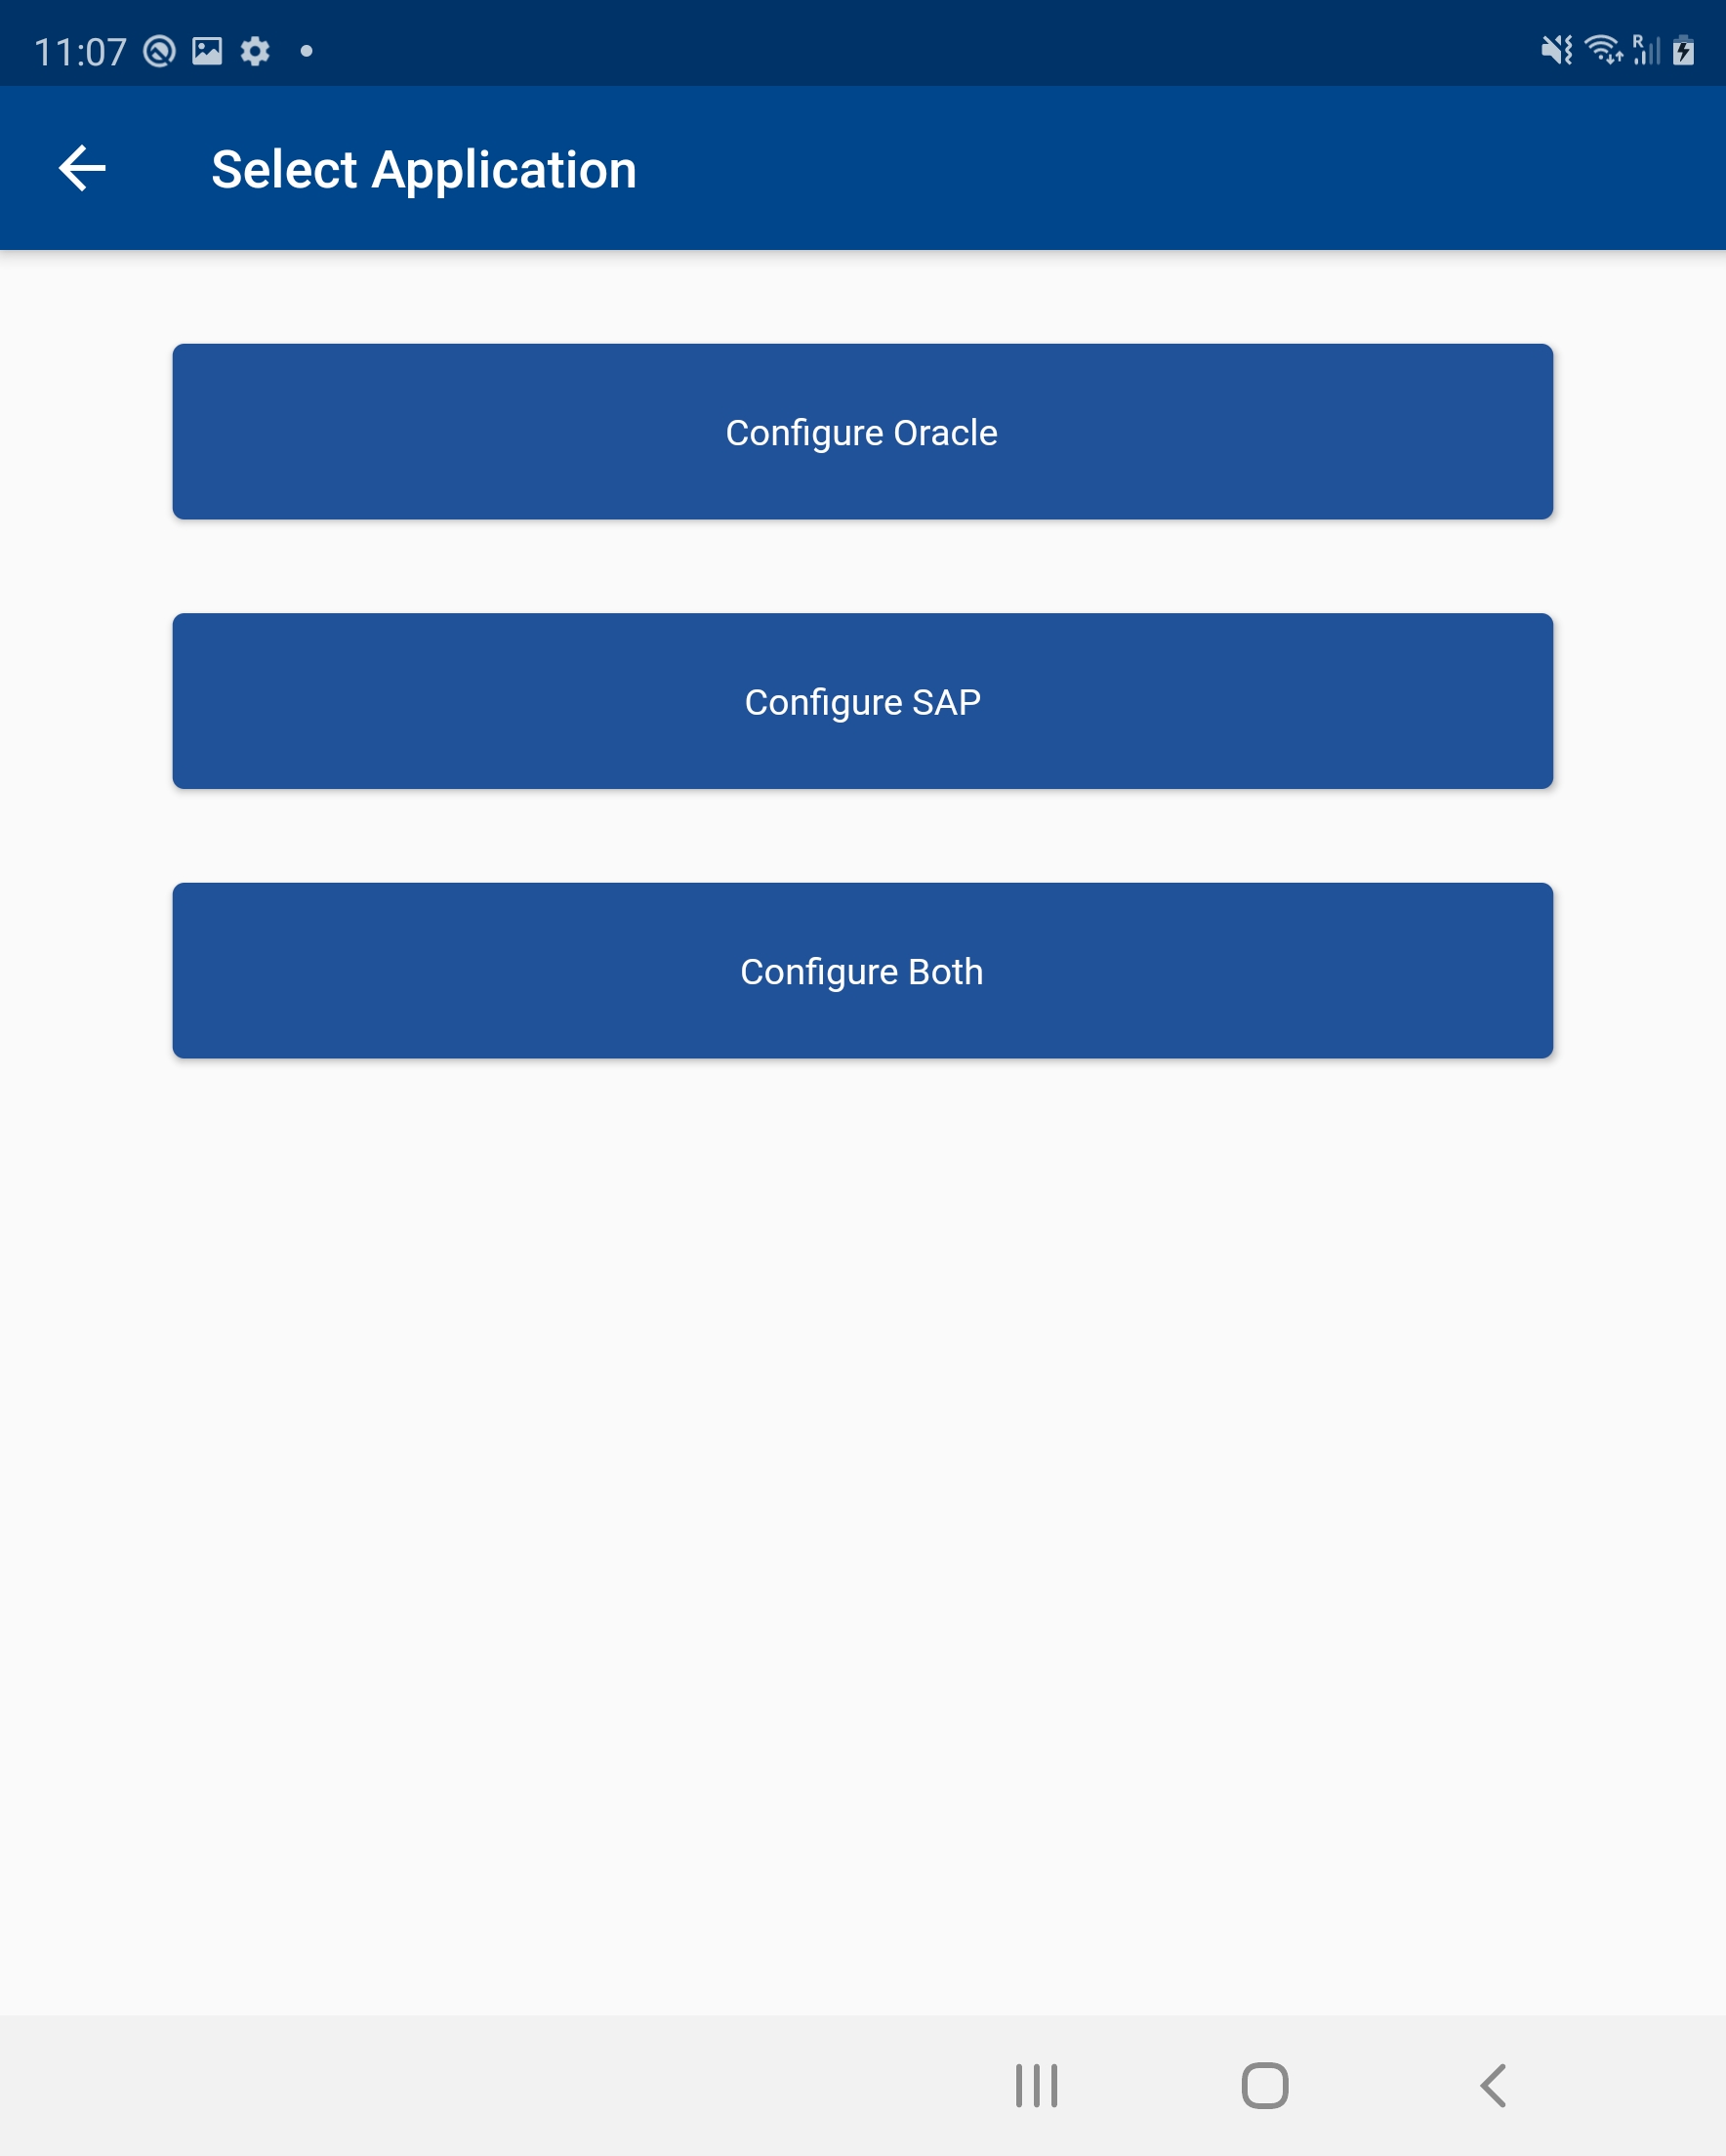
Tap/Click on the application name. If you want to configure both the applications, then tap/click on the "Configure Both" button.
The default configuration will load all the paths for Oracle Cloud Application and SAP Hana S/4 Cloud. Later, you can modify the configuration as per your business need. If you are responsible for configuration at your organization, you can configure all the forms, fields, charts, queries, etc. Export the configuration file and load it to a server (ex: github.com) from where all other users can import the configuration
Once the configuration is complete, the app will take you to the login screen.

The default configuration for both the applications (SAP & Oracle) can take up to 3-4 minutes. However, a custom configuration usually will take less time, depending upon the number of configurations the app needs to complete.
Default configuration times on some devices
* Galaxy Fold 2 - 20 Seconds
* Samsung Galaxy S7 - 110 Seconds
* Nexus 10 - 130 Seconds
* iPhone 11 - 80 Seconds
* Windows 10 Pro OS (8GB RAM) - 35 Seconds
Login
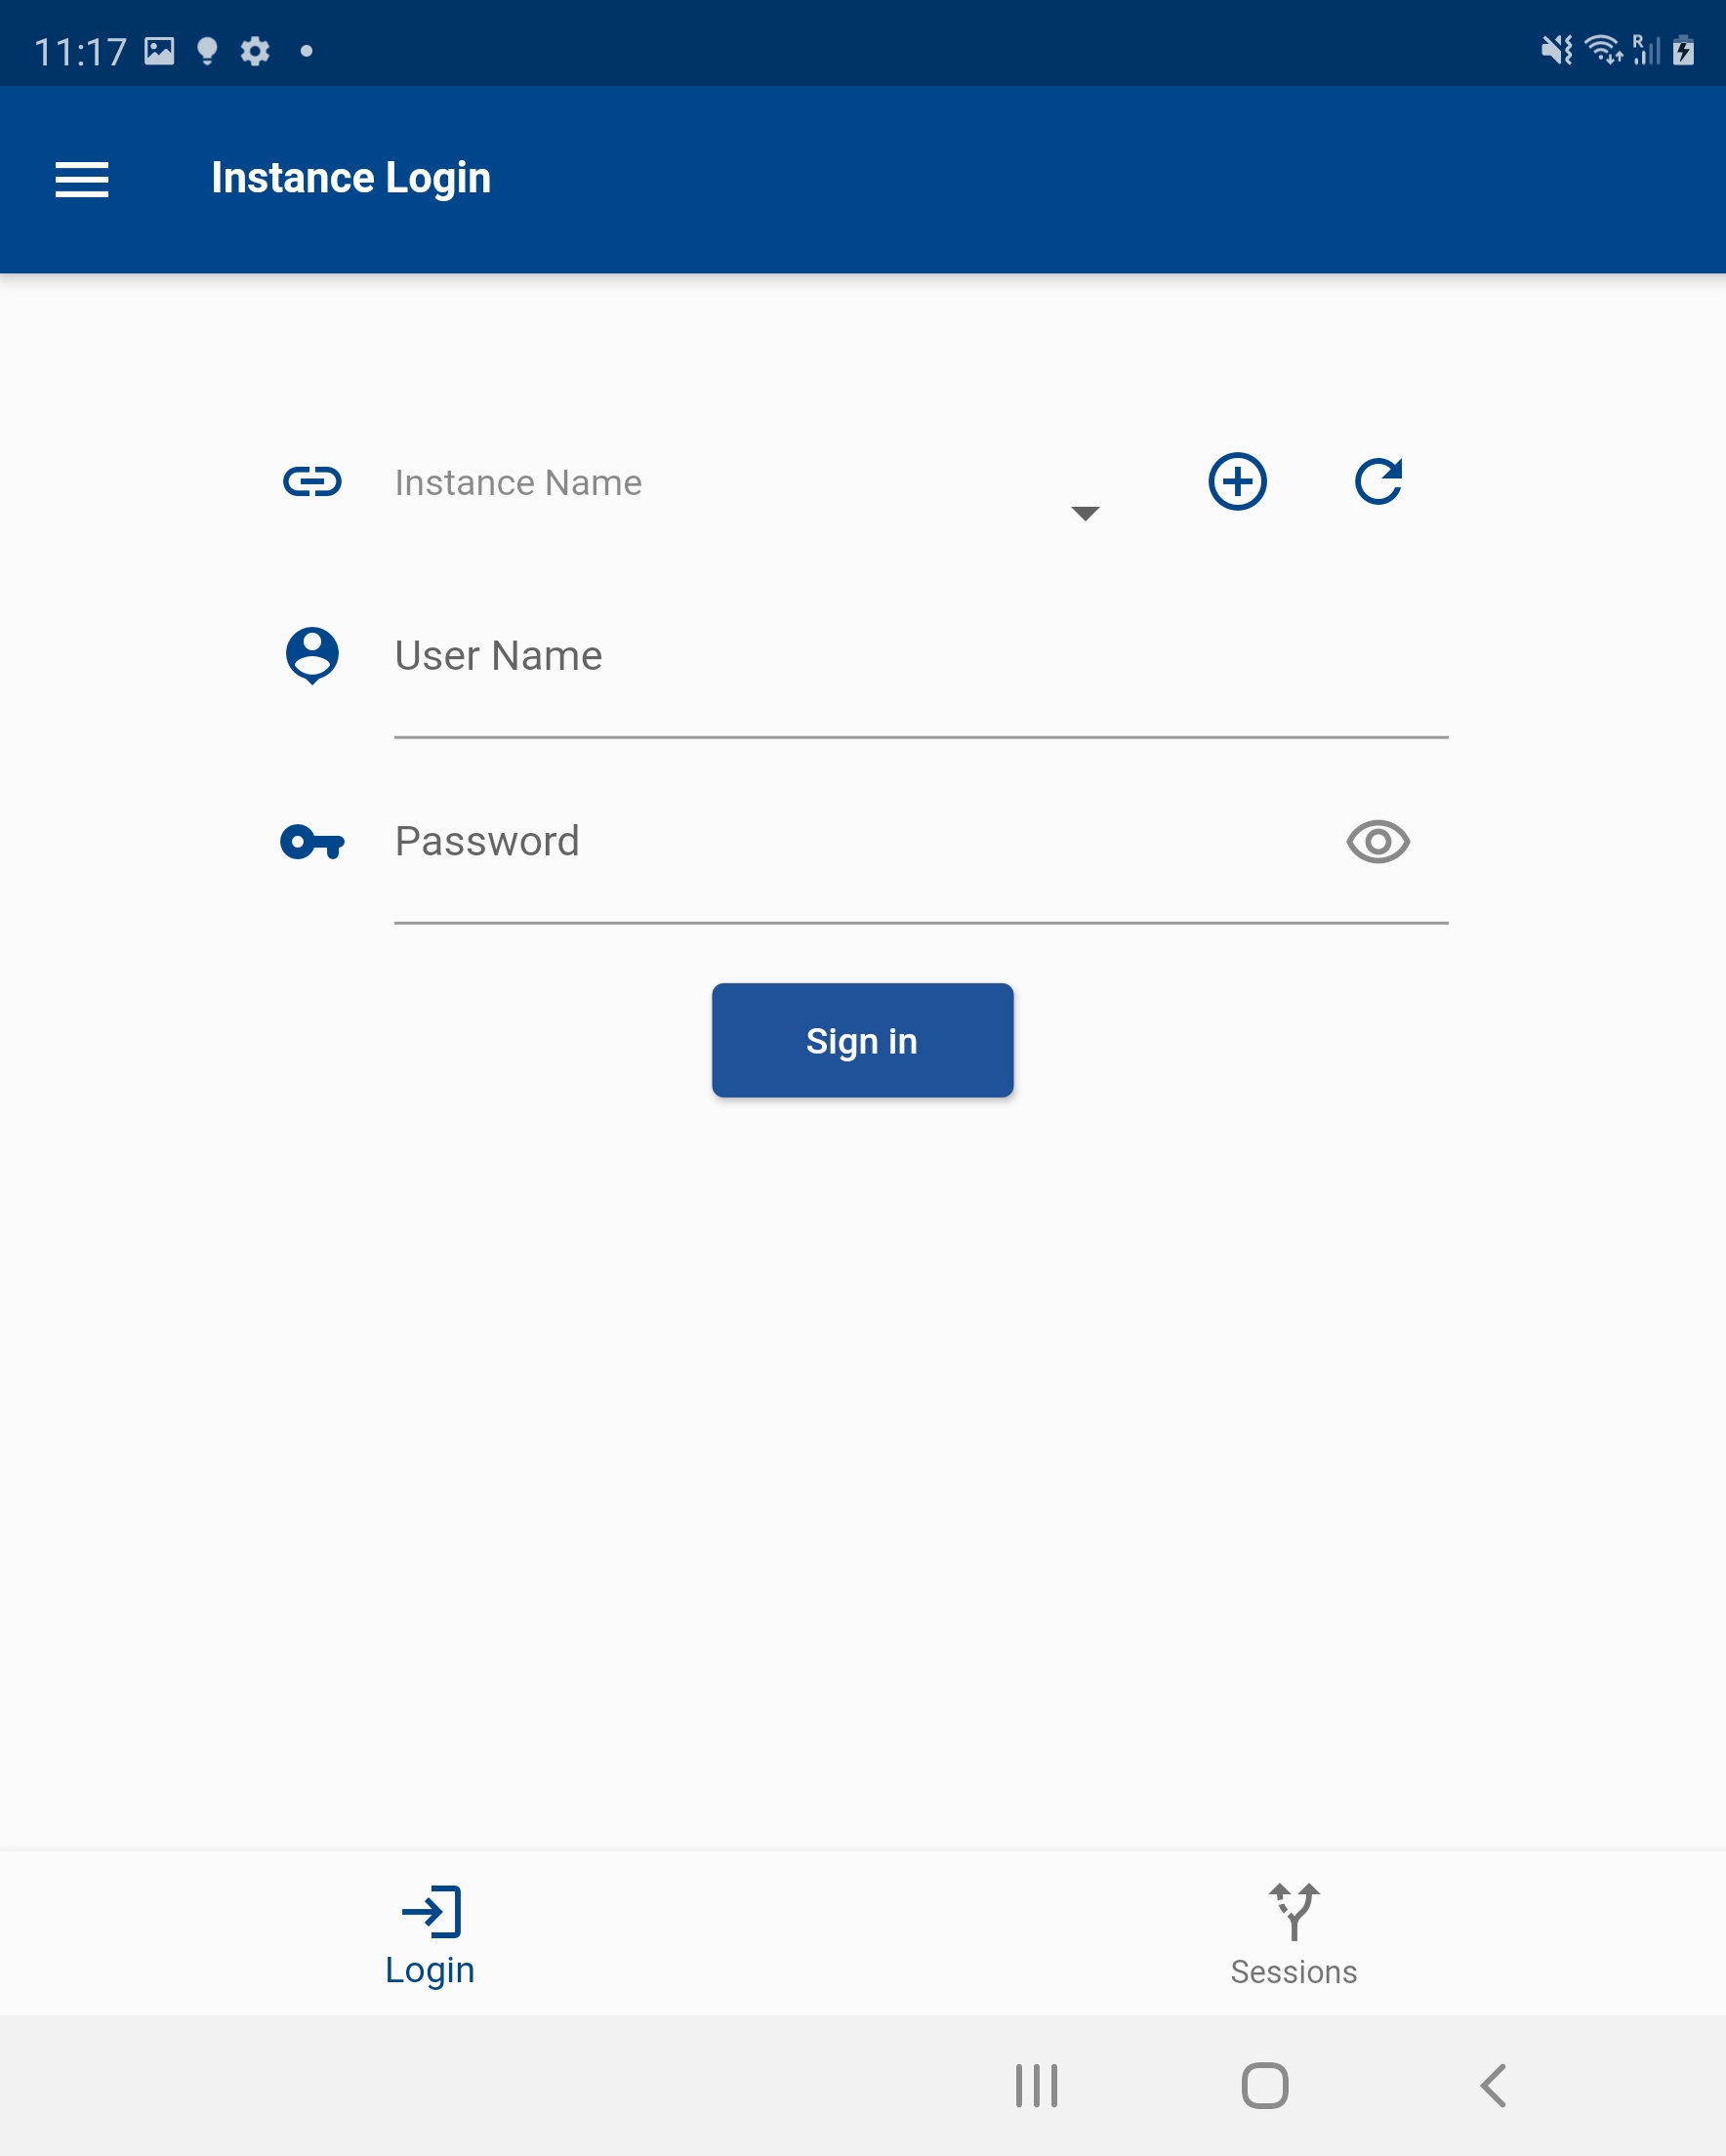
To login
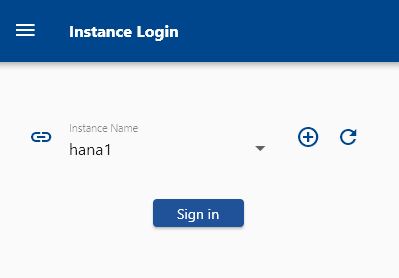
- Select an instance
- Enter your username
- Enter your password
Click on login.
If you have used the default configuration, then the app will show a few demo instance details. You need to modify the instance details before trying to login. If you have used custom configuration, your admin would have configured all the required instances for you. So, you can ignore the below steps.
Demo Mode
You can run the application in demo mode to preview all the menus, forms and configure various entities without using any username/password. To use the app in demo mode, select the demo instance on the login screen.

If you select the demo instance (or SAP sandbox instance), the app will remove the username and password fields. Click on the Sign-in button to login into the app in demo mode.

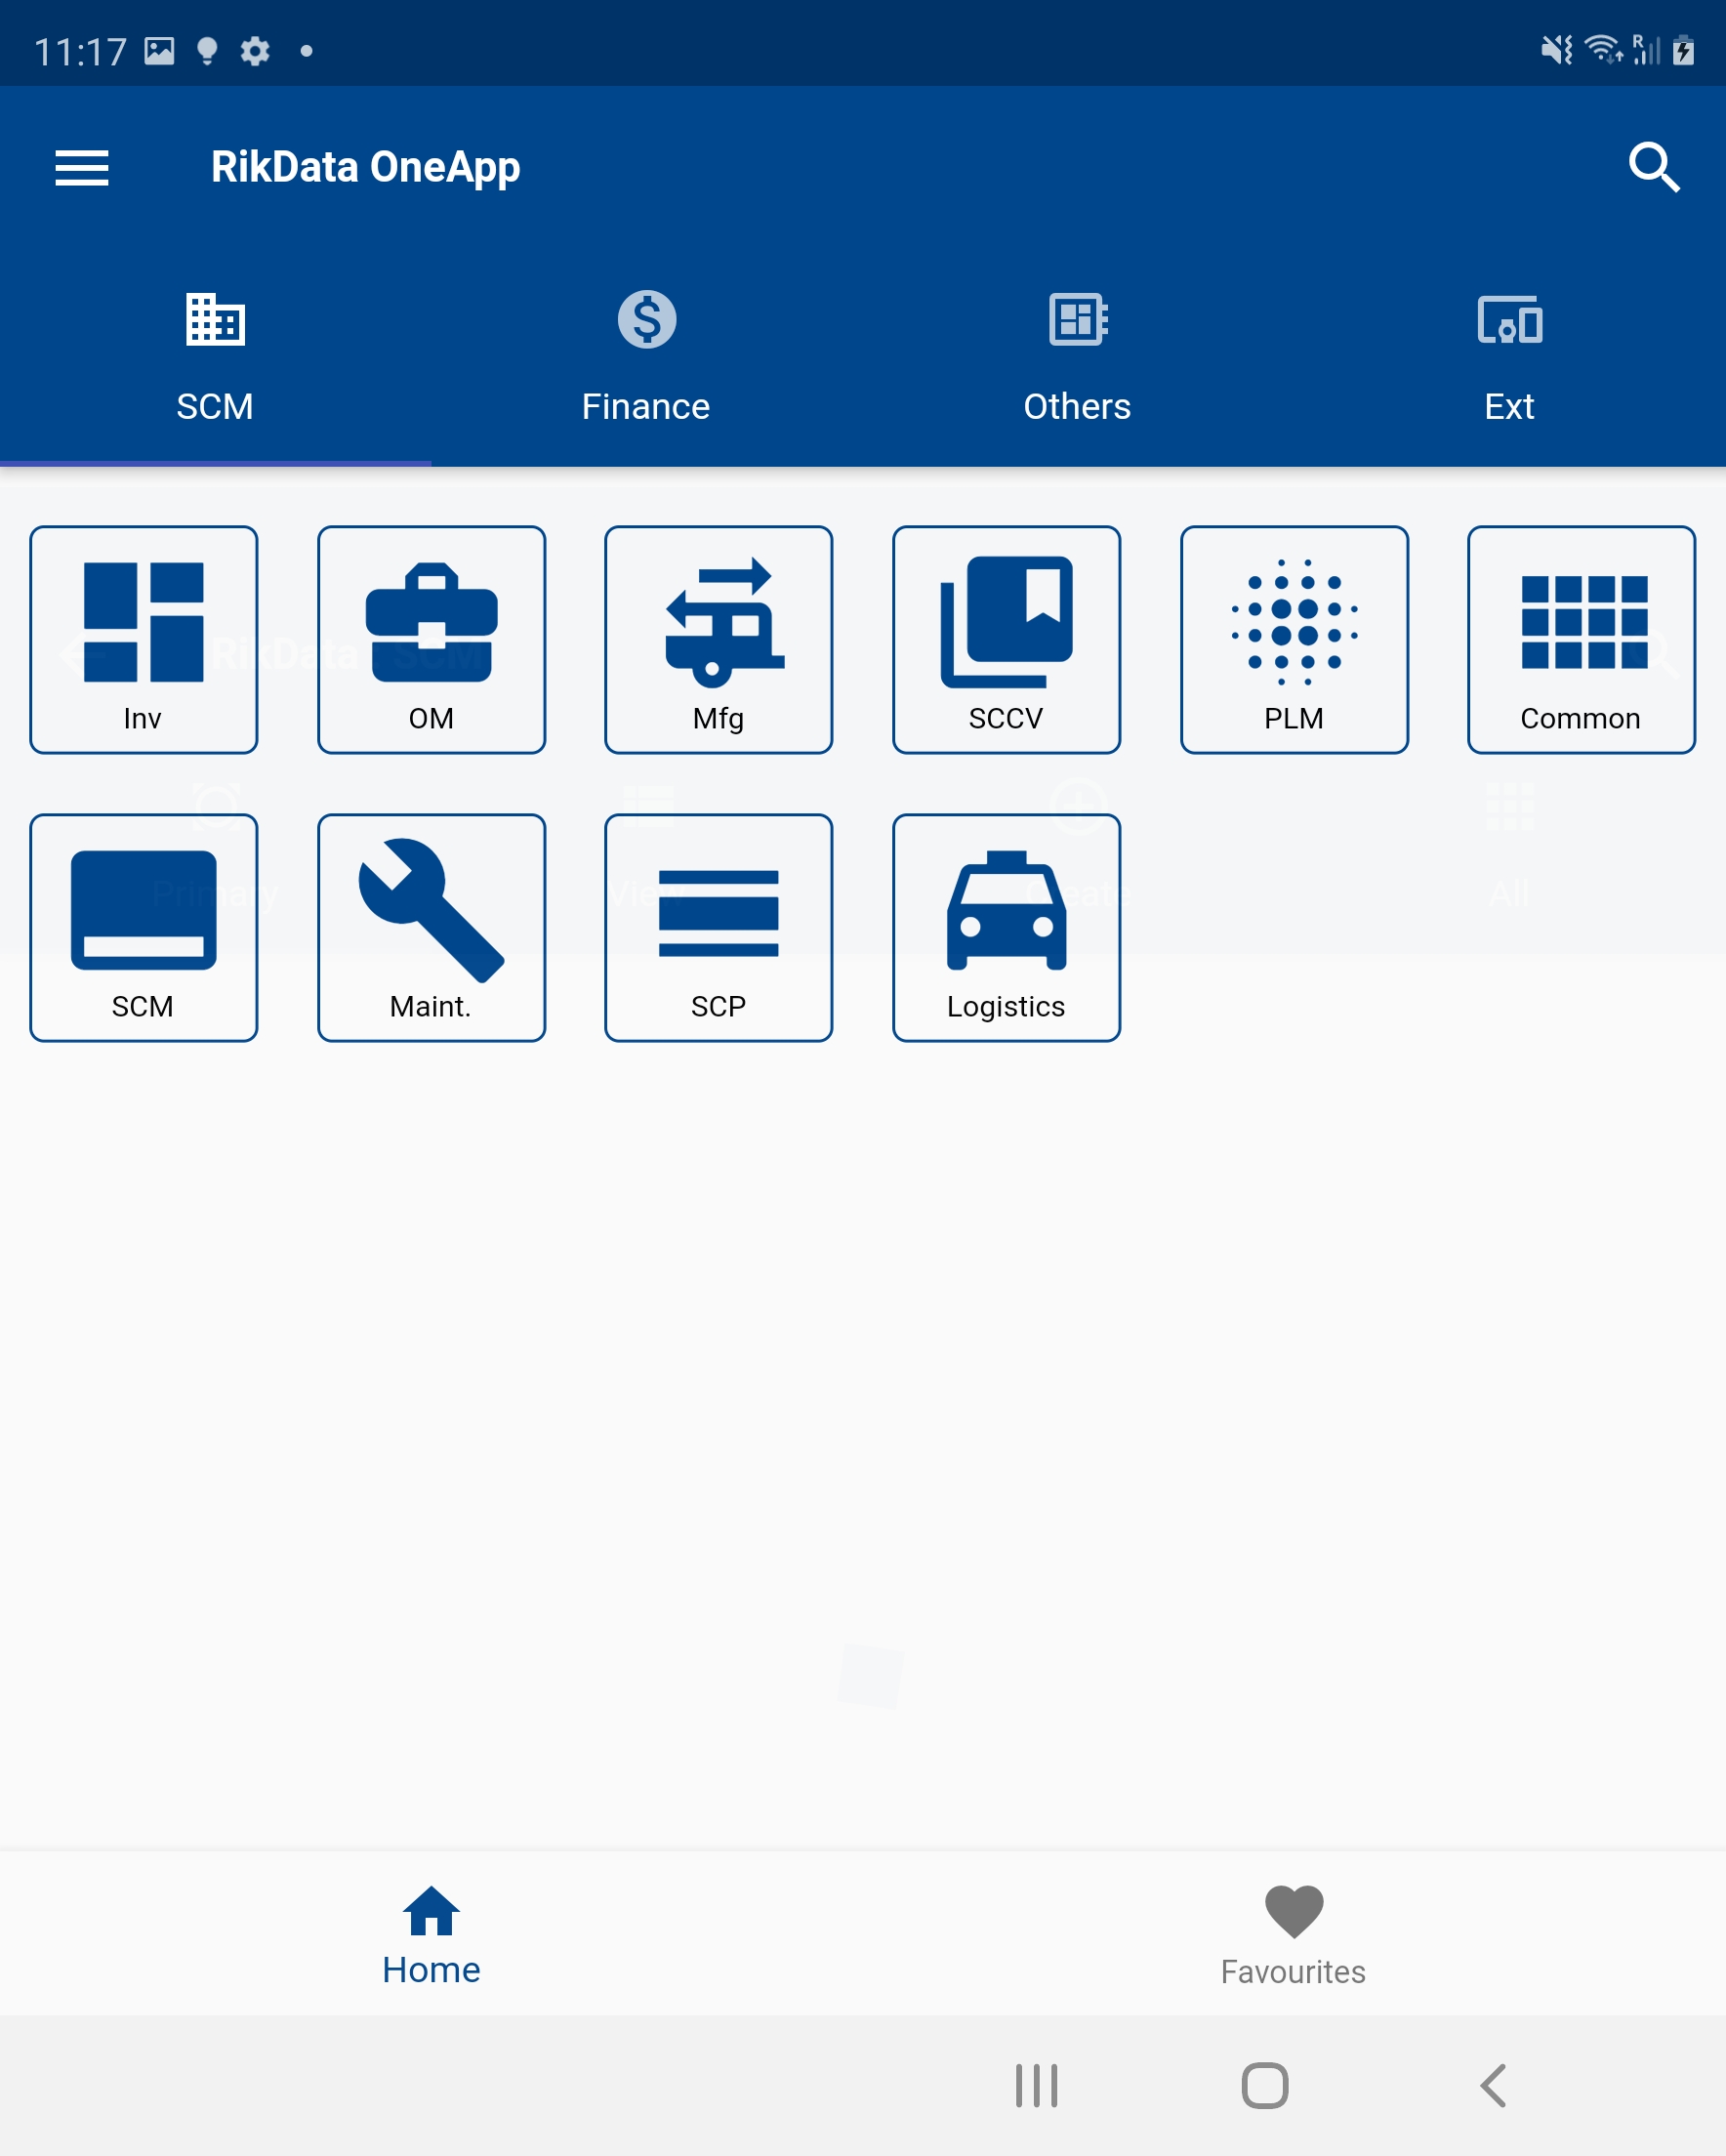
The app will take you to your default dashboard. You can select one of the sedded SAP/Oracle dashboards as your default dashboard in the settings screen.
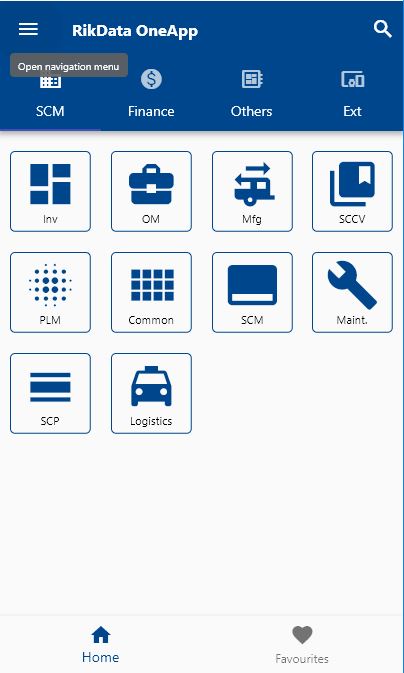
You can click on any module icon to view all the menus/entities available in that module.

You can click on any menu to navigate to the corresponding search form. In demo mode, you cant search any data as the app is not connected to any instance. SAP provides a sandbox instance where anyone can view data from a test environment. You can use that instance to view all SAP related functionality without using your own instance. Unfortunately, Oracle does not provide any such features. So, you need to have access to an instance to test OneApp features with Oracle Cloud Application.
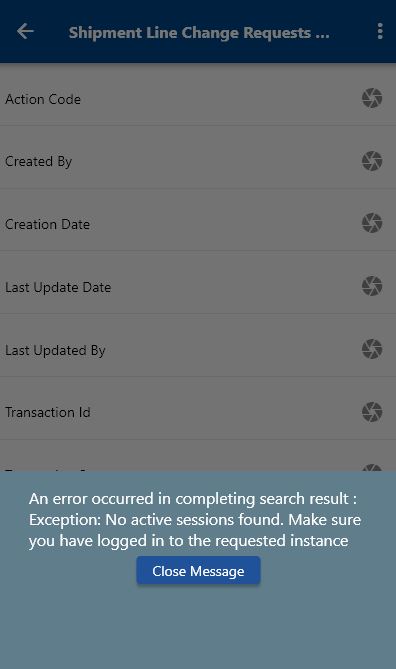
If you try to search any document in demo mode, the app will show you the above error message.
Instance Setup
Click on the plus sign on the login page, and the app will take you to the instance search screen.
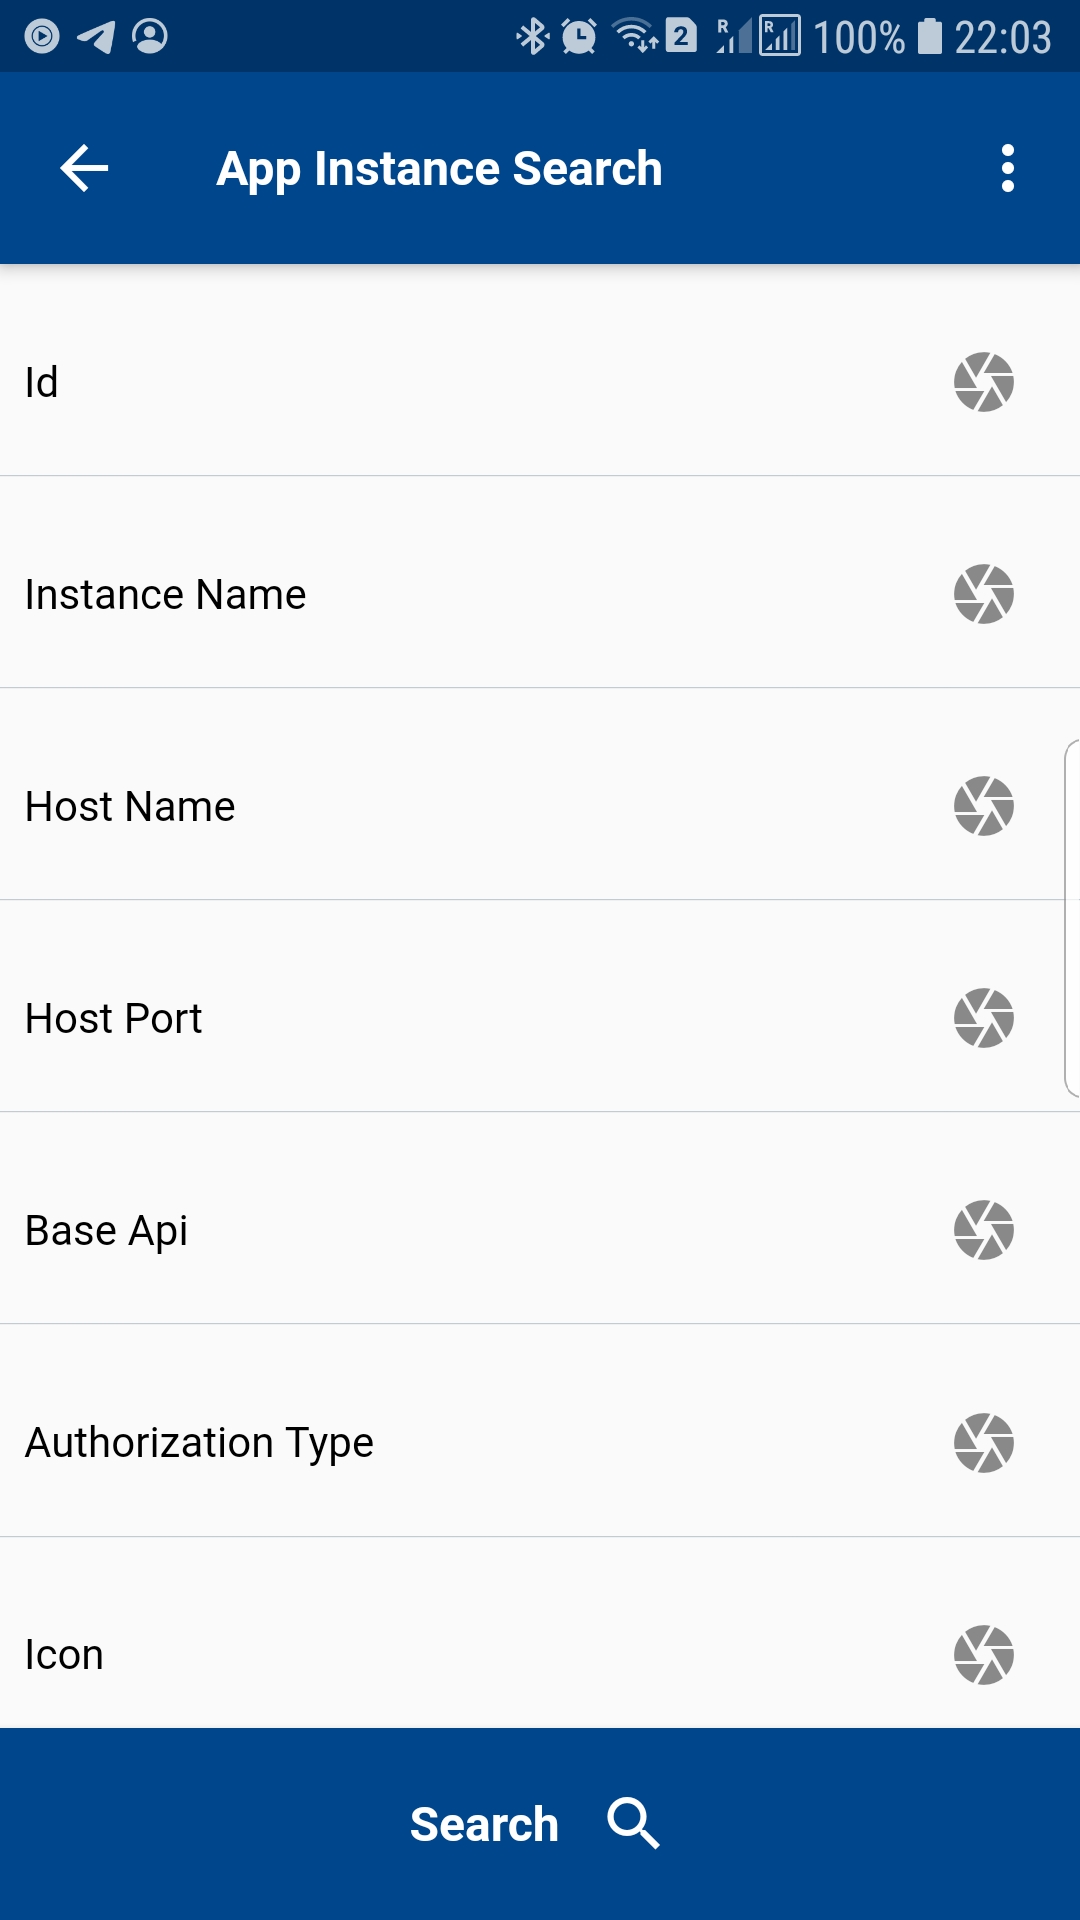
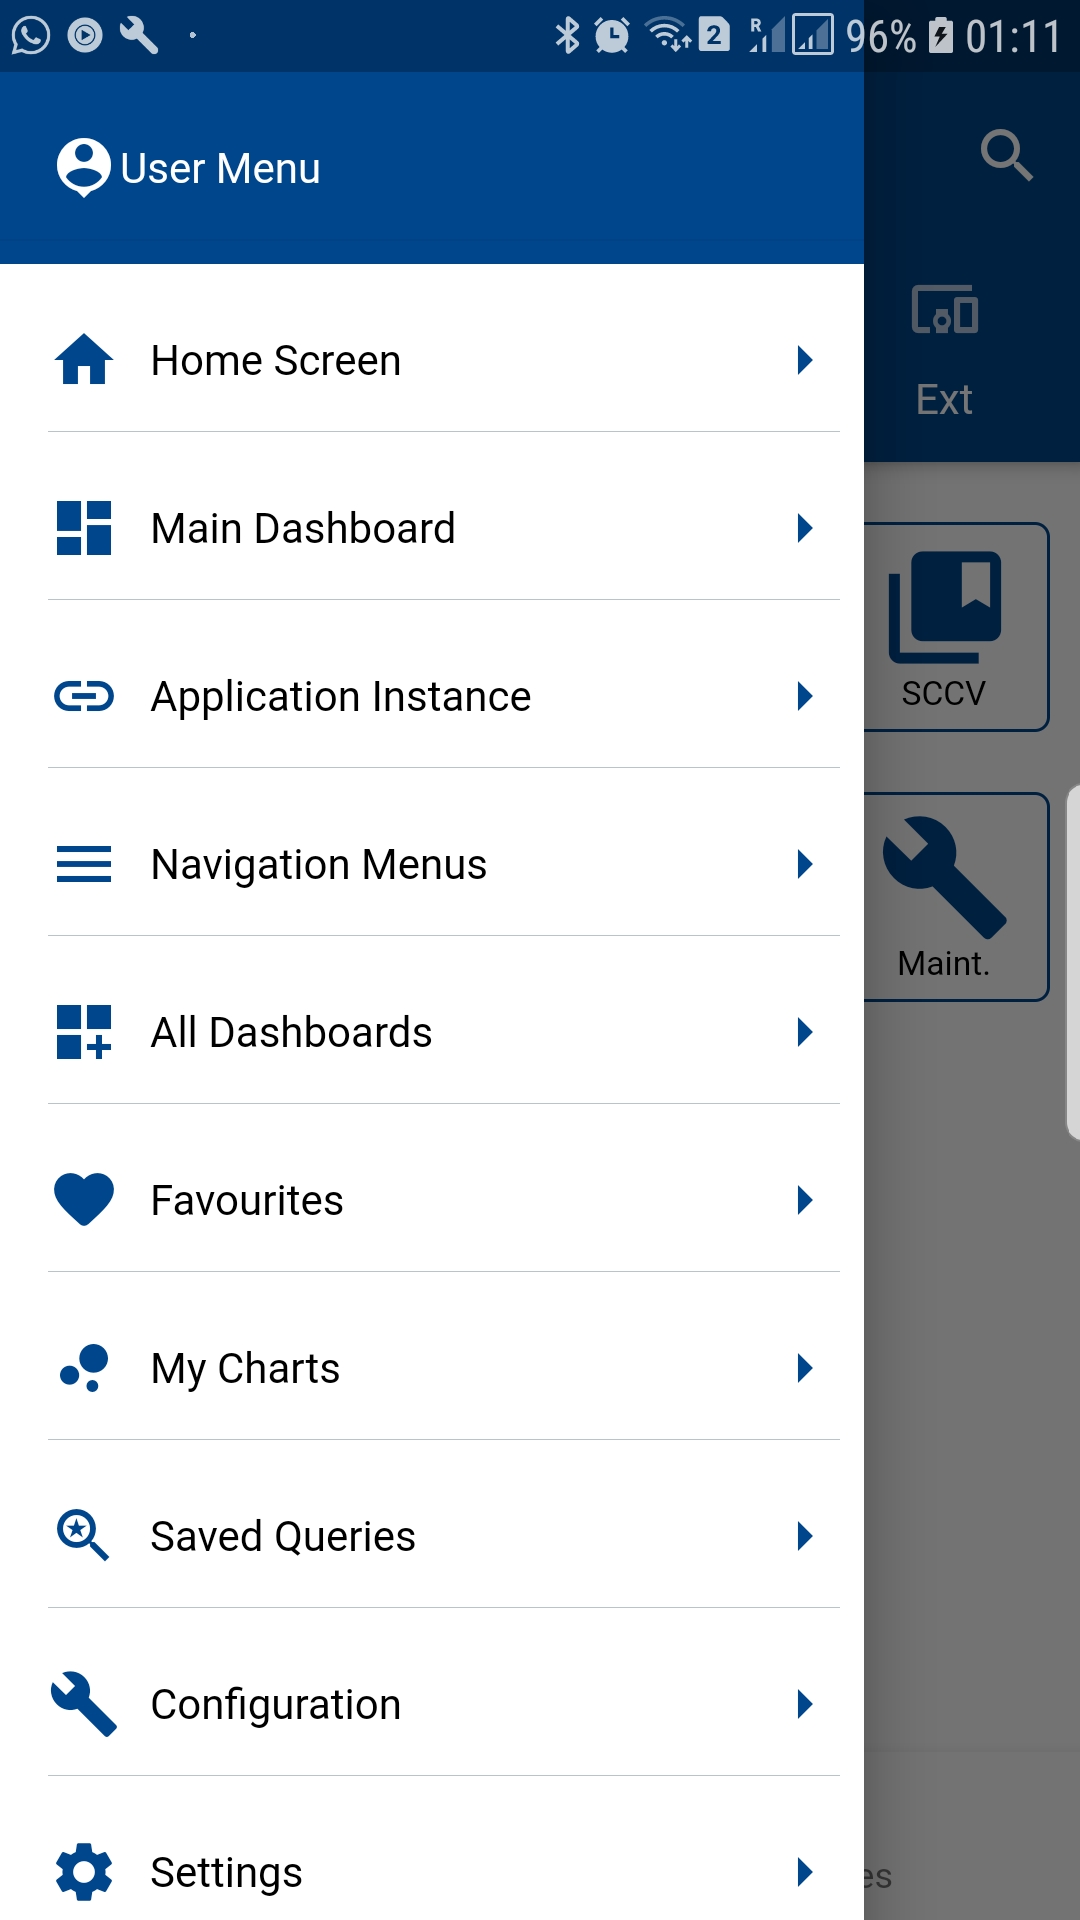
You can also navigate to the instance screen by clicking on Application Instance on the User menu.
Click on the search button to search all the existing instances. If you want to search a specific instance, then enter the corresponding instance details in the search fields and then click on the search button.
You can select the result format - table or list before clicking on the search button—the value defaults from your settings.
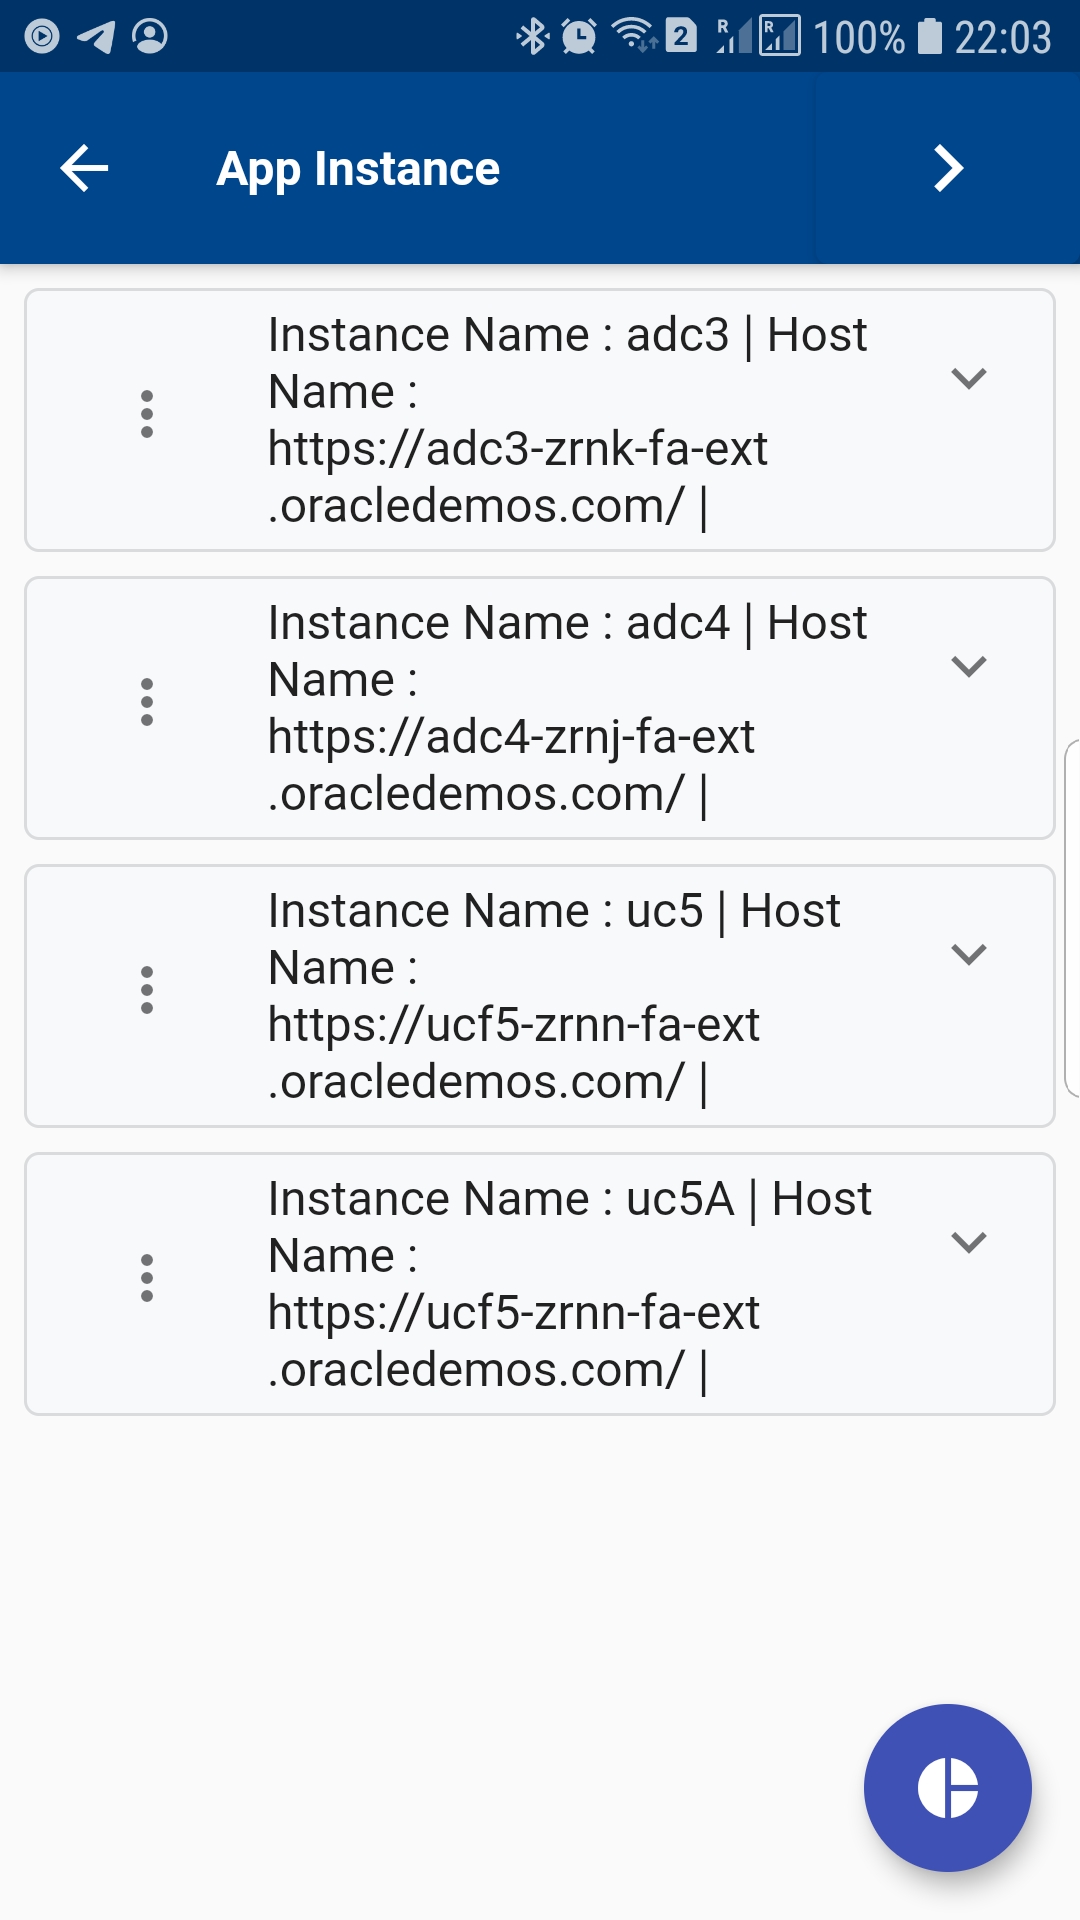
The app will take you to the result screen.
View/Edit an Instance
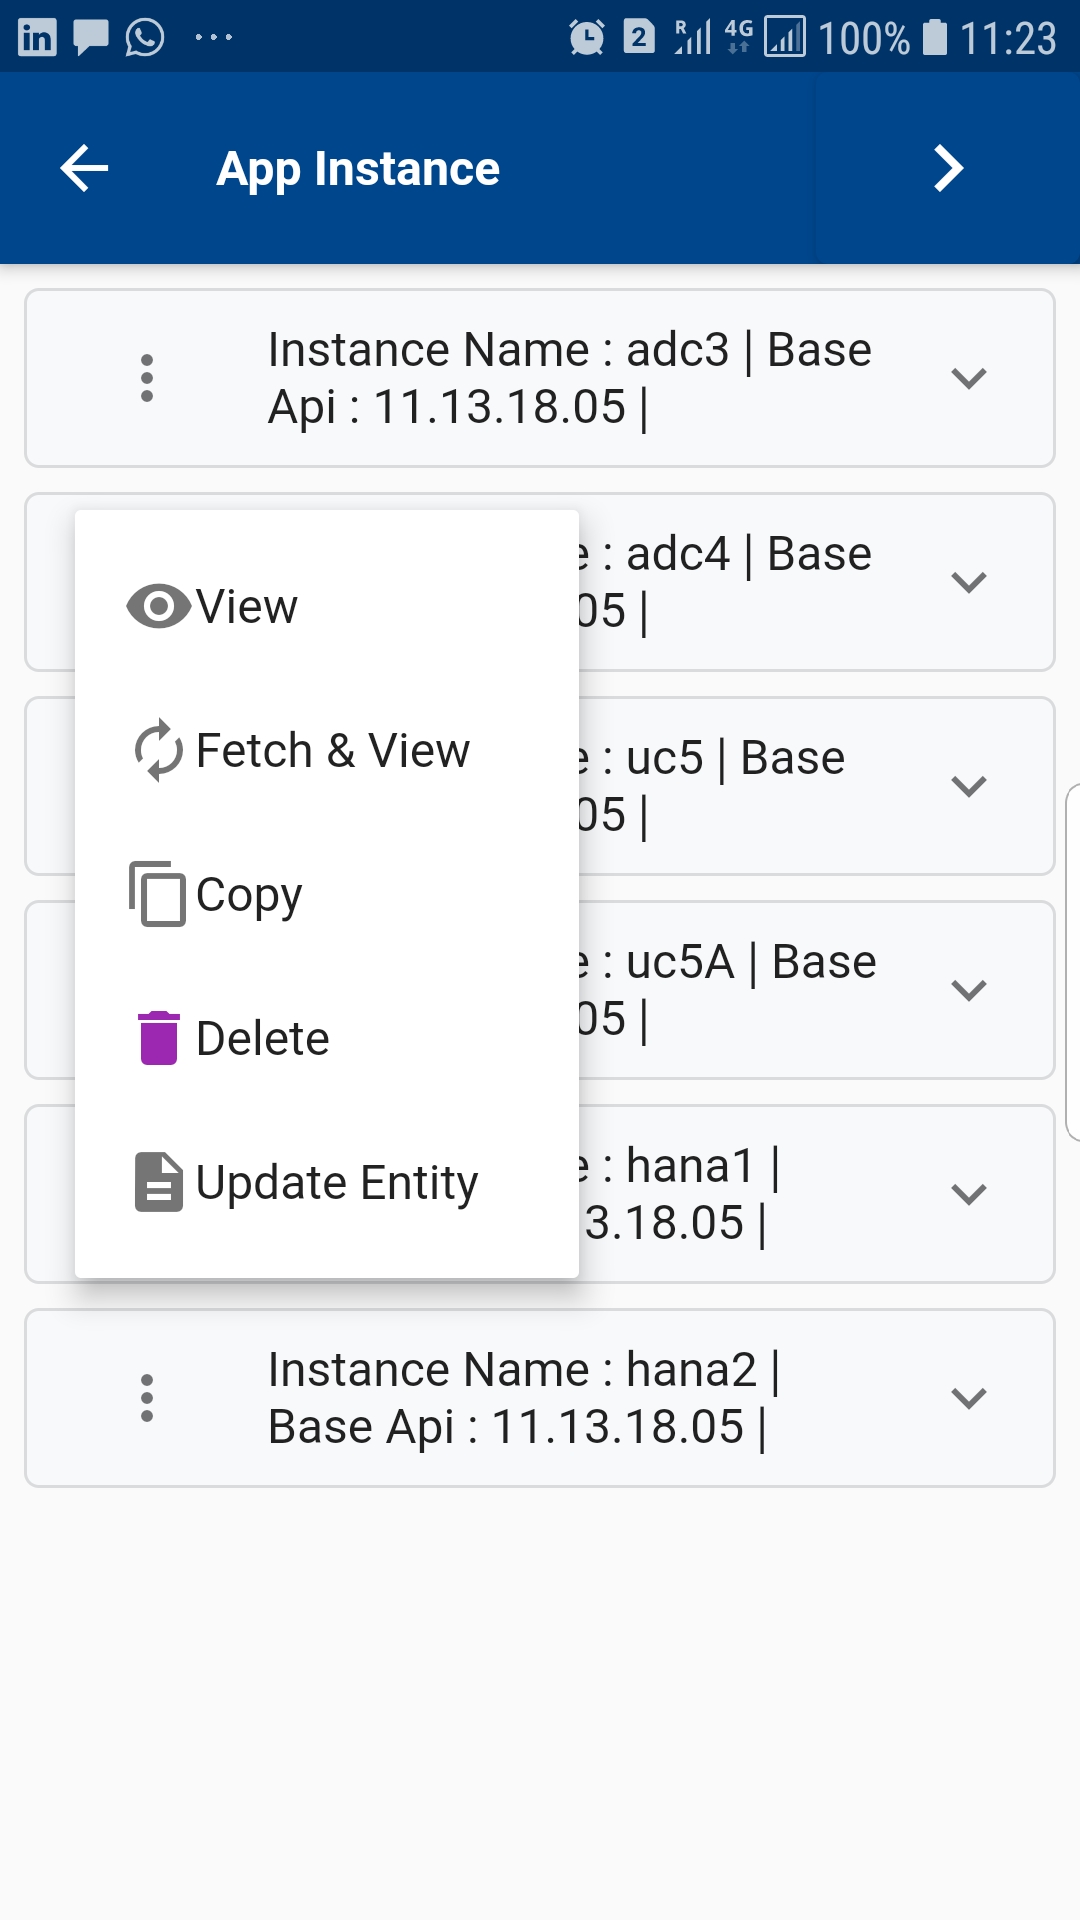
Click on View / Fetch-View to view and update the details of an instance. *There is no difference between View / Fetch-View, for instance, as all the data are stored locally. However, for documents and transactions (such as POs, WOs, Item., etc.) Fetch-View always fetches data from the server but View the first check if the data has been fetched for the current session. If it finds any existing data in the cache, then it shows the data.
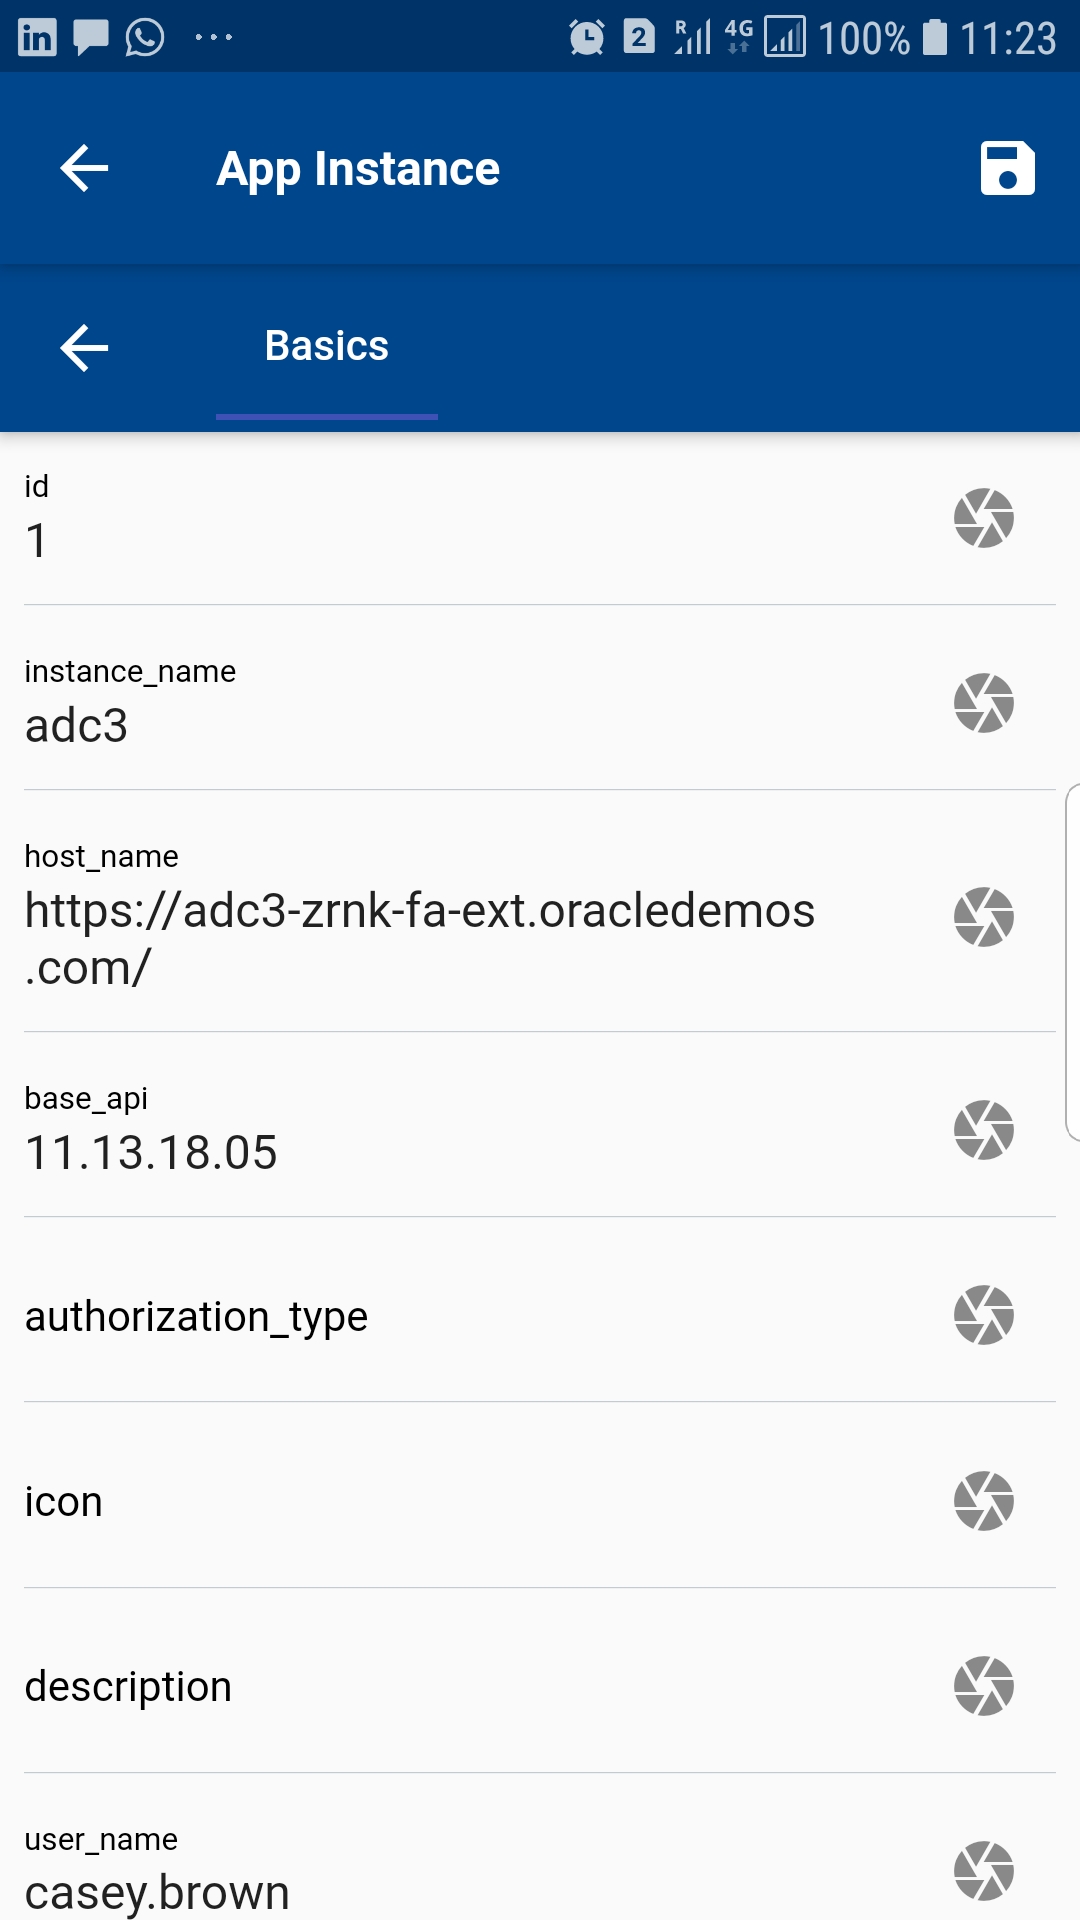
Review the details and make modifications as required. Click on the Save button at the top right corner to save the instance details. Click on the back buttons at the top to navigate back to the login screen to complete the login.
Copy an instance
To copy an instance, click on the copy button on the search result screen.
The app will copy all the details of the selected instance and will take you to the view/edit form. Enter/Modify all the required information and click on save
Delete an Instance
To delete an instance, click on the delete button on the search result screen.
The app will show you a confirmation dialog box.
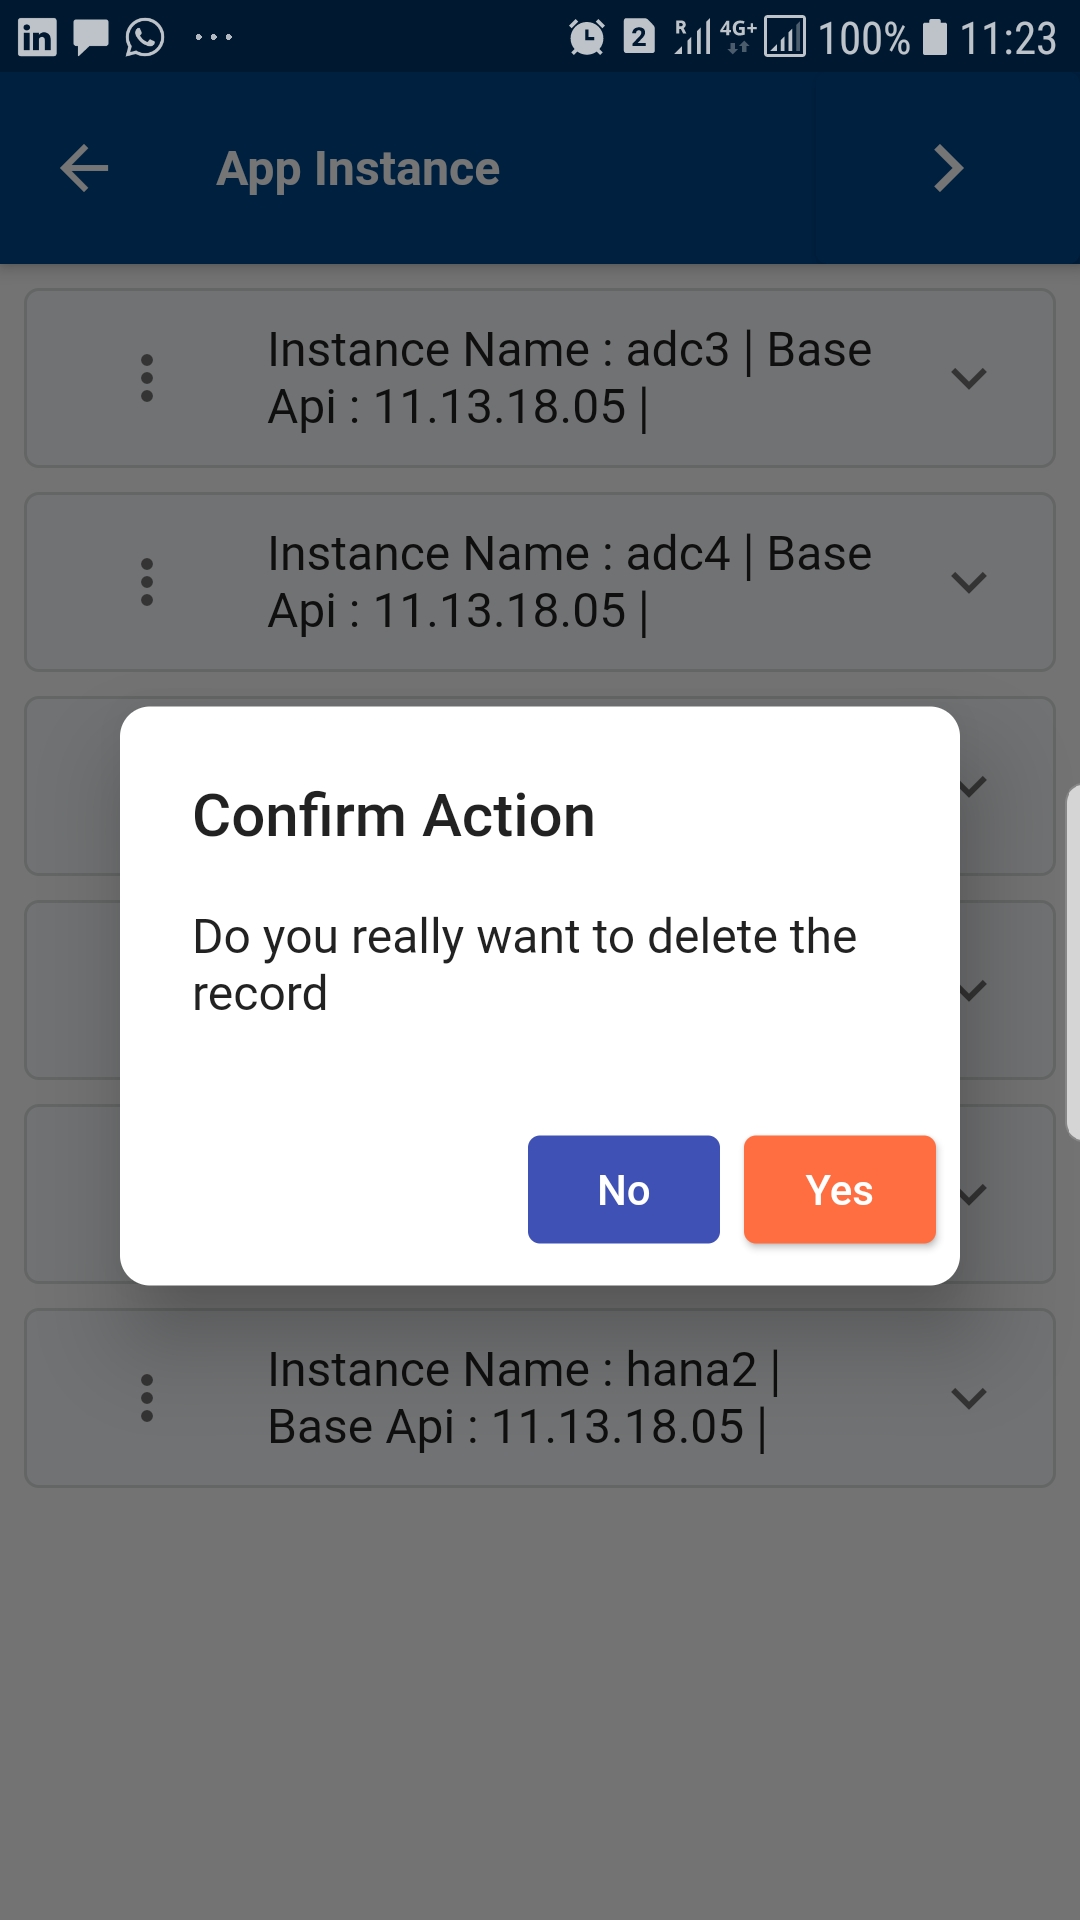
Click on "Yes" to delete the instance. Click on "No" to cancel the action.
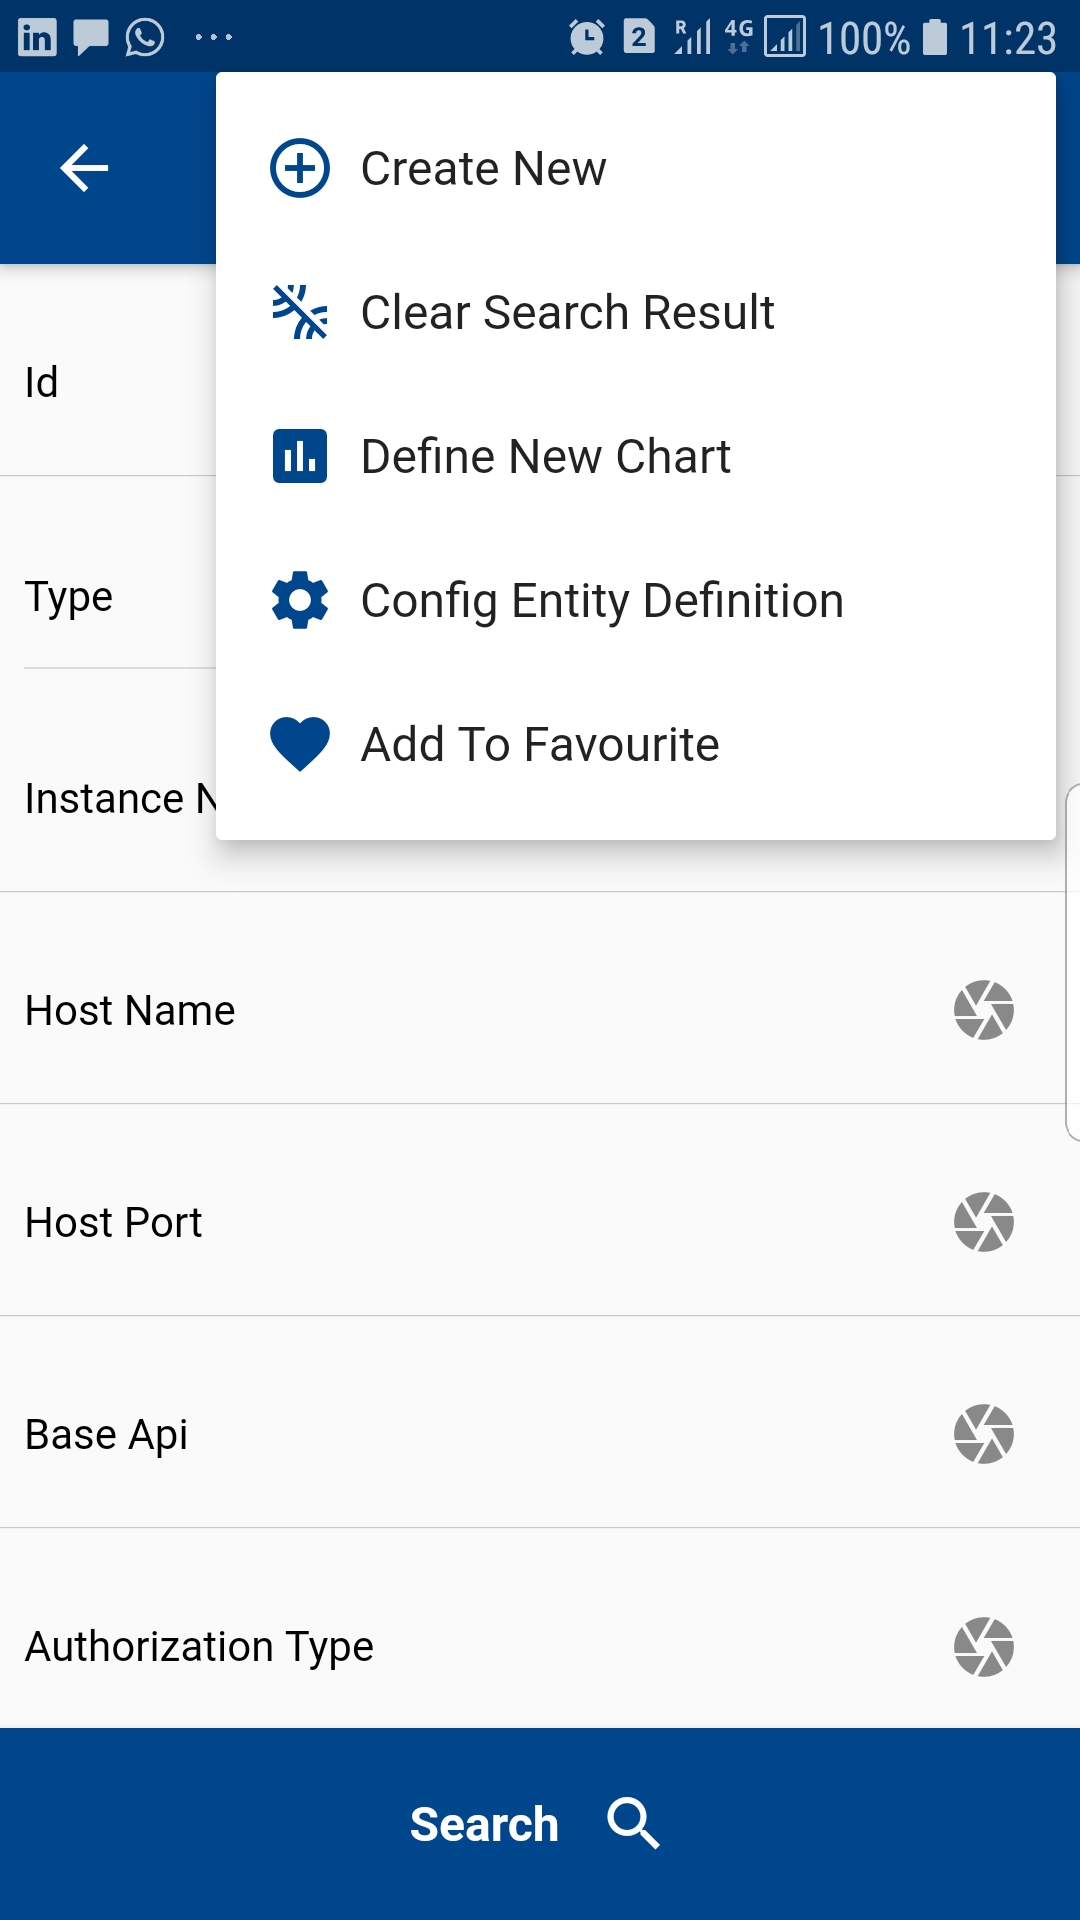
Create a new instance
To create an instance, click on the menu button (three dots ... on the right side corner) on the search screen page and select "Create New".
The app will take you to a new instance form(same as the view/edit form). Enter all the information and click on save
SAP Sandbox
SAP Provides a sandbox instance that you can use to test OneApp without using your own environment. For Oracle, you need to have access to an instance. Till now, Oracle does not provide any feature similar to SAP Sandbox.But, Oracle provides several vision enviornments for testing. However, none of them are open and available only for customers with OPN account. So, if you have access to OPN, you can use any of those vision enviornment for testing.
To use SAP Sandbox, navigate to https://api.sap.com/ and register. The API key is available on all the pages.
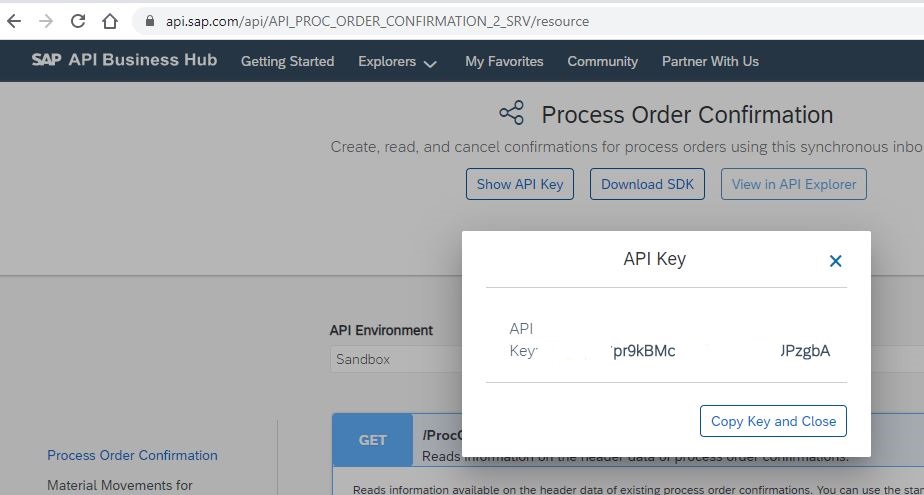
Click on "Show API Key" button to view the API key. Copy it, and enter it in API Key field on OneApp instance screen. The default configuration comes with one instance (hana1) with the snadbox hostname details. If you dont use that instance then enter the hostname.

Next, select the sandbox instance on the login screen
SAP Sandbox only allows to view data. So, you can't create/update/delete any record using sandbox instance